If you’ve never heard of a Holga, trust me when I tell you it can quickly become an obsession! That’s why we developed this Lightroom preset download for you!
Being a digital photographer at heart, I still love to shoot a roll of 120 in my Holga.
It’s not cheap shooting, developing, and printing images from this baby – but the this plastic camera with it’s foggy plastic lens and leaky housing which leaves your images prone to light streaks is just beautiful.
Working with the Holga Preset
There are 2 presets included in the download:
- Holga Base preset with the core look
- Holga Base preset that also includes a Kodak T-Max emulation all in one!
Let’s walk through some sample before and after images to give you a feel for how you might use this preset.
For a standard Digital SLR frame (portrait or landscape), when applying the Holga Base preset:
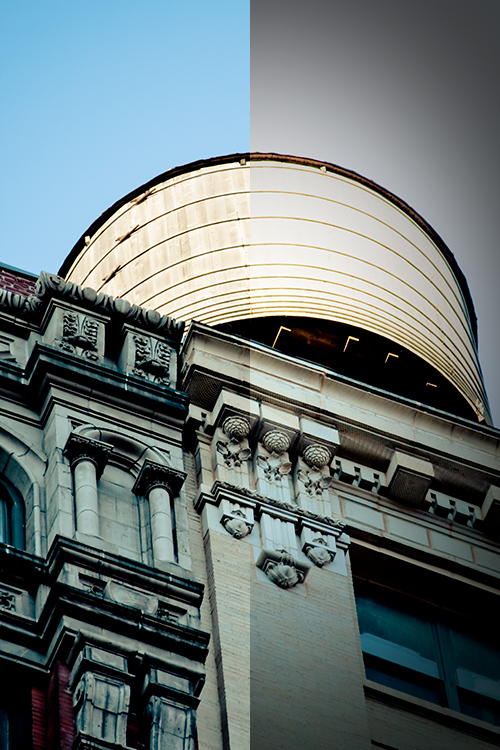
… you’ll get a nice base Holga effect.
For the pseudo-120 film cropping, I tend to just set the cropping in Lightroom to 1×1:
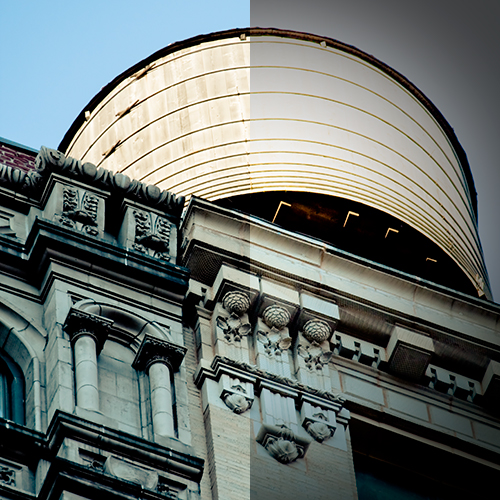
This is my favorite one … the Holga Base + Kodak T-Max emulation preset:
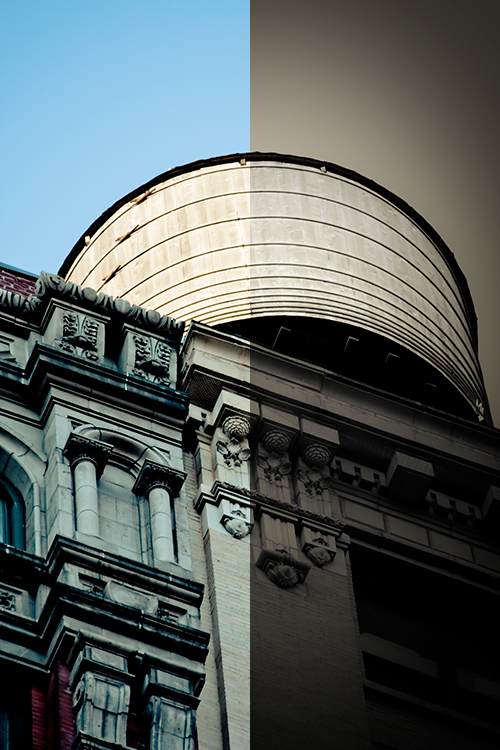
… and as if it can’t get any better:
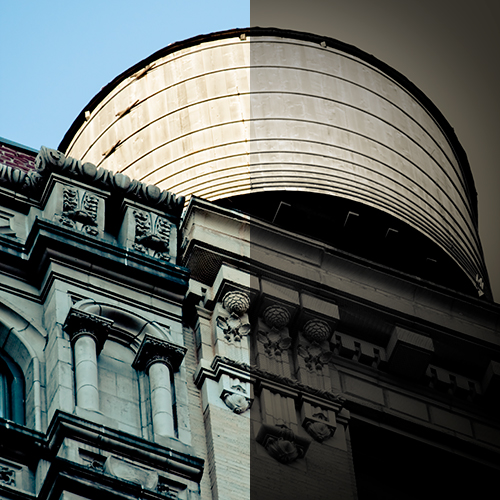
The mood totally changes on this one … this definitely reminds me of the black and whites I get from my Holga.
A few basic things to keep in mind as you work with this preset:
- First, use the Post-Crop sliders in the Develop Module to manage the vignetting on the edges of your image
- Additionally, the secret sauce is in the Graduated Filter which you can use to determine the angle, brightness, exposure, saturation, clarity, etc.
If you’re new to graduated filters they’re very straightforward. Once you have applied the preset in the Develop Module, simply press the M key and you’ll open the graduated filter panel:
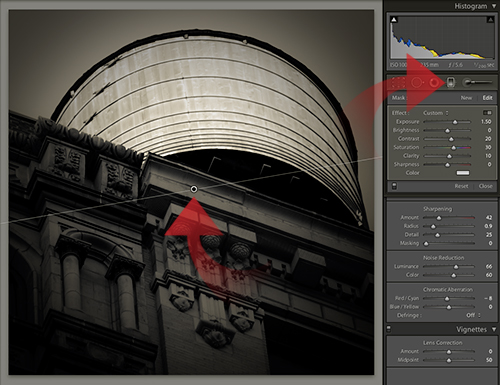
Now, select the circle in the image inspector and use the sliders to the right to tweak the look to your liking.
Working with the Adobe Camera Raw (ACR) Holga Base Preset
If you want to leverage this look in ACR exclusively, we’ve provided .XMP files to allow you to do just that! For a quick primer on ACR files, read more on that here.
There are 2 .XMP files included in the download:
- a Holga Base .XMP with the core look
- a Holga Base preset that also includes a Kodak T-Max emulation all in one!
To install the files for use in ACR:
Download the archive, extract the contents to a temporary folder – (download link below)
Next, go to the temporary folder, and copy the Holga Base Gradient.xmp file. This needs to be copied to the proper folder, as listed below for popular systems:
Mac: /Users/UserName/Library/Application Support/Adobe/CameraRawFolder/LocalCorrections
WinXP: C:Documents and SettingsUserNameApplication DataAdobeCameraRawLocalCorrections
Vista/7: C:UsersUserNameAppDataRoamingAdobeCameraRawLocalCorrections
(This places the Holga Base Gradient.xmp file in the location needed to be used as a Local Correction Preset)
Next, copy the Holga Base.xmp file to the appropriate folder listed below:
Mac: /Users/UserName/Library/Application Support/Adobe/CameraRawFolder/Settings
WinXP: C:Documents and SettingsUserNameApplication DataAdobeCameraRawSettings
Vista/7: C:UsersUserNameAppDataRoamingAdobeCameraRawSettings
(This places the Holga Base.xmp file in the location needed to be used as a ACR preset)
Using the installed .XMP files in Adobe Camera Raw 5+
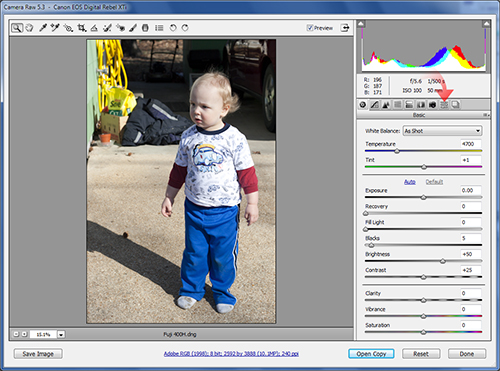
Now that the Holga Base has been installed into Adobe Camera Raw, it is ready to use. Fire up Photoshop and open a RAW format image. Once the file opens, click on the presets tab in ACR:
Then click on the Holga Base preset to apply the first phase of the Holga simulation:
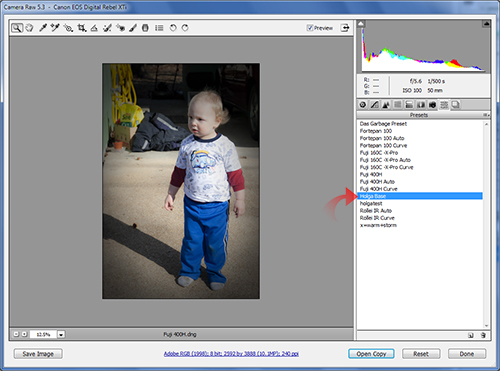
This applies the clarity adjustment and post-crop vignette used by the Holga Base preset. Now we need to apply the second part of the Holga Base preset; the Graduated Filter. Click on the Graduated Filter Icon in ACR:
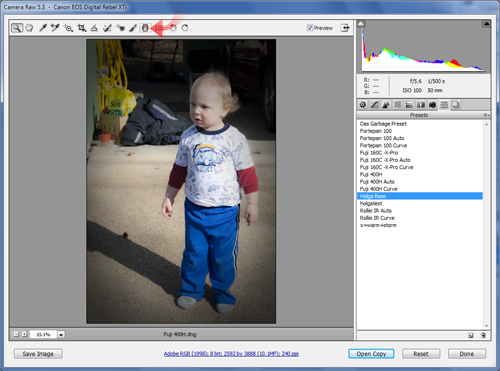
Now click on the Graduated Filter Menu in ACR:
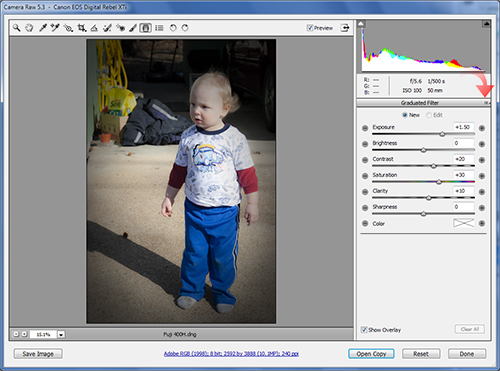
Then click on the Holga Base Gradient preset:
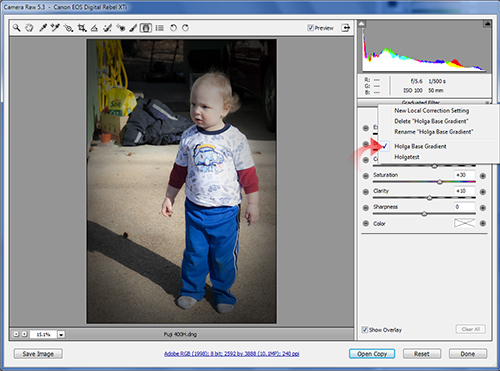
Accordingly, this populates the standard Holga gradient adjustment settings. Therefore, you just need to draw the path of the Graduated Filter:
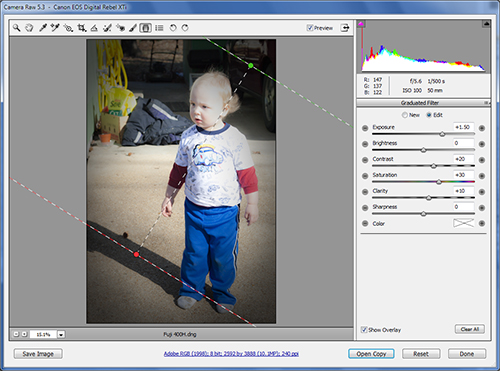
Finally, click at the starting point you desire and drag to the desired ending point. Adjust the gradient guidelines as needed.
Once satisfied, click Done to open the image up in Photoshop with the Holga Base Applied.
Holga is included in the XEQUALS Platform.


