Making Film Emulation Presets
When we at X-Equals release Lightroom presets, we strive to provide the highest quality presets with the greatest level of functionality possible. To this extent, we created a step by step process to emulate the look of any given camera and film combination, allowing for the simulation of the look in an accurate manner. Today I am going to share a basic development process for creating an emulation preset.
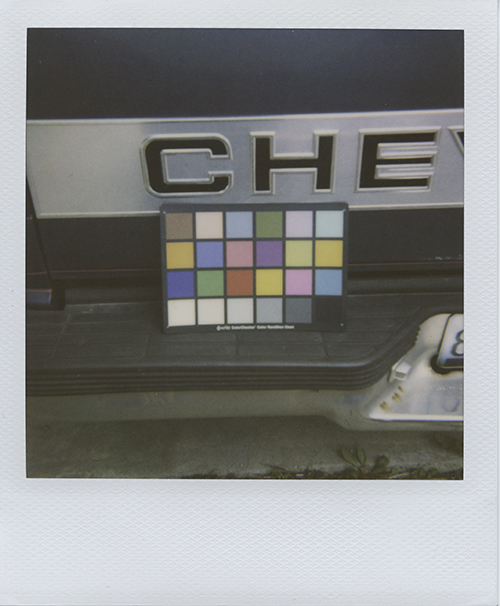
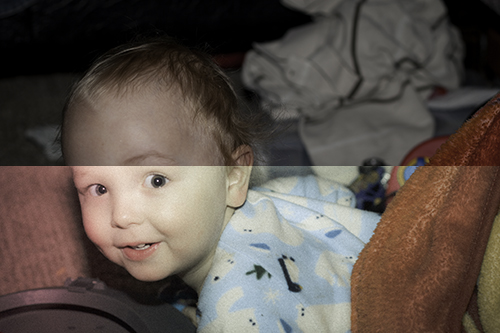
Originally I was going to emulate a 35mm Holga, however, my Holga has seen better days and the shutter was sticking. Instead, I broke out my old Polaroid Spirit 600 along with a pack of expired Polaroid 600 instant film (expired 2/2006) I fished out of the freezer. People like the look of Polaroid, right?
Phase I: Calibration
The first step of emulation, for Lightroom or any other purpose, is to have a completely color calibrated workflow. If your colors are not calibrated, from camera to scanner to monitor, there is absolutely no hope of an accurate emulation. A fresh calibration before any emulation is an absolute must; otherwise there is a chance of color drift skewing your results. Calibrate the monitor first, then move onto the scanner.
The next step is calibrating the scanner. Since the scanner is the only method to import film samples into Lightroom, accurate calibration is imperative. If not, you are not getting an accurate rendition of the film, and therefore cannot accurately emulate from your sample shots.
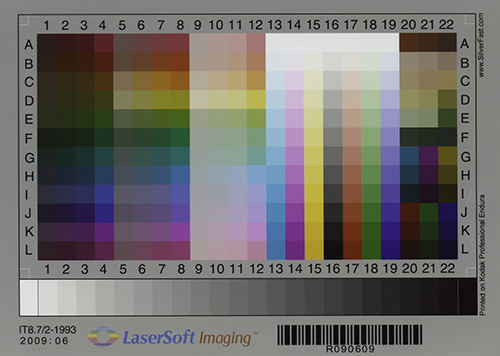
I utilize SilverFast 6 AI-Studio IT-8 for my emulation scanning. These IT-8 targets automatically calibrate the color response generated from the scanner in SilverFast to ensure accurate reproduction. As the Polaroid film produces an actual print, I will calibrate my scanner for photo prints, using the print IT-8 target. For more information on calibrating your scanner, check out SilverFast’s guide to scanner calibration, which will get you started.
The final step for preparing to emulate is to calibrate your digital camera in Lightroom using Camera Profiles. This is vitally important, as you want to start with the most accurate representation your camera can generate, and ACR Camera Profiles is the best tool to do so. This is a rather involved process, so check out our piece covering the basics of Camera Profiles.
Once you have calibrated all aspects of your color management system, we are ready to go out in the field and get some sample shots.
Phase II: Sample Collection
The second phase of emulation is collection of sample images. This requires the use of a variety of subject targets and shooting a few scenes.
I’ll use a Polaroid and limit it to 10 sample shots, so every shot counts. The more sample images you have to work from, obviously the better your results will be.
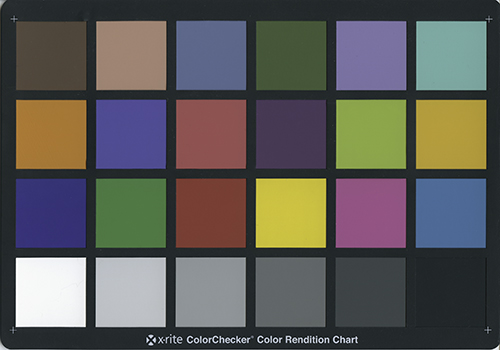
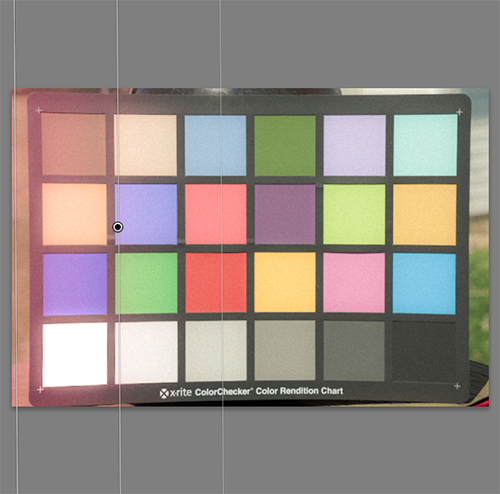
I start by shooting an X-Rite Color Checker, with both the sample camera and my digital camera. Set the color checker into nice, balanced light, and utilize a tripod or camera rest if possible. Shoot one shot of the color checker with the Polaroid, and shoot a second shot with the digital camera.
Shoot all DSLR shots in RAW, and set a custom color balance off a gray card, to ensure color temperature is as close as possible.
I shoot each target with both the sample camera and DSLR, then take a few subject shots for fine-tuning. The target or subject name and reason for use is listed in the list below.
- X-Rite Color Checker: Used to generate the color mix in the Lightroom HSL to emulate color response.
- IT-8 Print Target: Used to ensure and tweak color mix generated with the color checker.
- Graph Paper Target: Used to analyze and emulate the lens distortion of the sample camera.
- Portrait Shot: An image of a human subject used to check for skin tone consistency.
- Landscape Shot: To ensure that color reproduction is reasonably accurate.
- Still Life Shot: Again to ensure color reproduction accuracy.
Additional shots may be taken, as the more comparisons available, the easier it is to fine tune the emulation. Remember to shoot the shots as identically as possible with the two different cameras. Attempt to frame the shots as closely as possible. Since I am shooting a Polaroid for my samples, I am going to attempt to compose for a squarish crop. Otherwise, I would fill the frame if emulating 35mm.
With that we can move back to the computer.
Phase III: Scanning and Uploading
Once I develop all the sample shots, which is quick since I’m using Polaroid media, I’m ready to scan. Earlier I calibrated my scanner for photo scanning from prints, which would be accurate for Polaroids.
Now, things get a bit tricky. I want to scan in my samples at the highest quality possible, retaining as much color and image detail as possible. The first issue is color depth, which needs to be set at 48-bit (or 16-bit/channel in Photoshop parlance). This setting ensures as much color data as possible will be saved, usually much more than a scanner can produce. For a bit more information on bit depth, check out this article.
The next important setting is resolution. In SilverFast this is accomplished by using the DPI slider. Other scanning apps will let you set your specific resolution. I want to get as much detail as possible from my scan, so I am setting my print scanning DPI to 1200.
Apply no sharpening inside the scanning application, as we want the data as untouched as possible. If the is a need to sharpen for fine detail, do so later. Sharpening can produce undesired changes to the image, so leave that out. If you are new to scanning, here is a primer to get you started.
After completing the scan, I compare the results with the original to ensure accuracy. It should be close, but it will have a variance to the eye due to direct lighting in the scanner as compared to ambient lighting. If something seems drastically amiss, attempt to rescan, possibly adjusting the preview scan before performing the new scan. But the idea is accuracy, not aesthetics.
Wait, What If I’m Scanning Film?
If I was scanning film, I would have approached this with slightly different settings. I would have scanned using the 48-bit HDR feature in SilverFast and scanned in at a 3200 DPI for 35mm or smaller film or 1600 DPI for medium format. The resultant scans would have been rendered using SilverFast HDR before saving the final TIFF files. Questions regarding DPI and PPI, check here.
The export of the scans is vitally important as well. Images should be saved as 48-bit TIFF files. This ensures every pixel generated is manipulated as little as possible. No down-sampling of color and no compression applied. This results in huge images, but will ensure accuracy.
Now, fire up Lightroom and import the resulting TIFF files into the Library. Then upload the RAW files from the DSLR as well. Add all the images, scans and RAW, into a new Collection in Lightroom. With this, we are finally ready to start the emulation process.
Phase IV: Emulation
With all images uploaded, we’re ready to begin the emulation process. This can be a bit tedious to do, but is very rewarding once everything starts coming together.
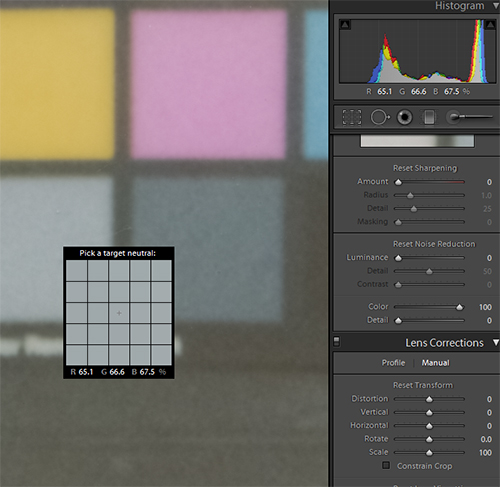
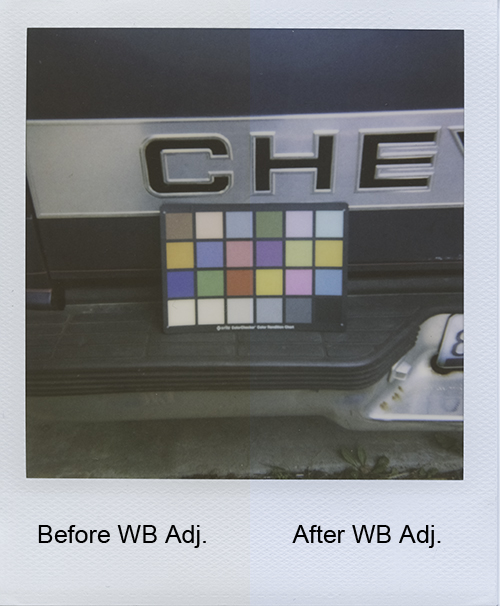
First, select the Color Checker sample from the scan. Before we go any further, crank up the Color Noise Reduction slider in Lightroom, eliminating color variances in the scanned image. Then set the White Balance in Lightroom to the third patch from the right, on the bottom row of the Color Checker, just under Yellow. After the White Balance is set, turn the Color Noise Reduction back down to zero, restoring the natural colors to the image.
Then, Copy the White Balance setting from the color Checker Scan to the IT-8 scan as well. We do this to eliminate any color cast from the scan, enabling us to emulate the “true” colors.
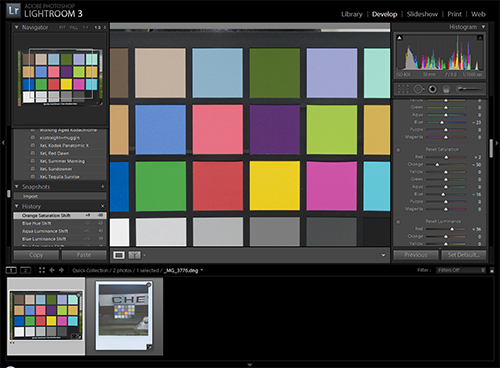
Now, start comparing back and forth, between the scan and the RAW file (which should have a custom White Balance applied, eliminating the need for setting its White Balance.) Start with the Primary colors and adjust the RAW file’s Hue, Saturation and Luminance for each color in the HSL panel in the Develop Module. As we get the Primary colors accurate, move onto the Secondary colors, adjusting them the same way.
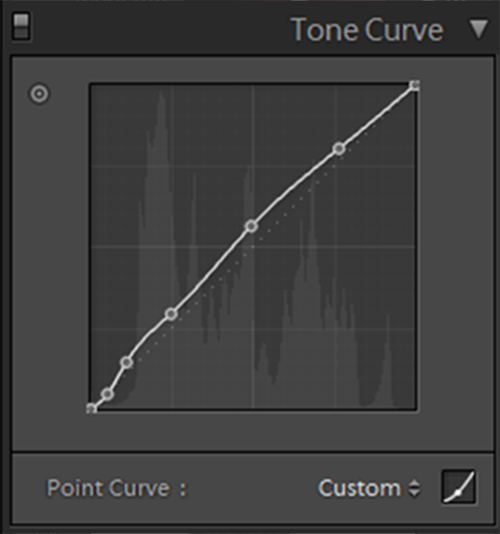
As we slowly get all the colors to sync up, move on to the Tertiary colors, until all the color patches of the checker reasonably close. The colors may be too dark or light, fix this by adjusting the Tone Curve until we get close, then re-address the HSL. Jump between HSL and Tone Curve adjustments many times in this process. Once satisfied with the color mix (and often you have to make do with close), we are ready to check the overall color response.
If you are not familiar with the HSL tools in Lightroom, check out this tutorial.
To check the rendition of color response, create a new preset from the color checker image, adjusting the Treatment (Color) and Tone Curve. Apply this preset to the IT-8 RAW sample and compare it to the scanned IT-8. It should be close, if it is not, make some minor HSL and Tone Curve adjustments trying to bring the full spectrum representation of the IT-8 chart as close as possible on the original scan and RAW adjustments.
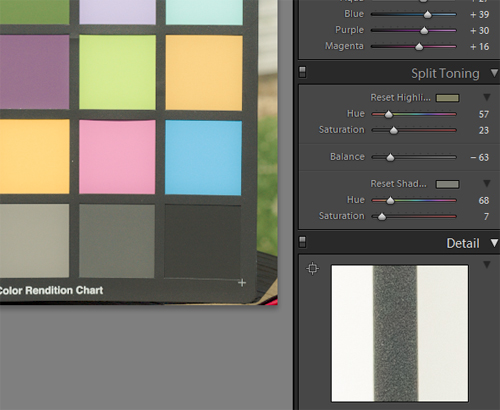
Once the color is close, update the preset with the new adjustments. At this the Color Mix is complete. Now revert both the Color Checker and IT-8 scans to their Import status, undoing the White Balance adjustment. From here look at the White and Gray patches of the Color Checker and start working the Split Tone sliders, attempting to reproduce the color cast preset on the Polaroid scan. Once satisfied, update the preset, adding the Split Tone adjustments. Then check the effect again on the IT-8 chart, if satisfied, move on.
The next step is to address the overall tone of the scan. So, apply the preset to Portrait, Landscape and Still Life shots. Check the tone and clarity of the original, and set the Clarity on the RAW file and lightly adjust the Tone Curve until the tonal qualities of the original and RAW file start to get similar. Update the preset again adding in the Clarity and updating the Tone Curve.
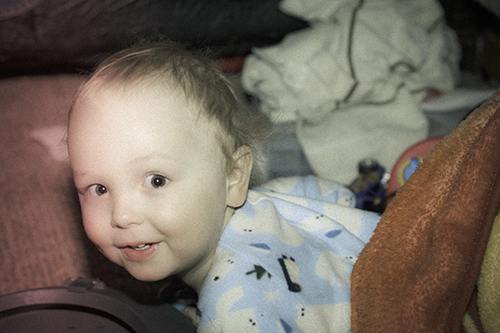
With the Portrait sample open, check the skin tone and make sure it is well balanced between the scan and RAW file. If the preset is making the skin too Orange, back off the Orange Saturation until the skin looks better, the less adjustment the better. If the preset is not popping enough in the skins, up the Orange Saturation just until the image looks right. Once the skin looks right, update the Treatment (Color) in the preset.
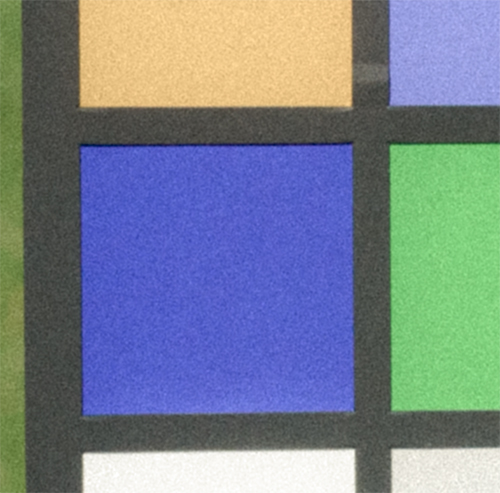
The next step, and last when doing film emulations, is the grain analysis. To do this, jump back to the Color Checker scan. Zoom in first on the White patch, usually at a 1:1 zoom. Look at the grain density, size and shape and then hop over to the RAW color checker image and zoom in. Try to zoom the RAW file in to about the same size as the scan. This may require using a 2:1 or even 3:1 zoom depending on camera model. Once it is close, attempt duplicate the appearance of grain as closely as possible.
This is hard, as the Lightroom Grain does not look 100% like the grain in any film, but it can get a reasonable approximation. After the White patch is close, check it against the Black, then Red, Green and Blue patches. Once convinced it as close as Lightroom allows, update the preset adding in the Grain settings. Due to the nature of Polaroid film, it does not have traditional grain or dye clouds, but still a discernable grain pattern. Lightroom does not emulate this well.
At this point the “film” emulation is complete.
Here’s How We Did It, So You Don’t Have To
Our film presets have a few more steps not easily reproduced. The sample of the Color Checker and IT-8 are taken to the Physics lab at a university. From here, a technician friend runs the frames through a few measurement devices to get averaged RGB and LAB values for each color patch. Negative films also get the orange mask measured, along with both negative and positive values for all the colors.
From here, the technician creates a scan, applies the calculated color values through a Photoshop script adjusting the color curves to generate a “true” reproduction of the actual colors present in the frame, adjusting for orange mask with negative film. Grain is measured from a 2mm x 2mm patch of the frame and enhanced. A count, analysis and measurement of grain is done and an enhanced grain image is produced.
I am provided with all the raw data and corrected scans to carry out my comparative emulations. This step saves a lot of accuracy concerns, then relying upon my skills to translate the scan and data into usable Lightroom adjustments. This is a bit more through than simple comparative emulation. That said; textbook accuracy never prevents us from artistic corrections to ensure ease and quality of use.
Now try to simulate the effect of the plastic lens of the camera. This process uses the graph paper target, so open the scan of that target. Zoom in around the edges, looking for any distortion in the lines of the graph. The focal length of the Polaroid seems to create a slight pincushion effect at the edges. Not normally evident, but there none the less. Then hop over to the RAW file and attempt to adjust the Lens Correction, primarily the Transform, sliders to approximate the distortion. Then hop back to the scan, zoom in and attempt to refine the adjustment to the RAW file. Once satisfied, update the preset including Lens Correction, Transform adjustments.
The softness of the lens should be evident in the preset already, but if the image does look softer in the fine lines of the graph, drop the clarity until it looks correct. Negative Clarity starts to induce softness to the image and can be useful in cases like this. However, there was no need to refine Clarity for this lens.
The final step of this emulation is to add a light leak. Although none of the sample shots included a light leak, it can be common in Polaroid film, so we want to add in the feature. Sometimes it is the camera to blame, other times the film gets the edge exposed to light in packaging, other times it’s the result of an edge cut being included in a film pack. Either which way, it has been frequently seen in Polaroid images, and worth of inclusion.
To do this, add a Graduated Filter to the left side of the frame. After the graduated filter is added, crank up the Local Exposure to blow out the image, and then throw in a Red Color adjustment to add a slight color cast to the light leak. Also, drop the Local Clarity to really soften any subject matter in the over-exposed area. Once again, update the preset, adding in the Graduated Filter.
Remember, the filter will be added to the position of the RAW frame the same way every time. The end user can relocate or shift this filter as desired. However it will always default to the same side of the frame, adjusting to the top or bottom when shot in portrait orientation. Multiple light leaks can be created in a preset, but I chose to do one as it is a common abnormality.
With that, our emulation is complete. Now test the new preset on other images in the catalog, ensuring we get consistent results. The preset will not play well with severely over or under exposed images, but when the exposure is close; it should look nice, depending on lighting. Any given emulation is not representative of any film stock or camera as a whole, but is specific to the pack or roll shot for testing and the camera used.
The post on Seven by Five further covered packaging of the preset, but most of you are familiar with our distribution configuration, and it would just be eating up your inbox. If curious, hop over to the original and get that final bit.
Preset Goodness
We did all the work for you. As always, the preset is a pack with both the full effect and all the components available in a single download.
Give it a spin and see how you like this film! Don’t forget, crop to a Polaroid frame… 3 x 3.125 as the Custom setting for cropping.
Polaroid Spirit 600 is included in the XEQUALS Bundle.
