Everyone knows about Lightoom’s presets (if not you should). From Development Presets to Export Presets – presets make you life easier. However, in the print module there are not any presets, per se. Instead you have the ability to save templates, maintaining a layout of images for print jobs.
Personally I do not use Lightroom for printing, so I only step into the Print Module when I need a quick proof on my inkjet. However, you can export your print layout to JPEG to send off to a lab, which is a lifesaver when needing odd sized photos not readily available from a lab.
Print templates are easy to make and work with. After you configure your page size and other settings, laying out spots for images is simple. And using the template later is even easier. Today we will look at the Picture Package print engine, which allows you to generate layouts of multiple prints for the same image.
First, fire up the Print Module.
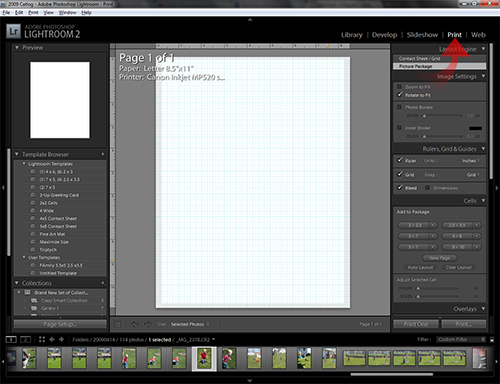
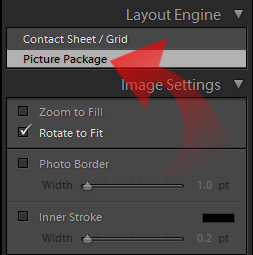
Now, on the right hand menu, scroll to the top, looking for the Layout Engine palette. From there, select Print Package, is it is not already selected.
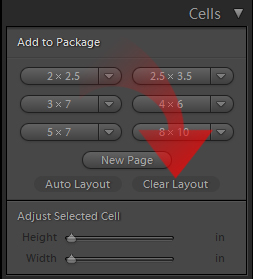
Next, make sure the layout page is clear, so scroll down the right menu to the Cells palette and click on Clear Layout, it the layout page is already filled.
Now that the Print Module is primed, we need to configure the printer settings, which allow us to configure page size and orientation for the layout page. From the menu select File >> Print Settings…
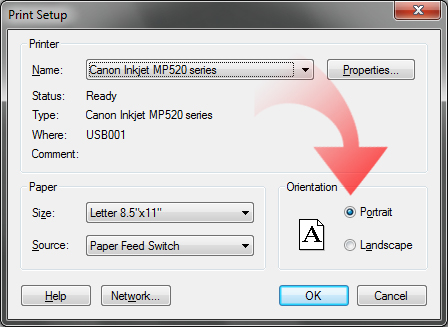
Obviously this dialog will be different on OS X, but the options should be the same. First, select your layout orientation. In reality, this has little effect on the final results, but can make it easier for you to design you custom layout. Next, you must select your page size.
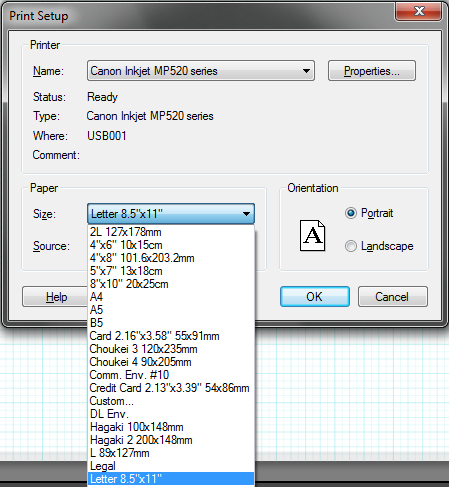
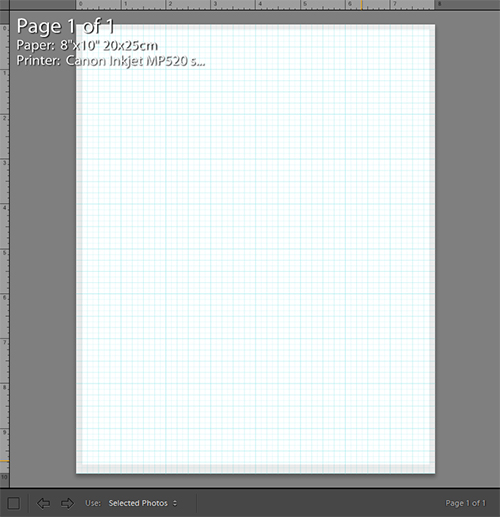
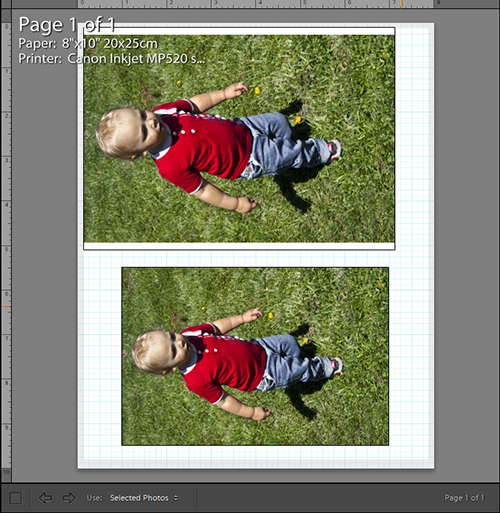
Here you choose from many different paper sizes, including the most common photographic print sizes,4×6, 5×7 and 8×10. Select 8×10 for the purposes of this walk through. Click OK and you will be presented with your new, 8×10 layout page.
Now the fun begins, defining your own custom layout. First, let’s drop a 5×7 frame onto the layout sheet. On the right menu, go to the Cells palette, and click on the 5×7 button.
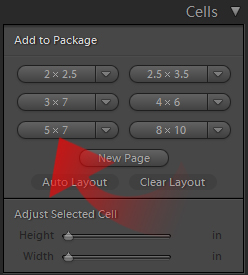
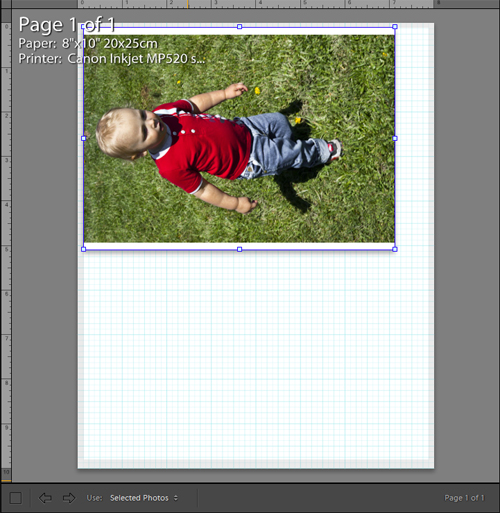
This drops a 5×7 frame onto your layout page. Move it around as you see fit by click and grabbing.
Now we will add a 4×6, by repeating the process, clicking upon 4×6 instead.
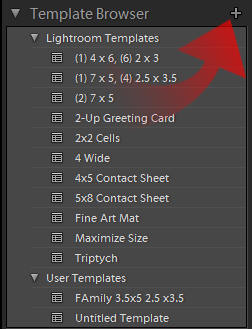
Obviously, you can configure any print setup you want, and a 5×7 and 4×6 is an odd layout, but let’s save this as a new template. In the left menu bar look for the Template Browser. Here you will find many ready-made templates, as well as store your own custom templates.
Simply click on the (+) icon to save your new template. This brings up the New Template dialog, where you name your template and define its location, much like a preset.
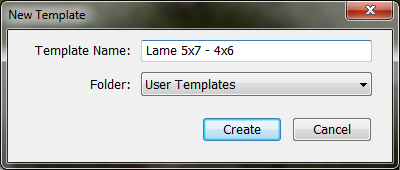
Click Create and your new template gets saved into the Template Browser. Now you are ready to select your photo for the package. Once you do, it populates in all the previews. Now you are ready to select Print from the bottom of the right menu. If you want to export to a jpeg to send to a lab, scroll down the right menu to the Print Job palette.
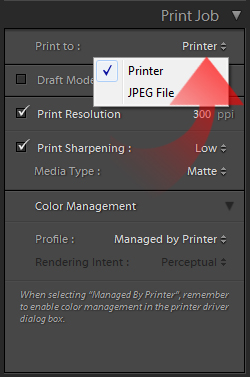
Click on the Print to: dropbox and select JPEG File. This changes the palette to reflect JPEG options.
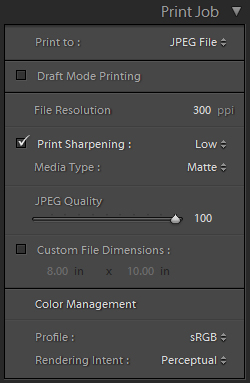
Set your options up as you need, and then click the big Print button at the bottom of the right menu. You will now export a composite JPEG of your layout with images as opposed to printing on a local printer.
A downside of using the Picture Package layout engine in the Print Module is that you can only create a package of the same image, you cannot mix images in a single print job. But for portraits this is rarely a problem.
You can use more than one image in the Contact Sheet/Grid engine, which is handy to make composites and triptychs, but that process is very different than Picture Package layout and requires a different set of steps, which we will look at in another digest issue.
You are not limited to just one page of layout, you can create multiple pages with a multitude of differing layouts. If you do portraits, you can use the Print Module to configure sheets of photos, as opposed to single prints. Using 8×10 print paper, you can provide a single 8×10 on a sheet, two 5×7’s on another, and a 5×7, two 2½ x 3½’s and three 2 x 2½ prints on a third.
For school portraits and senior sessions, selling prints by the page, as opposed to size can be convenient to you and the customer, and the Print Module makes this easy. Templates make it even easier, as you can save you common layouts.
Now that you know the basics of designing a print template, you can create any custom print layouts you desire and save them for later use. With just a bit of time, you can have a collection of templates at your fingertips allowing you to quickly configure print jobs, printed on your local printer or exported to jpeg to send out to your favorite lab.


