One of the biggest selling points for Lightroom has to be its ability to use presets. However, most people simply think of develop presets when they hear the word “preset”. This misconception is understandable; especially considering everything a good selection of develop presets can do for you.
But presets can do more for you than make pictures pretty, they allow you to super charge you workflow, making menial tasks single click affairs.
Using Export Presets allows you to be quick and consistent …
So today we are going to look at a single subset of presets, Export Presets. These are specialized presets you can use to configure you export parameters when exporting images from the Export Module. Essentially, they are small files that simply save a preferred collection of export settings, making them readily available with a click of the mouse; instead of manually configuring you export each time.
Using Export Presets allows you to be quick and consistent with your export needs. Take a simple case scenario. Assume you are a pro photographer with different needs for each shoot. You regularly contribute to a magazine, where the Art Director wants RAW files lightly edited. You also frequently send out portrait work for printing to your local lab that requires a defined resolution for each different print size.
In this scenario you can configure a single Export Preset to export your edited RAW files to DNG, which you can send to our fictitious Art Director, so she has all the RAW data as well as your Lightroom edits. Then you can configure a multitude of Export Presets for each print size you need at you local lab, maintaining their preferred resolution for each image.
Export Presets can also make it simpler to prepare images for the web. If you need to have images for web with a maximum width of 500 pixels at 72 PPI in the sRGB color space, simply concoct an Export Preset that maintains those requirements. The options made available to you for creating Export Presets are limited only by the limitations present in Lightroom. If you can configure an export for your needs, you can save it as a preset.
Making an Export Preset is quite simple. Start from the Export Dialog.
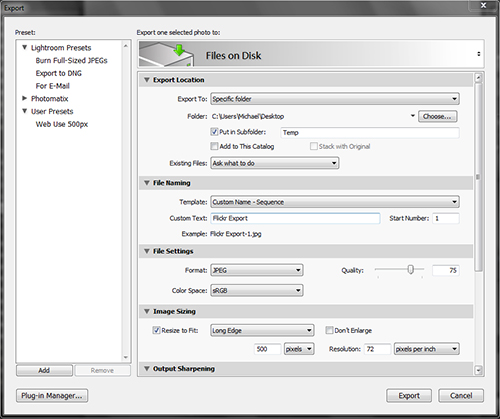
Now simply work down the right side of the Export Dialog, setting all your options as you will need them to be for your desired purpose.
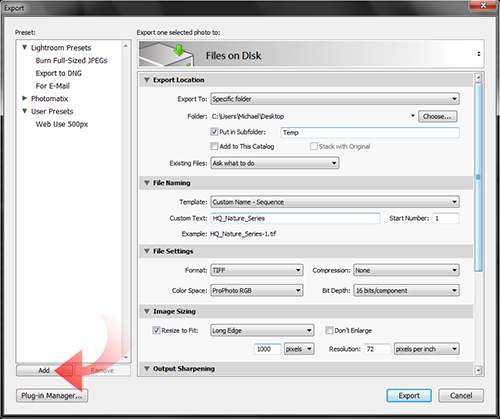
Now that your settings are configured, simply click on the Add button as depicted in the image to bring up the New Preset dialog.
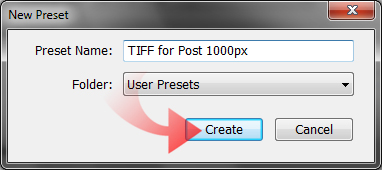
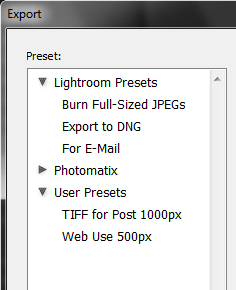
Now your preset is saved in the User Presets on the left pane of the Export Dialog.
If you have multiple copies of Lightroom running on different machines, you can also export your new Export Presets and then import them into you installations on other machines. Simply Command-Click/Right Click on the preset you wish to export to bring up the contextual menu.
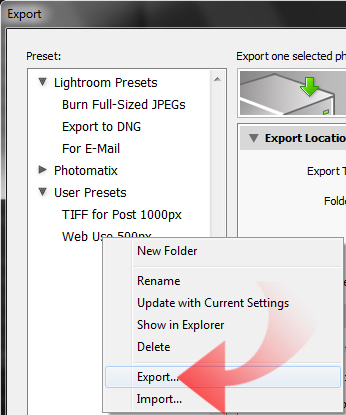
Once you click the Export… option, it opens up the Export Preset dialog.
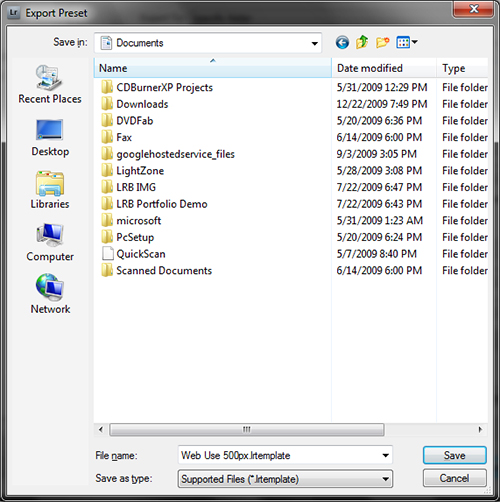
Click Save where you wish to save you file. Now you can copy the .lrtemplate file to a USB drive or e-mail it to yourself to get it on the new machine. To import your preset on the new machine, get into the Export Dialog in your new copy of Lightroom. In the left presets pane, Command-Click/Roght Click on User Presets or whatever folder you wish to add the new preset to.
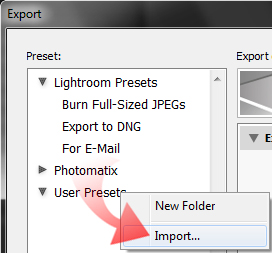
Then click the Import… option. This fires up the Import Preset dialog. Now simply browse to where you have the file saved and select it.
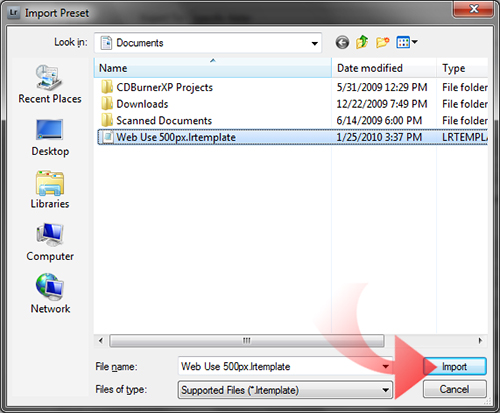
Click on Import and you will now have your Export Preset available in the second copy of Lightroom.
If you were not already utilizing Export Presets in your workflow, you really should give them a spin. The minutes saved by not having to configure your export each time can quickly add up. If you were unfamiliar with Export Presets, you should now have the knowledge needed to create and use them. Once you start, you won’t look back.
Presets speed up your workflow all across Lightroom, when editing or exporting. Make sure you fully utilize the capabilities presented to you and make the most of your Lightroom experience.


