Luminance takes your reds, oranges, and yellows from meh to dialed in, fast.
There has been a lot of talk about the Hue, Saturation, and Luminance (HSL for your cool types) panel lately, so I though I would take you through an example of how I use the lesser known Luminance (L) control to solve issues that oftentimes I see folks attack with the Hue, Saturation, Exposure, or Tone Curve exclusively.
The Luminance control really is the red-headed step-child of the Hue and Saturation family. I find people rarely use it, and oftentimes if they do use the HSL panel it’s to target Hue and Saturation only.
I’ll admit my tendency to do the same.
For instance, if I see certain primary or secondary colors that need adjusting, it’s usually because they are over-saturated or a flattened hue (like skin) that I want to bring back to life. There are a few ways to work the Hue and Saturation to resolve issues – Targeted Adjustment Tools and the like – some of which which I have documented here.
But lately, I am finding that adjustments to the Luminance of an image are leading me to some very nice results that are far more targeted than previous approaches – and with less work.
Let’ s back up and define just what Luminance is … and I’ll make it simple:
Luminance controls the lightness or darkness for specific color ranges in your image
Ok easy enough right? I thought so too.
Let’s dig into an example project to see just what Luminance can do for us while working on an image that generally is OK, but could use some improvement – all achieved with Luminance adjustments.
{note: all tool, panel and module references are always in BOLD for easy reference as you map our workflow to Lightroom}
Here’s a quick before (bottom) and after (top) to help set the stage:

My main issues with the image:
- a bit too low in the exposure
- flat skin tone
- a tad too dark in the hair details
- the red sweater (especially the forearm) is over-saturated in the red – and missing some highlight details as a result
In the past, I would have attacked these issues with a mix of the standard Lightroom tools (including but not limited to):
- Exposure
- Contrast
- Fill Light
- Hue and/or Saturation Adjustments
What’s missing? … you guessed it: Luminance
We can achieve all of these ‘fixes’ with simple adjustments to the Luminance slider.
We’ll begin by heading over to the Develop module (use keyboard shortcut D if you’re lazy like me), and selecting Luminance from the HSL panel:
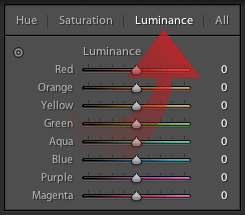
Now this is where things get interesting.
Keeping in mind that luminance is defined as the the lightness or darkness for specific color ranges in your image, let’s re-examine our original images issues, and how we might attack:
- a bit too low in the exposure
but there IS an overall warm tone which we could adjust with the Orange slider
- flat skin tone
overall brightness and depth could be adjusted for the skin tones using a mix of Orange and/or Yellow adjustments
- a tad too dark in the hair details
similar adjustments for the skin could benefit the hair as well
- the red sweater (especially the forearm) is over-saturated in the red – and missing some highlight details as a result
the details ARE there, but they are too dark in the Reds to come through
So now I have my plan of attack – let’s look at the Luminance settings after my adjustments:
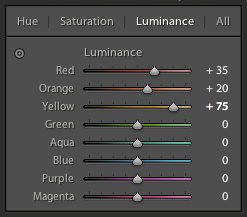
And again our resulting image before (bottom) and after (top):
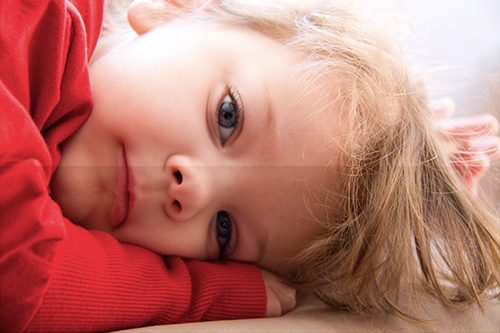
Not all the adjustments are as readily aparent in this image, so let’s step through each adjustment and its effect along the way:
Red +35
before (left) and after (right)
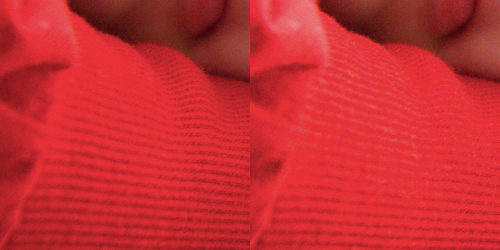
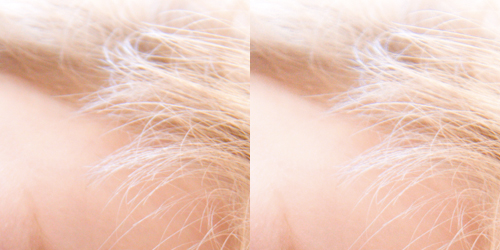
Orange +20, Yellow +75
before (left) and after (right)
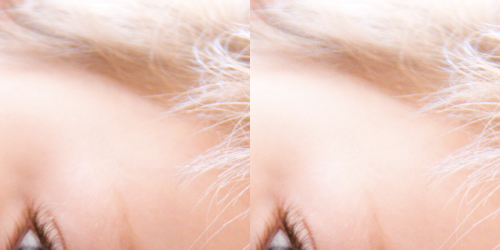
Orange +20, Yellow +75
before (left) and after (right)
Things to keep in mind
- I am lucky to get 1/3 or possibly a bit more of pseudo-exposure correction with these controls – for images that need more exposure compensation you’ll still need to hit up the Exposure slider
- If you attempt to target specific colors that already have a fairly high or low luminance value to begin with, you risk clipping those colors with results that can look noisy
- EXPERIMENT – this control is quite possibly one of my favorites – it offers a very targeted level of control over your image
- My one wish – a Luminance adjustment brush!
- Share your experiences in the comments below


