With the just-released Adobe Lightroom 6 or Lightroom CC now available, it’s time to take a look at some of the new features. Before that however, just a quick note on the name of the software. If you are a subscriber to Adobe’s Creative Cloud, your application is called Lightroom CC.
If you choose to buy or upgrade as a standalone, then it’s Lightroom 6. The actual software is exactly the same in either case. Although I am a Creative Cloud subscriber, throughout this post I’ll refer to it as Lightroom 6 for sake of continuity with previous naming conventions used in other posts.
The new release boasts a few changes over previous releases in terms of speed and mobile integration. As far as new tools and features go, Photo Merge is likely to be the one of most interest to photographers.
With this new Lightroom feature, we no longer have to go round-trip to Photoshop to develop these types of images.
It comes in 2 forms – Merge to Panorama and Merge to HDR.
With previous versions of Lightroom, if you wanted to take a series of exposures and create a panoramic image or a high dynamic range image, you could select them in Lightroom. However, the actual processing would need to take place in Photoshop or one of the many third-party options available.
With this new addition in Lightroom 6, it’s possible to do it all within Lightroom.
Let’s begin by looking at Merge to Panorama. You’ll need to start with a series of photographs that have been taken with a panorama in mind. In the image below you can see that I’ve selected 9 of them to merge in order to make the final photograph.
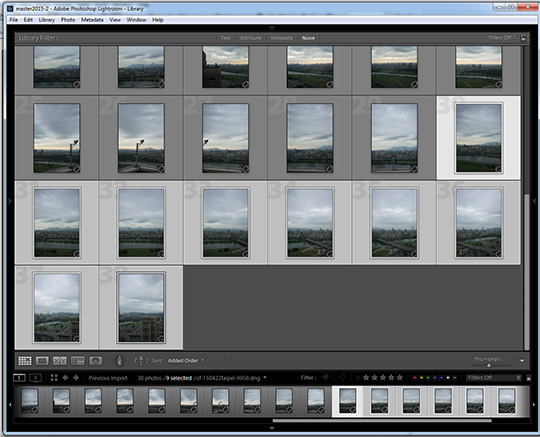
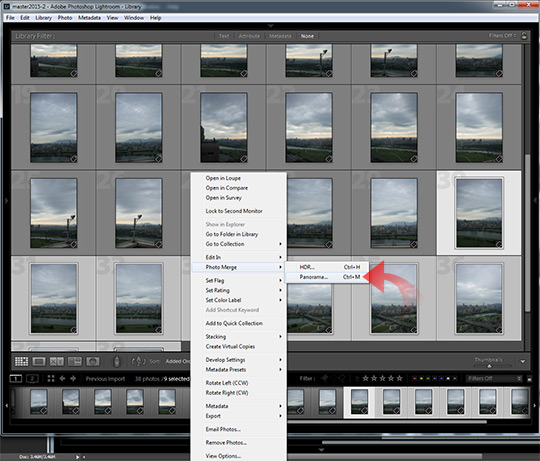
You can be in the Library module or the Develop module when you make your selection. I typically do my selects in the Library, and since I’m going to merge the images before I make any color or toning adjustments, I’ve made my selection from the Grid view. Right click to bring up the menu then navigate to Photo Merge and Panorama. You could also use the keyboard shortcut Ctrl-M.
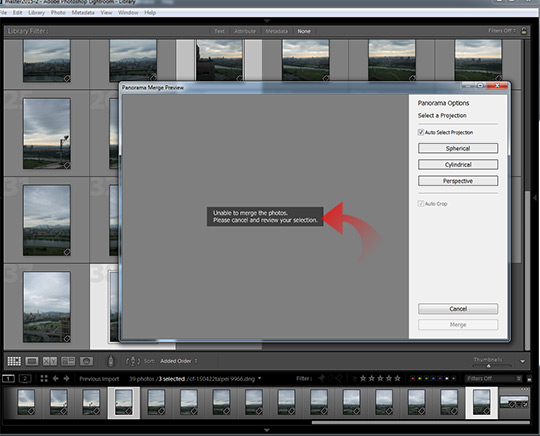
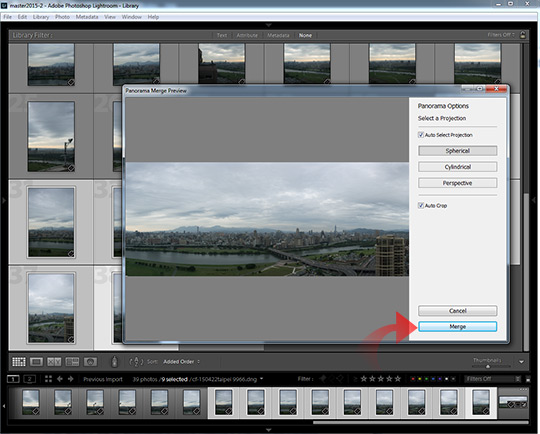
A pop up window will open and Lightroom will begin analyzing the images and building a preview. If your images cannot stitch together into a panorama, you will receive an error message stating, “Unable to merge the photos.” Please cancel and review your selection,” will appear (as seen in the second screenshot below).
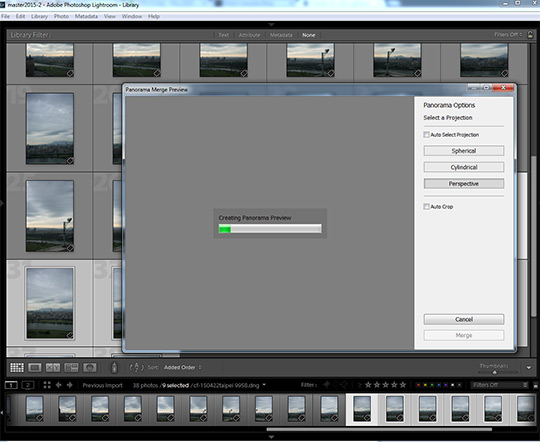
You have 3 options for the projection (Spherical, Cylindrical, and Perspective), as well as Auto checkbox. I’ve found leaving Auto checked does a pretty good job but go ahead and try each of them to see the difference. With the improvements in speed in Lightroom 6, it takes less than a second to rebuild the preview for each option.
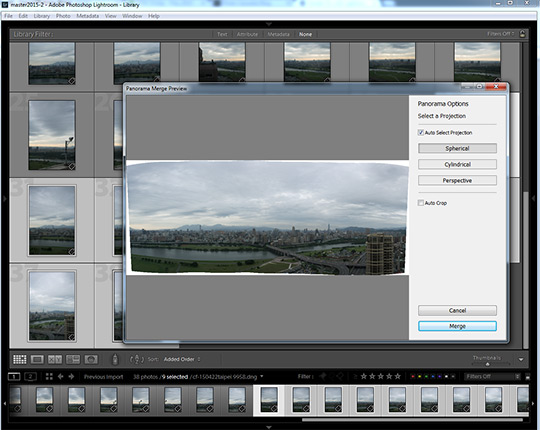
Finally, I’ve checked the Auto Crop box before making the actual merge. I’ve found that starting without this selected allows you to see exactly how the image aligns, which is useful when cycling through the different projections. Once happy with a particular alignment, check the Auto Crop box and hit the Merge button.
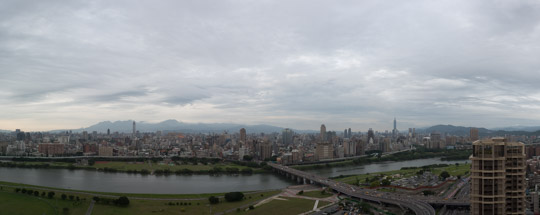
My merged image came from 9 frames. Normally when you shoot for panoramas you will lock the camera down on a tripod to ensure everything is even. When I shot this however I cheated and did it handheld.
Why?
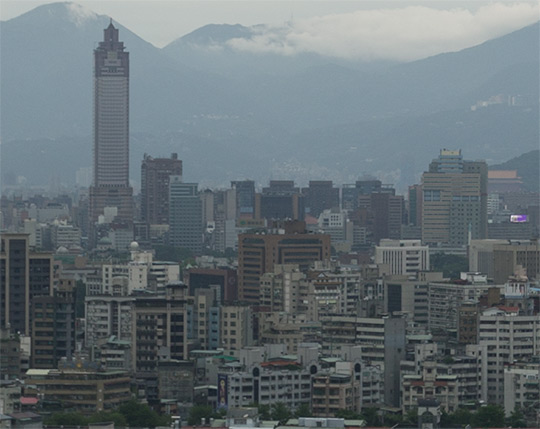
Well, on one hand, handholding the camera offers a better test of the stitching abilities since elements are less likely to align than if I had shot from a tripod. And on the other, unless you specifically set out to shoot landscapes or panoramas, most of us have probably tried doing it free hand at one time or another. Below is a 100% crop showing how good a job it did.
The merged photograph will be outputted as a DNG file. This means you can then dive straight into editing it as you would any other RAW file. Below is the photo as it comes out of the Photo Merge process, and then after I’ve before a basic edit using an X-Equals Develop Preset.
Now, on to Merge to HDR. They may be three of the most polarizing letters in photography. HDR or High Dynamic Range is often either loved or hated. Lightroom 6 however does something a little bit different.
Traditionally, when creating a high dynamic range image, the selected frames would firstly be merged together, and then undergo a processing step known as Tone Mapping. It’s in this second step that a lot of the cartoonish and unrealistic colors and tones are produced.
In Lightroom 6, all the Merge to HDR does is merge the exposures together and gives you a DNG file ready for normal processing.
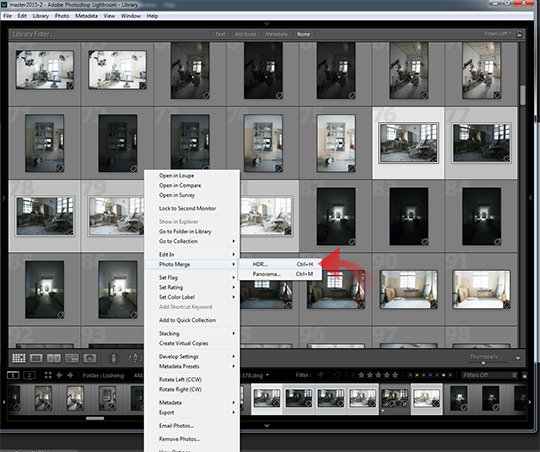
So let’s get started. The initial steps are basically the same as those for the Merge to Panorama were, although in this case you’ll be selecting a series of bracketed frames. Here I have selected a 5 frame sequence with exposures one stop apart from -2 to +2. The keyboard shortcut is Ctrl-H.
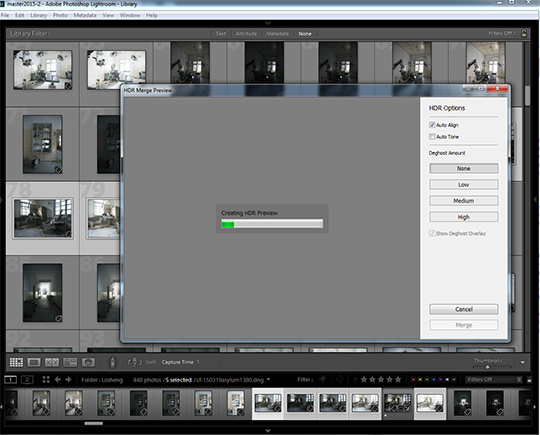
The Merge to HDR window opens up with a similar format to what we saw with Merge to Panorama. The preview is in the main area, with various options to the right. Auto Align ensures the images align properly.
I captured the example photo as a 5-bracket burst during a location scout. I didn’t originally plan to merge or blend the image, so I wasn’t worried about slight movement in the longer-exposed frames. Because of that it serves as a useful test for Lightroom 6, and the Auto Align performs excellently.
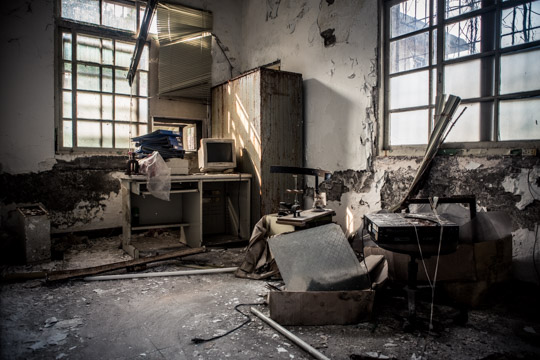
If you typically use the Auto Tone option when processing your images, then you can do so here. I prefer to use a mixture of presets and my own individual adjustments so leave that unchecked. Since there are no moving objects in this photograph, I don’t need Deghosting and have left it set to None.
At the end of the post are a couple of examples from a different scene to show how deghosting works.
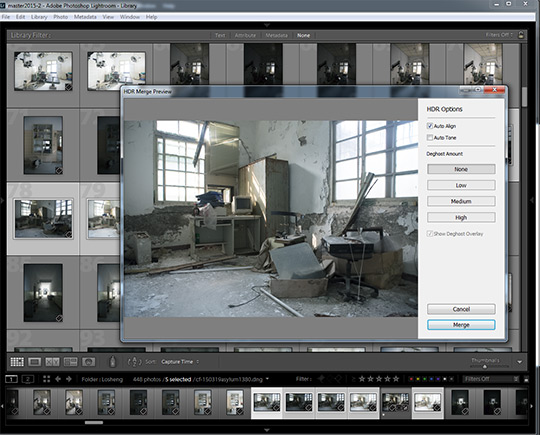
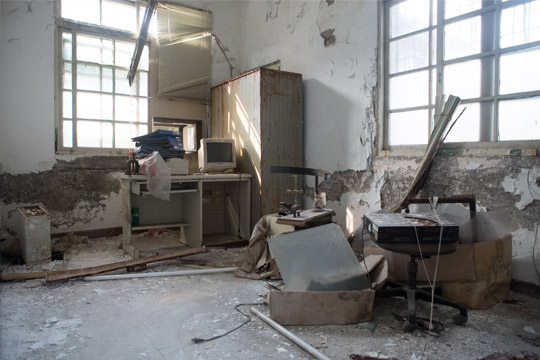
Click on the Merge button, and as with Merge to Panorama, it outputs a DNG file that is ready for you to process in the same way as any other image. Below are examples of the image as it’s output from Merge to HDR, and the final after I’ve used a preset and tweaked a few settings.
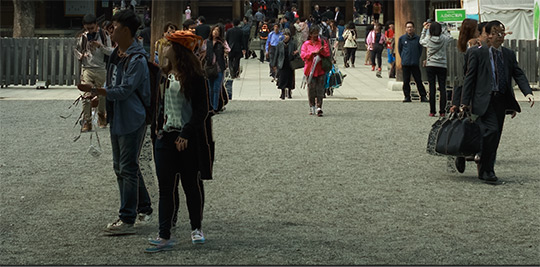
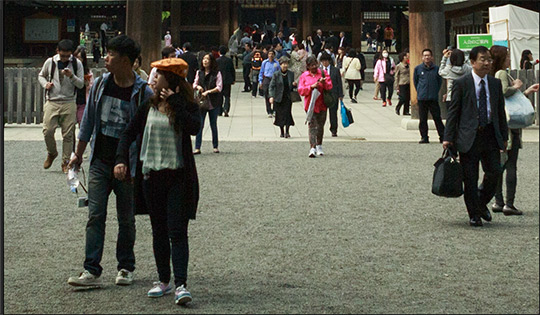
Here are a couple of examples of Deghosting. I took a 7 frame bracketing sequence from a busy shrine in Tokyo where a lot of people were moving around.
The first image below shows no Deghosting, and at 100%, the ghosting effect is easily visible. The second image below uses the high setting and does a successful job is removing that effect, making for a cleaner image.
With this new feature, it’s super cool that we no longer have to go round-trip to Photoshop to develop these types of images. It’s a total time saver – one that should be part of your processing arsenal!


