It’s All About the Bokeh
Sticking to my promise to expose more complete details on my workflow for select projects, we’re going to look at a detailed workflow leveraging Lightroom’s localized correction toolset.
This post roots itself in my previous tutorial on faking depth of field in your images. The one caveat to that technique is the round trip journey to Photoshop to finalize the effect.
On a recent shoot for New York’s finest underground house label Indicant, I decided to put the localized corrections tool to the test. This technique doesn’t necessarily produce the glassy effect I liked most about the depth of field tutorial although it does have a life of its own. This technique gives me more of a ‘selective’ soft focus effect which is completely controllable and non-destructive. The fact that this is all contained in Lightroom makes this a mandatory chop to put in your bag.
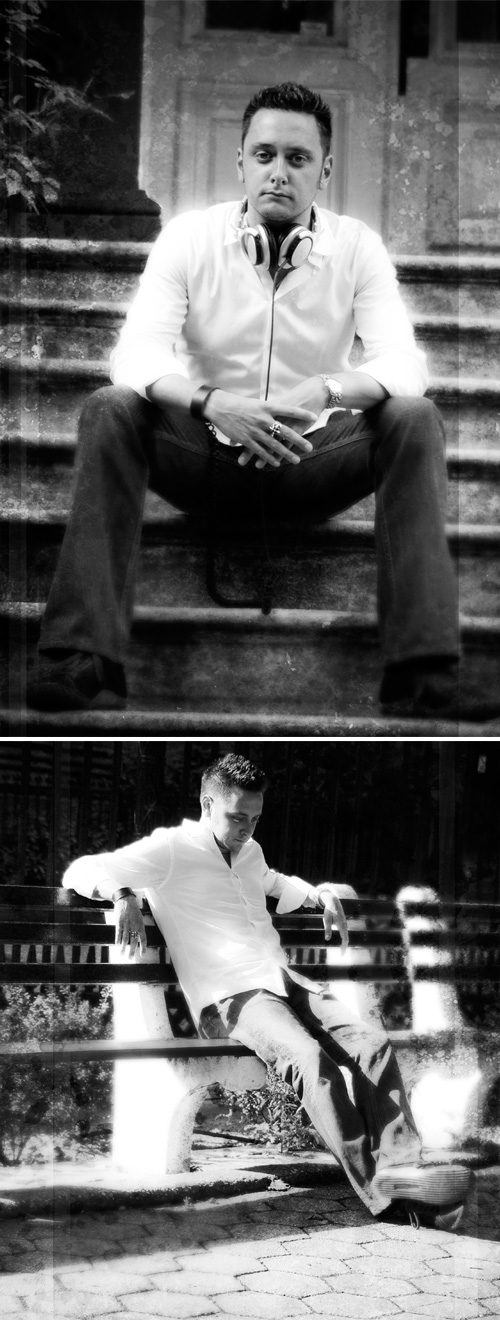
First, as always, let’s start with our final images. But before we do so, keep in mind not ALL the work done below was completed in Lightroom. For the final image I post-processed in Photoshop. That being said, the core adjustments in the images were based off this technique.
Ok … the final images:
Here’s where I started in Lightroom. I’ll explain how I applied the soft focus technique on one of the images as the other image used exactly the same workflow.
Before and after:
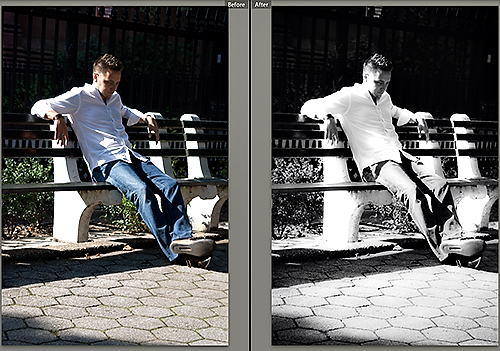
Whether you convert to black and white is entirely up to you. This technique will work regardless.
I’ll hone in on the image and make my first adjustment: select the clarity slider and drag it all the way to -100:

As you can see in this before and after, I have blown out my whites and softened my image – adding a bit of glow to the edges …
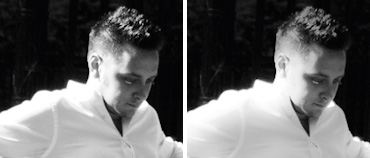
… which i exactly what I want. Using an Adjustment Brush we can sharpen selective parts of the image – this is where the magic happens!
Next I’ll head over to the Adjustment Brush to setup my localized adjustments for my image:
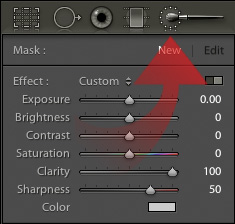
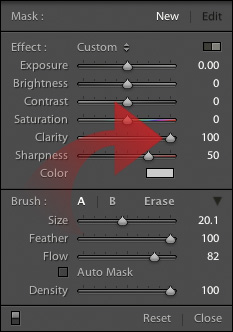
With my Adjstment Brush selected I’ll move the clarity slider to +100, and set my brush size (ie. 20.1):
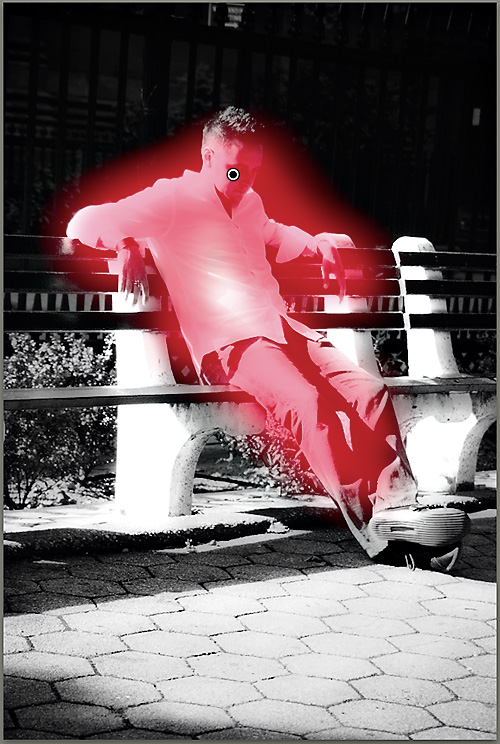
… and paint back in those areas I want to selectively bring back into focus. As you can see here, the red denotes those areas where I used the brush to sharpen up the specific points where I wanted to tone down the effects of the previous clarity adjustment of -100:
At this point I’m ready to push this image to Photoshop to finalize my work, so our trip stops here!
The adjustment brush and all the other localized adjustment tools bring an entirely new level of sophistication and capabilities to Lightroom that were often relegated to Photoshop – present example included.
