Back in October 2008, I wrote an article for Layers Magazine about some steps you can take to protect your copyright when posting photos online (big thanks to the editors at Layers for posting the full article!).
I think it would be worth your time to take a few minutes to give that a read through to get the big picture before diving into this (go ahead, I’ll wait).
Since that was published, I’ve wanted to flesh out some of the details that pertain to applying a visual watermark in Lightroom 2.
Thanks to X-Equals for the space to do that!
I’ve come to rely heavily on the LR2Mogrify Export plugin by Tim Armes for all my watermarking from Lightroom. It’s an incredibly versatile plugin and has completely changed my workflow!
LR2Mogrify is cross-platform donationware, and even offers a free trial. Check out Tim’s site for the installation how-to. Once installed you will find all the LR2Mogrify options in the Post-Processing section of the Export dialog.
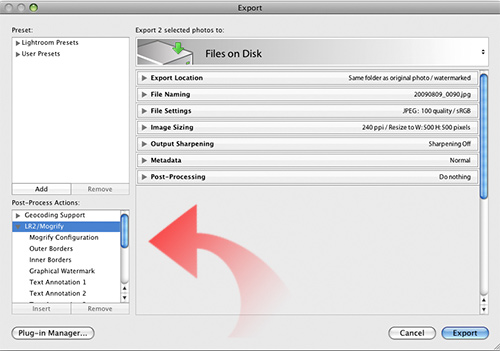
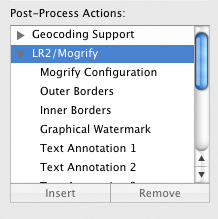
LR2Mogrify offers a broad range of functionality, but I am only going to focus on the two functions that can be used to apply visible watermarks. One is called Text Annotation and the other is a Graphical Watermark. They can be used independently or together depending on what suits your taste and needs.
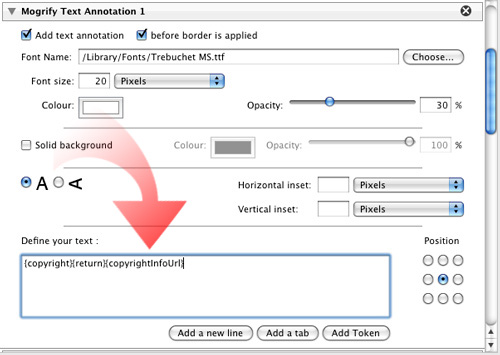
The Text Annotation feature can pull metadata from your photos or you can enter customized text (or both!) and display it as a watermark. For example, I pull the information I enter into the Copyright and Copyright Info URL fields and display that as a watermark.

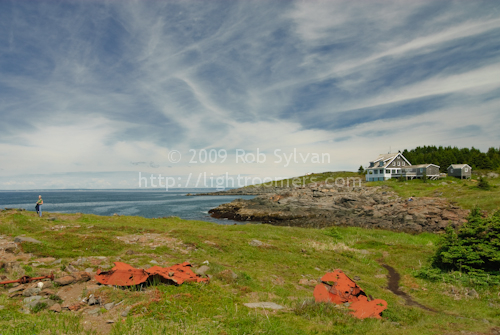
This is an incredibly useful function and opens all kinds of possibilities for what EXIF and IPTC metadata you can display on your photos.
Here’s how I set up that basic copyright annotation:
Step 1
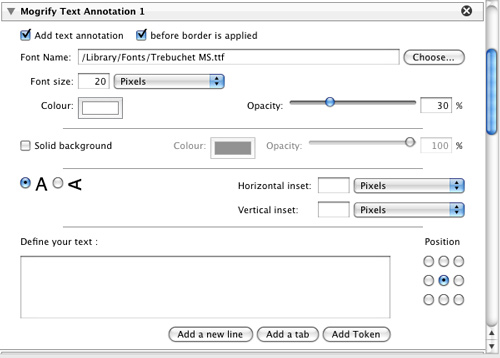
Double-click the Text Annotation 1 option in the Post-Processing section (you can add up to 3 different text annotations) to add it to your current Export.
Step 2
Select a font (TTF seem to work best) and set the font size. Choose the color and set opacity.
Step 3
Click the Add Token button. This launches the Select metadata value dialog box.

Step 4
Use the drop-down menus to choose a metadata value and click OK to add it to the Define your text field. You can also type directly into that field to add custom text.
Step 5
Choose the location for where the text annotation will be placed by clicking a spot in the Position grid. You can also tweak that placement further using the Horizontal and Vertical offset fields, and even configure the text to be written horizontally or vertically.
Step 6
Configure any other Export settings in the other panels and click the Export button to create your watermarked copies.
The Text Annotation may provide enough watermarking options for many uses, but if you have a logo or other graphic element you want to use instead the Graphical Watermark function is a great solution. I often use the graphical watermark function to add a digital version of my signature to exported copies.
If you don’t already have a graphic created you can create one in the image editor of your choice. I suggest saving it into PSD format, as PSD supports transparency and works with LR2Mogrify’s resizing by percentage function.
Note: The Graphical Watermark panel does not have an opacity slider, so control your opacity in the graphic itself before using it with LR2Mogrify.
Here’s how I apply my signature graphic as a watermark:
Step 1
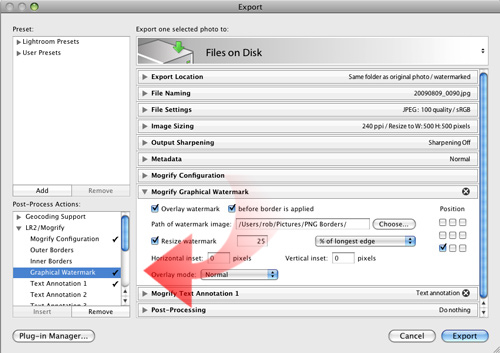
Double-click the Graphical Watermark option in the Post-Processing Actions section to add it to your export (remember all these post-processing actions can be added in any combination to any type of export).

Step 2
Click the Choose button and navigate to the graphic file you want to use.
Step 3
Check the Resize watermark box and configure the size.
My source signature graphic is about 2,000 pixels wide, and in this case my exported photos are going to be resized to a maximum 500 pixel width and height, so I find it easiest to use the % of longest edge resize option and choose a value that works for me (in this case 25%).
This way LR2Mogrify will resize my source graphic to 25% of the longest edge of my resized photos no matter what size I make them.
Step 4
Choose the location for where the graphic will be placed by clicking a spot in the Position grid. You can also tweak that placement further using the Horizontal and Vertical offset fields.
I’m designating the lower left corner and then bumping it horizontally and vertically by 10 pixels.
Step 5
As I said before, there isn’t an opacity control, but you can set the overlay mode for different effects.
Step 6
Configure any other Export settings in the other panels and click the Export button to create your watermarked copies.
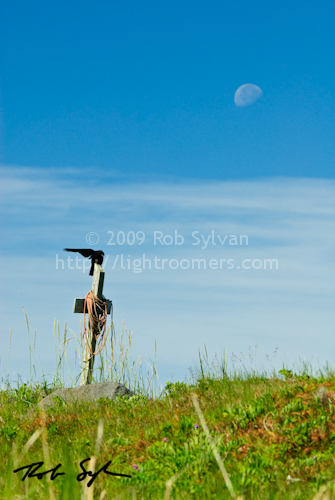
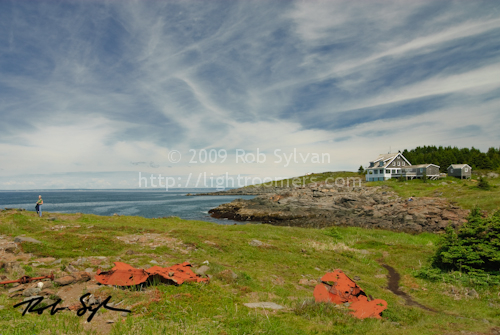
That’s all there is to it!
I hope this introduction to how this plugin works sparks your imagination for the many ways this can be used in your workflow.
Cheers!


