Long a standard practiced by studio and commercial photographers, shooting tethered should be an essential part of your photography. It may seem a bit intimidating at first but you probably already have all the necessary equipment for shooting tethered, and setting things up is not at all difficult.
Got a camera? Good.
Got a computer running Lightroom? Good.
Got a USB or firewire cable? Good.
Then you’re officially a photographer and all set to begin shooting tethered.
Every digital camera I’ve ever bought has come with a USB cable to connect your camera to a computer, but they tend to be a little short. You’re lucky if it’s 6″.
You can still shoot tethered, but you’re going to need to have that camera and that computer very close together. Unless you’re shooting tabletop still life, you’re probably going to want something a little longer.
There are companies that make specialist tethering gear that gives you 15 or more feet of working space which should be sufficient for most photo shoots. They’re not expensive at all running around $30 or so. You could also simply get a long USB extension cable and plug the cable you already have into that.
Reasons You Should Have Implemented This Already
My main camera body, a standard full-frame DSLR, has a 3.2” LCD screen on the back of it. Not only is that too small to be judging fine details and other essentials, it’s also uncalibrated.
I can’t be sure if my colors, white balance and all that jazz are rendering accurately. Sure, I can fix color casts in post, but isn’t it better to get it right in camera?
But by comparison, my laptop has a 13” screen. And it’s already calibrated. I can take that on location with me and use it during a shoot to immediately and easily know that everything in the photograph appears how it should be.
If you want to go all next level in the studio, shoot tethered into your desktop or hook a large monitor up to your laptop and have an even bigger viewing screen.
Once you start shooting tethered, you’ll wonder how you ever managed without it.
Using these approaches gives you a much better idea of which way to go when making critical judgments. Therefor, viewing your images on a 27″ screen vs. a 3″ screen is a no-brainer.
Additionally, if you are working on a commercial assignment and have an art director on location with you, they can give immediate approval to the images you are creating as you create them.
The downside? Shooting tethered will slow you down.
But here’s the trade-off; quality goes up because you have an increased ability to make changes as you go. If you’re shooting a client’s headshot, for example, they can see the results immediately on the bigger screen which quite often relaxes them and makes the shoot go more smoothly. Or the makeup artist can notice touch-ups needed in the makeup of a model. Same for hair and wardrobe adjustments. You’ll shoot fewer frames but get better results and make your editing job a lot easier.
Bonus: If your camera allows it, you can also get an extra level of safety with your images. When I shoot tethered into Lightroom, I can have one copy of the image stored on the computer’s hard drive, and another on the camera’s memory card.
Setting Lightroom Up For Tethered Shooting
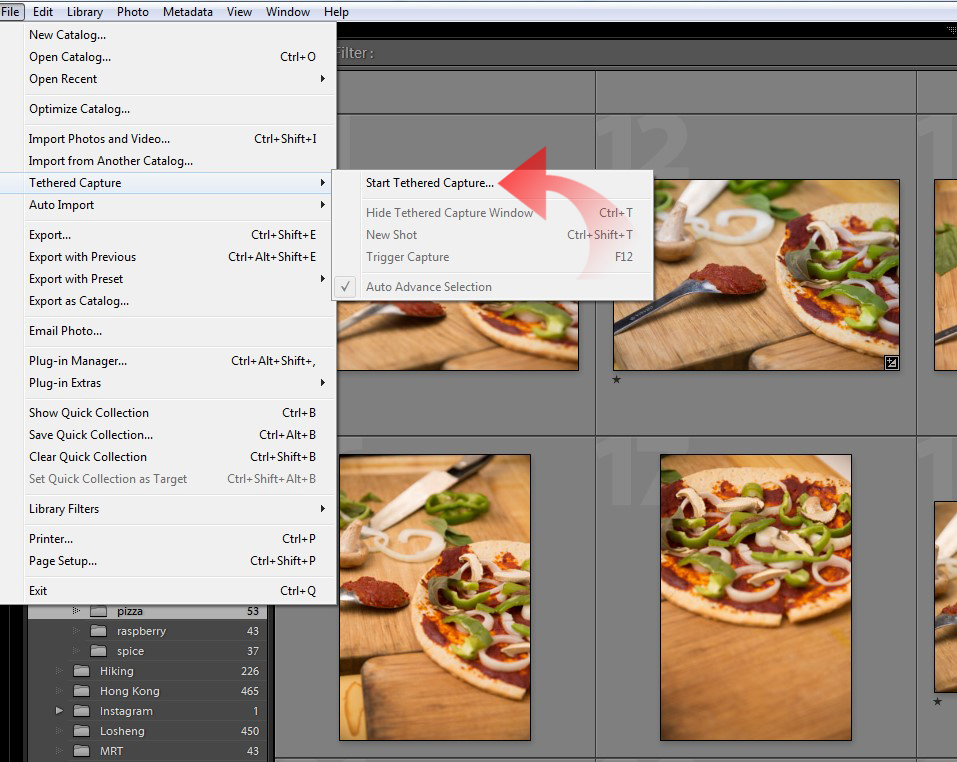
Open Lightroom and connect your camera to the computer. Head up to the File menu and just under the Import options you will find Tethered Capture. The flyout gives you the Start Tethered Capture option so go ahead and click on that.
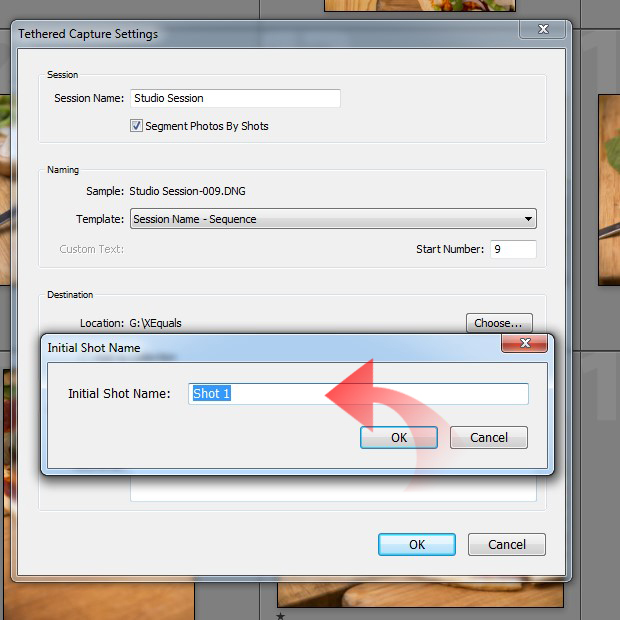
A popup will allow you to set destination, create naming conventions and folders. Session Name is essentially your top level name for the folder. Underneath there’s a checkbox that reads Segment Photos By Shots. If you check this it will allow you to create subfolders within that folder and after you click OK you’ll get the option to name the subfolders.
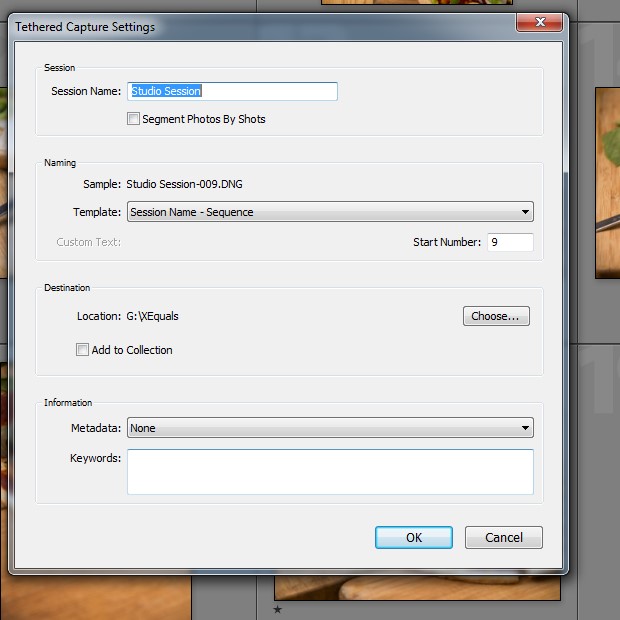
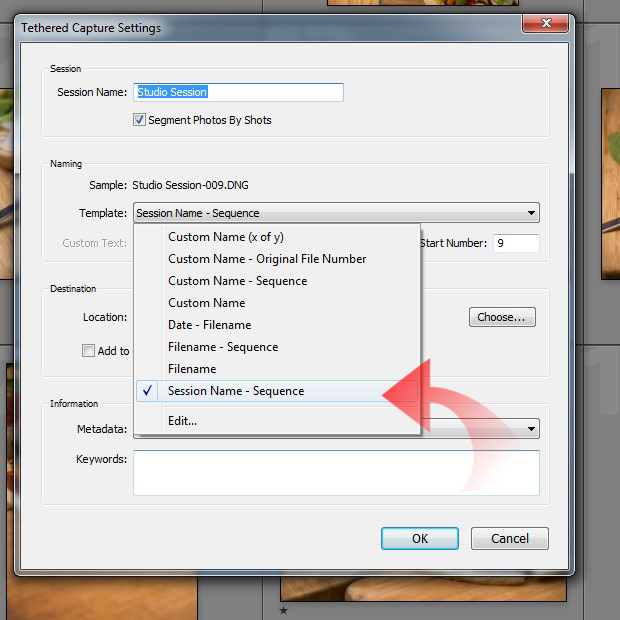
The next section covers Naming of your files. It offers the same template options as you would typically choose when Importing your images from a memory card or hard drive.
Destination follows to allow you to choose where on your computer to save the files. Another check box option is here that you can select if you want to add the photographs to a Collection. You can choose Quick Collection, an existing Collection or create a new one. I generally don’t use this method because my workflow revolves around Smart Collections – as you can see in the screenshot below, the only collection I have is one for images submitted to contests.
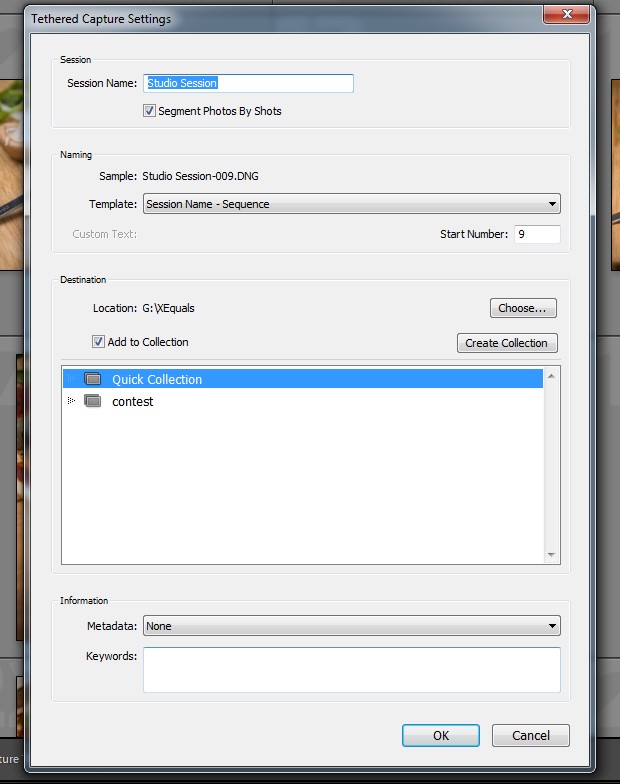
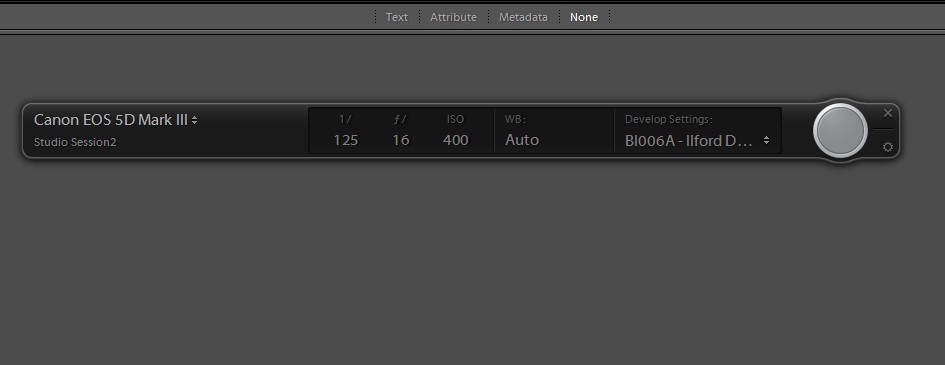
Finally, there’s the familiar Metadata and Keywords options. If you have specific Metadata templates that you regularly use when Importing images, or wish to assign keywords to the shoot, you can do so here. Once you have everything set, click OK. If you have selected the Segment Photos By Shots as described above you’ll create your subfolders now. Otherwise a floating tethered capture bar will appear.
Interrogate Your Images After You Capture Them
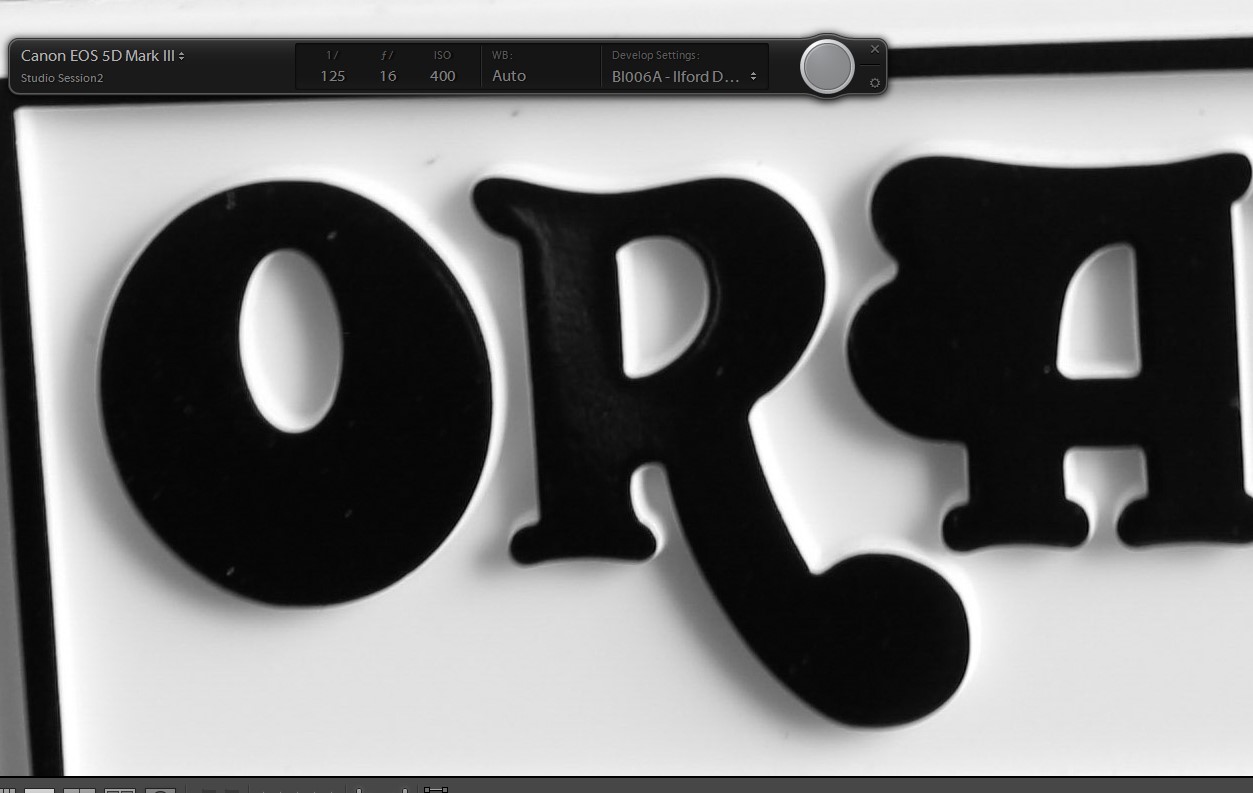
You can move the tethered capture bar around the screen to wherever makes it easiest for you to work. There’s also the option to apply Develop Settings such as X-Equals presets to your images as they come in. And that large gray circle on the right functions as a shutter button.
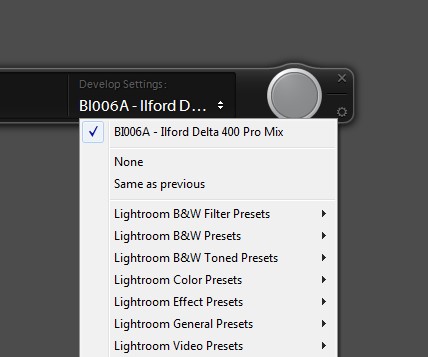
In the Why Shoot Tethered section above I mentioned that one of the advantages of tethered shooting was that it let you immediately view your images on a large, calibrated screen. In the screenshot below, you can see the result shooting into a 23” monitor with Lightroom set to Loupe view (keyboard command E). I’ve also selected a Develop preset from the X-Equals Black and White presets, in this case, Ilford Delta 400 Pro Mix. I know that I want the final result in black and white, so I can see it that way as it comes in. However, I’m shooting in RAW, so I still have all the color information in case I change my mind later on.
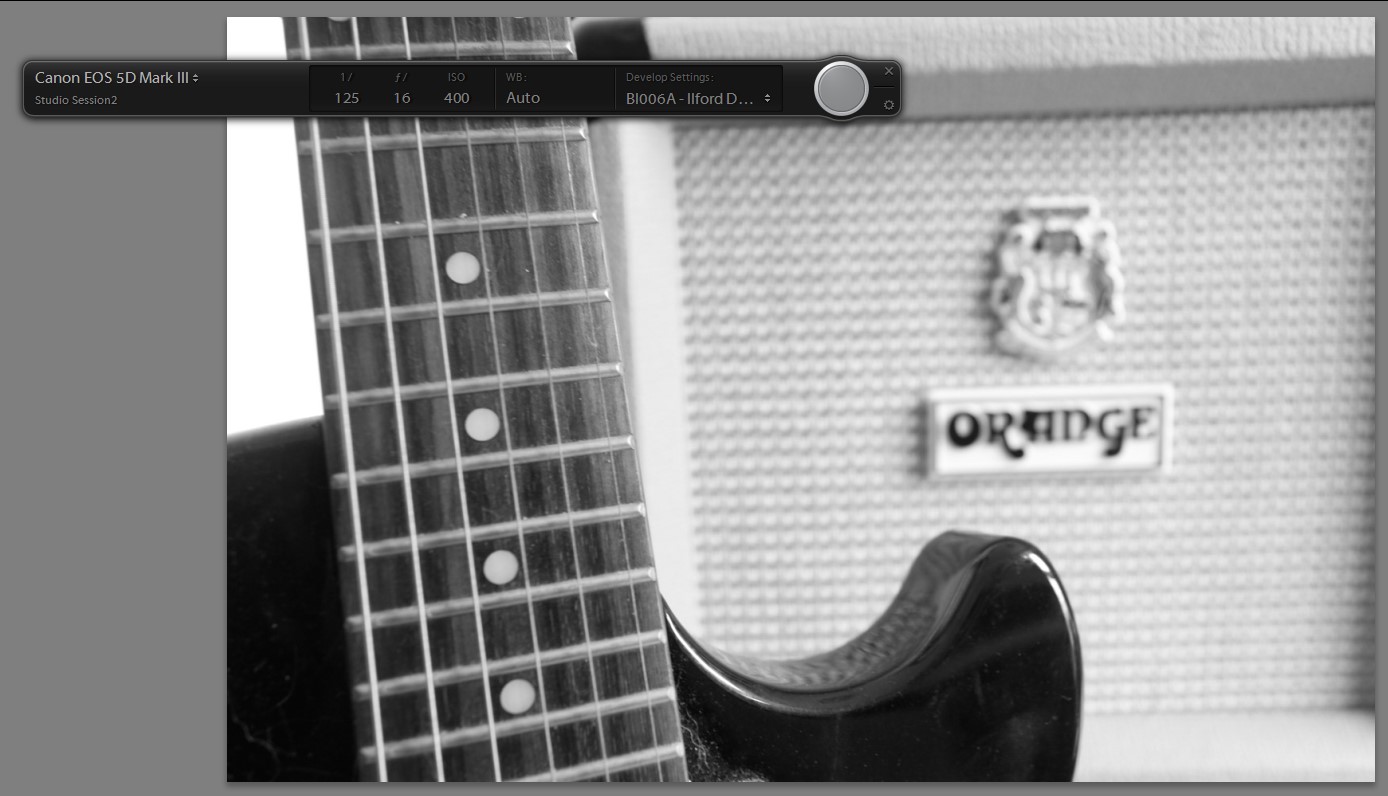
Not only am I able to set Lightroom to show the whole image being captured in real-time, but I can also have it zoomed in at 100% to a critical area to see fine details and focus as the images are coming in. The screenshot below shows a 100% view of part of the frame, and I can immediately see that the focus is a little off. If I also check it on my camera’s tiny 3.2” screen, even when zoomed in all the way it’s hard to tell if I’ve nailed the focus or not. This one looks okay on the camera screen but not right at 100% on the larger computer monitor.
Once you start shooting tethered, you’ll wonder how you ever managed without it. You will see a marked improvement in your photography, if only in the ability to get your shot in fewer images than before. The slower pace it provides gives you more time for your creativity to come to the front as you feel less rushed during the photo session.


