In Part 1 and Part 2 of this series, we have covered several options presented to us in the Lightroom Preferences Dialog. Today, we will look at the Interface tab of Lightroom Preferences and take a look at Catalog Settings as well. So let us jump right in.
Ready, Settings, Go!
Open up the Lightroom Preferences dialog and switch over to the Interface tab. This panel allows you to customize the Lightroom interface, allowing you to tweak settings and turn capabilities on and off.
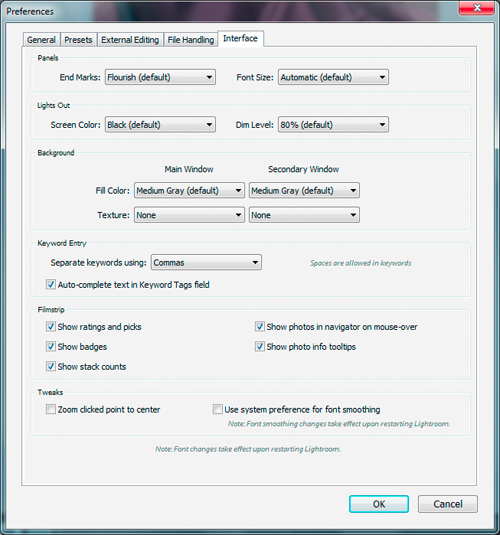
We will just run down the windows and cover each part.
Panels
This option contains two drop boxes, one for End Marks and one for Font Size. End Marks allows you to choose the decorative flourishes that you find scattered about Lightroom.
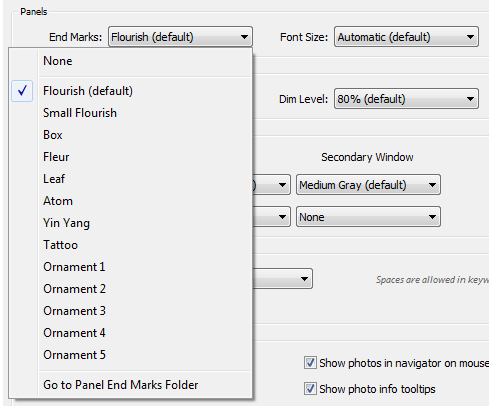
You can choose from a few designs or the complete lack of flourishes. Font Size, obviously, allows you to configure the size of the text in the Modules and Panels within Lightroom.

Using this option allows you to adjust the text for your own readability needs.
Lights Out
This option box provides you with two settings to adjust, Screen Color and Dim Level. Screen Color allows you to change the background color in Lightroom when using the Lights Out feature.
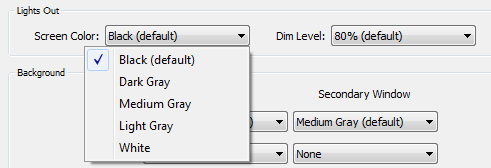
You can choose from Black, White or 3 different shades of Gray. You might switch to medium Gray or White depending on your image content, but typically, Black is optimal for Lights Out mode.
Dim Level allows you to set the percentage that Lightroom dims the interface when using the Dim Lights feature. You can set Dim Level to 50, 70, 80, or 90 percent.
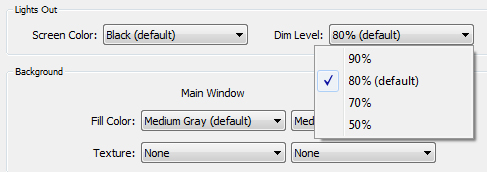
Default is 80%, but you might prefer 50% for a dim yet still visible interface, enabling continued editing.
Background
The Background settings allow you to alter the color presentation of the Lightroom’s background behind the image in Develop or Loupe views. There are sections for fill color and texture for both the Main Window and Secondary Window.Generally, the Main Window will be the screen on your primary monitor and Secondary Window will be the screen on a second monitor.
You can set the Fill Color for both windows to a selection of Black, White and three shades of Gray, Depending on your needs.
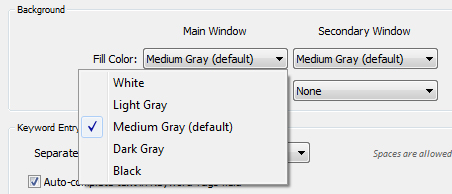
I set the background to Medium Gray and Lights Out to Black for quick viewing in both modes. Set the background to whichever color works best for you. Texture allows you to all a pinstripe effect to the background, which may be appealing to some users.
Keyword Entry
The Keyword Entry settings allow you to fine tune your keywording experience. The Separate keywords using: drop box allows you to choose commas or spaces as the keyword delimiter.

Set this simply to your preference. With Commas set, keywords will be defined by the text string betwixt the commas, which will allow you to use spaces within your keywords. Using Spaces will allow you to type in keywords, using only a space between them to set keywords. Downside to that is you are unable to use spaces in your keywords.
The Auto-complete text in Keywords Tags field checkbox will enable auto-completion, recommending keywords as you type.
Filmstrip
This section allows you to define what information you wish to be visible directly upon images in the film strip.

- Show ratings and picks – This option will cause information regarding your star ratings and pick flags to be visible directly on images in the filmstrip.
- Show badges – This option causes information badges to appear on your filmstrip images. A tag denotes the image has a keyword applied to it, a +/- denotes the image has been edited in the Develop Module or via presets, a dotted rectangle denotes cropping has been applied.
- Show stack counts – Will display how many images are currently within a stack.
- Show photos in navigator on mouse-over – When this option is enabled, the Navigator preview window will display which ever image you are currently hovering the mouse over.
- Show photo info tooltips – This option will allow a informative tooltip to be displayed as you hover your pointer over the photo. This information includes the filename, exposure information, camera and lens information as well as image absolute resolution.
Tweaks
This section has two options for you to further customize your Lightroom experience.

Zoom clicked point to center enables the function of centering the image window to the point clicked on in the image. Lightroom natively zooms generically, keeping as much as the image in screen as possible, this tweak allows you to center any point, even if most the image is off screen. Use system preferences for font smoothing allows the operating system to control the smoothing of fonts in Lightroom, using your system settings, as opposed to Adobe’s defaults.
On To The Catalog!
With that we complete our overview of the Lightroom Preferences panel, but we also need to consider Catalog Settings when we are discussing the configuration and customization options for Lightroom.
Catalog Settings is found within Lightroom in the Edit menu on Windows systems and the Lightroom menu on Mac systems. Clicking the Catalog Settings… selection will launch the Catalog Settings dialog.
General Settings
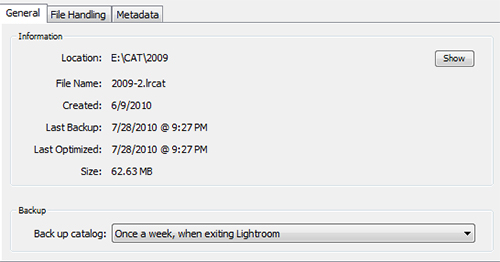
The dialog will default to the General tab, which shows some basic information. The Information pane displays information about the catalog; File location, file name, creation date, last backup, last optimize and catalog file size. There is also a Show button that will open up the catalog location in Explorer or Finder.
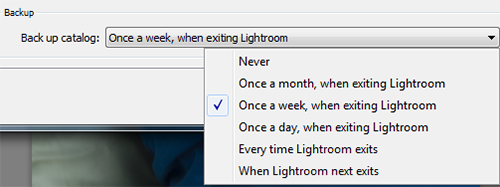
The Backup pane has one drop box, which allows you to configure the backup frequency of your catalog.
File Handeling
Clicking over to the File Handling tab, you are given options for the Preview Cache and Import Sequence Numbers.
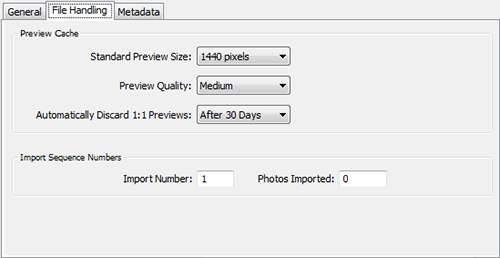
The Preview Cache settings configure the size and quality of preview images and length of time to keep 1:1 previews.
- Standard Preview Size – This drop box allows you to configure the maximum pixel dimension for previews as need for your monitor. Lightroom offers up the available dimensions as 1024, 1440, 1680 or 2048. You want to choose the next larger size that your monitor’s largest dimension. So, if you have a 1280 x 1024 monitor, you should choose 1440 as I have done. Your preview should have more resolution than your monitor can provide for best preview quality.
- Preview Quality – This dropbox allows you to configure the compression quality used on your previews. Just like JPEG compression, High will show few artifacts, Low will show more. Definitely keep this at Medium, if not High.
- Automatically discard 1:1 previews – This allows you to define the frequency that Lightroom discards 1:1 previews. Options are a day, a week, 30 Days or never. Lightroom defaults to a month, but if you are tight on space, bring it down to a week, if you want to increase system speed, set it to never. Remember, 1:1 previews are not used in the develop module, that information is in the Camera Raw cache, so this only speeds other places that images are viewed, such as the Library or Print Modules.
The Import Sequence Numbers allows you to configure the initial values the catalog will use when you are renaming files on import. Import Number denotes the starting point for when you use Import Session in a filenaming sequence. Photos Imported is used to set the unique file id, based on the sequence upon which photos were imported.
Metadata
Now, we can continue to the last tab of catalog settings, the Metadata tab.
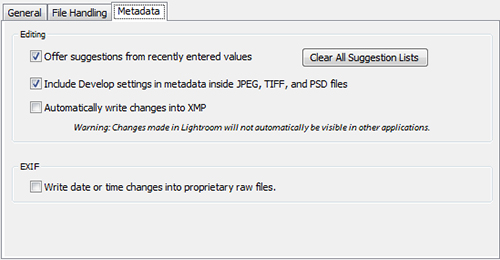
The Editing pane has a few checkbox settings that allow you to configure metadata settings.
- Offer suggestions from recently entered values – When enabled, this option will suggest previously entered metadata entries as you type. It will offer one or more options that you may be wishing to use, allowing you to click the selection to complete entry rapidly. If you find that you want to reset the suggestion lists, you can click the Clear All Suggestion Lists button to the right of the checkbox.
- Include develop settings in metadata inside JPEG, TIFF and PSD files – With this option selected, Lightroom will write metadata for develop settings into these image container formats. Uncheck this option to prevent your develop setting from being exposed.
- Automatically write changes to into XMP – This option will save all metadata changes, including develop settings, right into the XMP sidecar or DNG file. If it is unselected, all changes are stored in the catalog only and these alterations will not be made available to other applications such as Adobe Camera Raw.
EXIF
And we finally come to the last pane, EXIF. This pane has one option, Write date or time changes into proprietary raw files. This option allows you to write date and time changes directly to manufacturer raw file using the Metadata >> Edit Capture Time command.
And that brings us to the end of our survey of Lightroom Preference and Catalog Settings options. By using these options, you can tune Lightroom for your specific needs. And remember, if you need better speed and have extra disk space, Increase the size of the Camera Raw cache and set your 1:1 preview to never expire. It eats up some space, but will save a lot of your time.
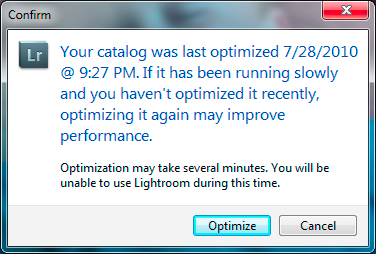
Oh, and one more thing. If your goal is to improve Lightroom performance, and you have added or removed a umber of photos from your catalog, you will want to optimize your catalog. To do so, click on the File menu option and select Optimize Catalog.
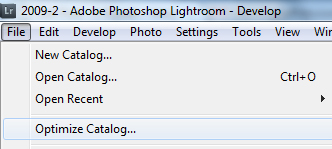
This will whip that specific catalog into shape, and along with a large Camera Raw cache and 1:1 previews, you will find your Lightroom experience much speedier.
If you have any questions or need further clarification, hit us up, otherwise, happy tweaking!


