In recent years, we’ve taught you how to make the eyes pop in Lightroom 3 and Lightroom 4, and now we’re back with a slick new way of doing it in Lightroom CC.
The main functionality I’ll discuss in this update has been available since Lightroom 5, but there’s a new addition to Lightroom CC that puts the icing on the cake. We’ll use two tools: the Radial Filter tool, and the Adjustment Brush tool. Let’s dig in.
The Color of Iris
First things first, process the entire photo to the point where you’re happy with it before doing anything else. Any adjustments to the overall image later will affect the eyes, despite the adjustments we’re about to make.
The best part of this enhancement method, like everything else in Lightroom, is that it’s a nondestructive process
Now let’s begin with the colored part of the eye: the iris. In the Develop Module, select the Radial Filter tool. In the resulting menu, select Iris Enhance as the Effect, then go directly to the bottom and click Invert Mask.
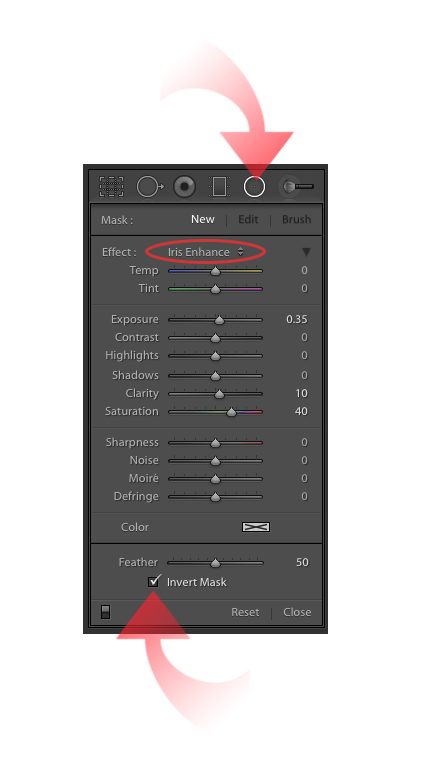
Next, click and drag to make an ellipse that covers the iris. You’ll see a color shift right away as the default settings are applied.
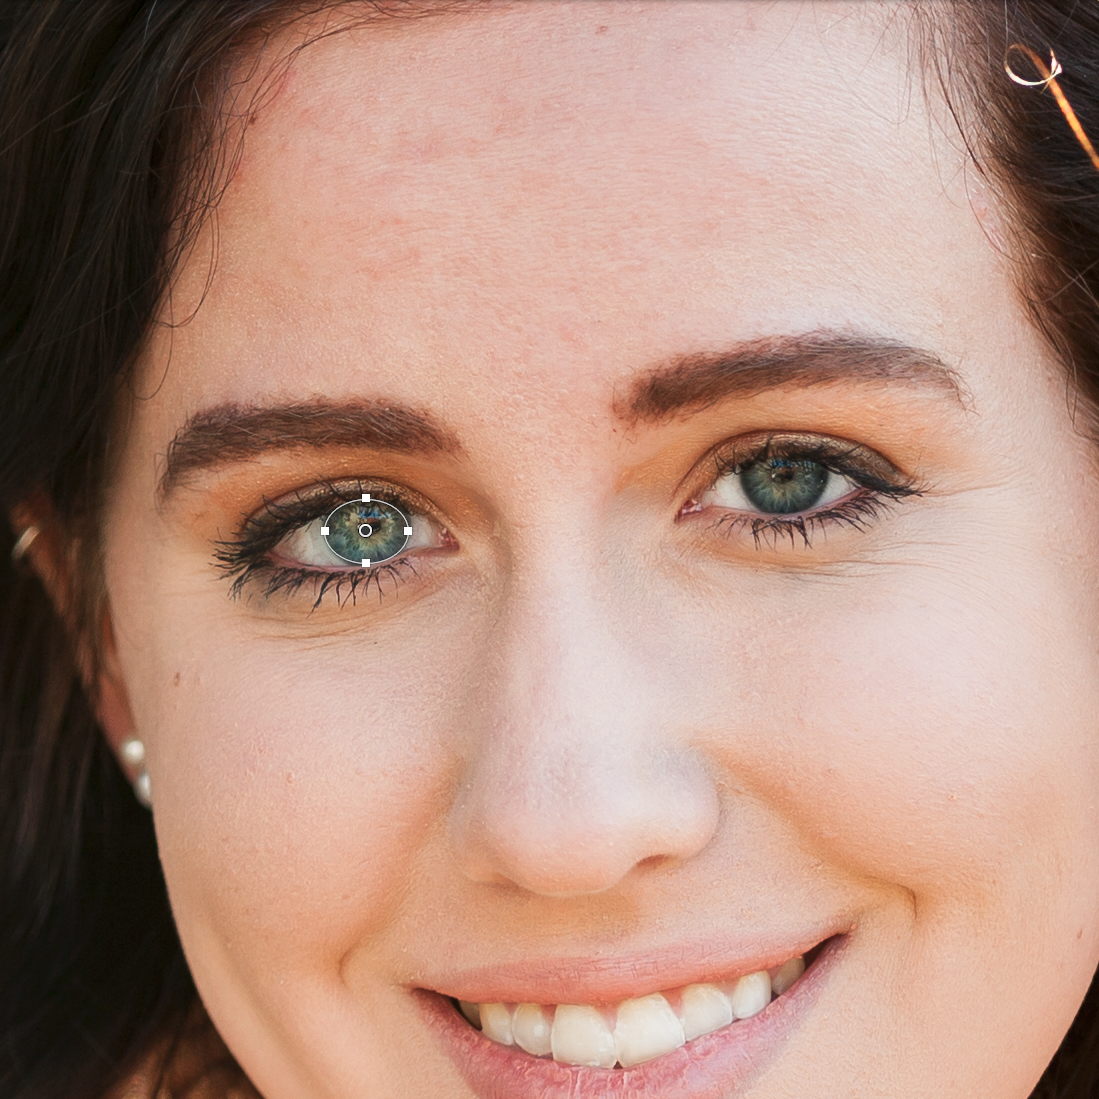
You can adjust the size and location of the ellipse after you let go of it, so don’t feel like it has to be exact. Adjust as necessary. Once you’re satisfied with the coverage of the ellipse over the iris, it’s time to adjust the settings.
To really make the eyes pop, we’ll focus on a handful of sliders:
- Exposure
- Contrast
- Clarity
- Saturation
- Sharpness
- Noise
As with all portrait retouching, especially with the eyes, subtlety is key. We want the eyes to pop just a bit, not burst with unrealistic color.
Start with the default settings, and then start adjusting the sliders until you get the look you want. Start at the top of the list: Exposure first. Then Contrast, etc. You can adjust each slider at any point if you find one affects the other in a way you don’t like. Here’s the recipe I used for this photo.
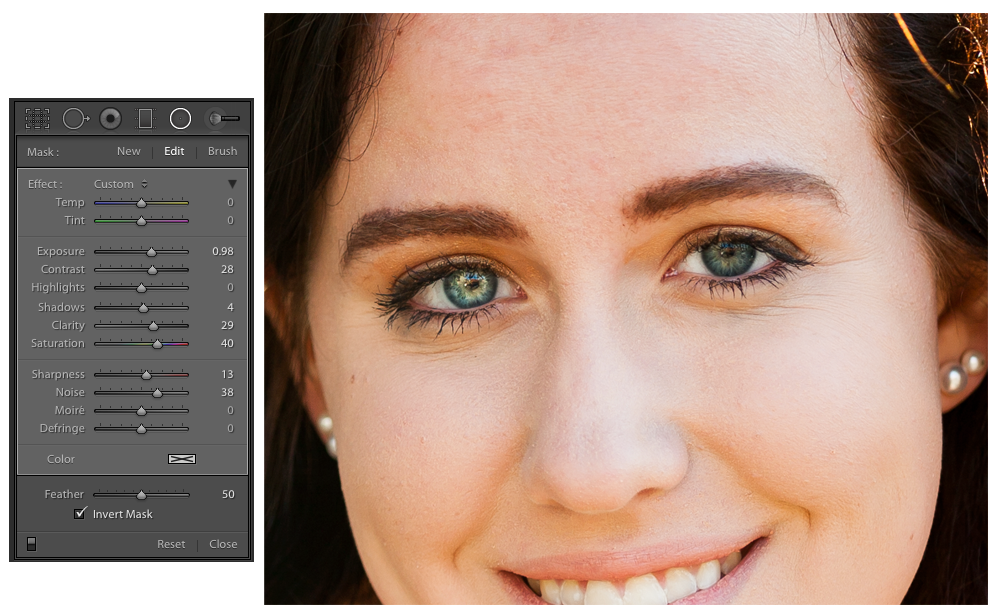
Each photo is different (different lighting, different facing angles, etc.), so you will need to tweak the sliders until you find what suits your fancy. The slider settings likely won’t be the same for each image, or even each eye.
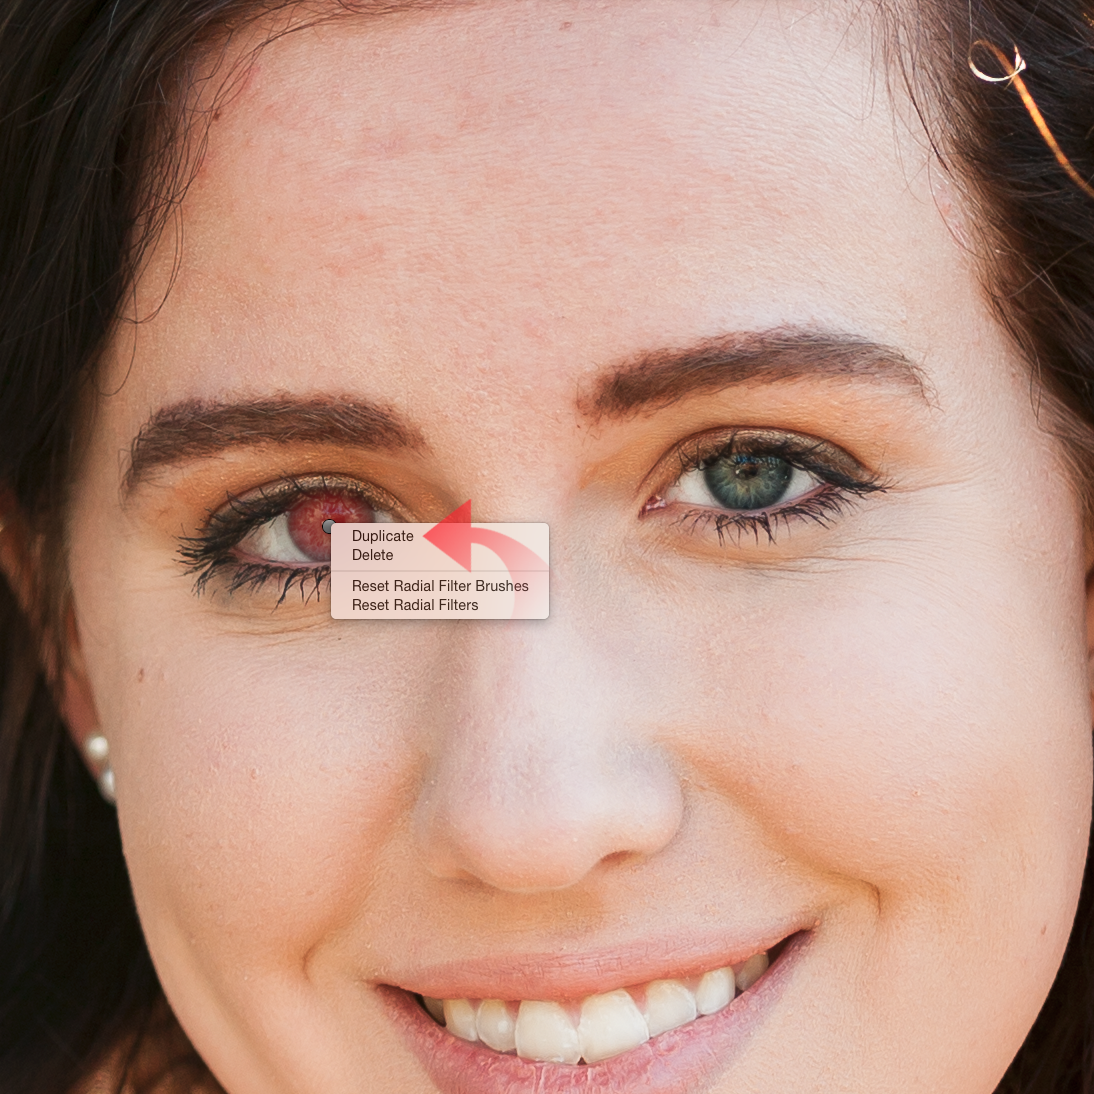
When you’ve completed the first eye, you can easily copy your work and paste another Radial Filter state. Just select the Radial Filter tool, right-click on the button and choose Duplicate. A duplicate state will appear on top of the original. Click and drag on it to move to the other eye. Then adjust the size by pulling the handles as necessary.
The finishing touch on the iris is to burn around the edges if they need it.
If they need it.
Often they don’t need it so don’t just do this step willy-nilly. If the iris already looks a bit darker around the edges, just leave it alone. If you need to add some color deepening, use the Adjustment Brush, and select the Burn preset.
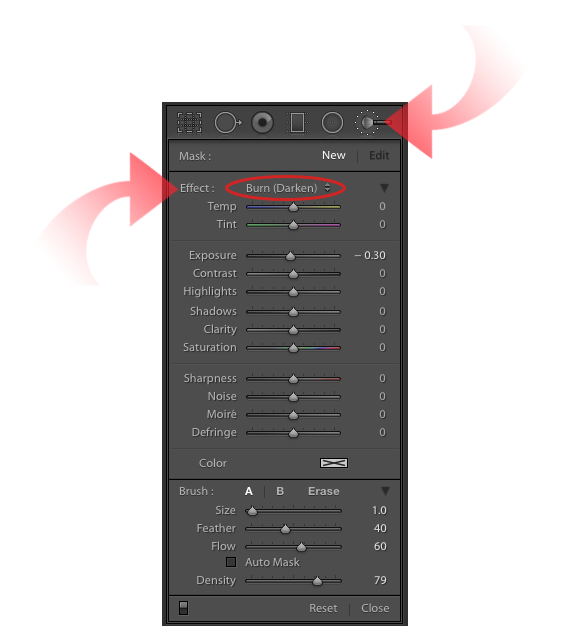
Quick Tip: to reveal the red mask of the adjustment you’re working with, tap the O key.
With a thin brush size at a Feather value of 50, Select the Burn effect, and brush the edges of the iris just enough so they have a deeper color than the rest of the iris. Remember you can adjust the Exposure slider after you’ve painted the coverage area to make it darker or lighter as needed. Again, subtlety is key here.

For the edge burn, you’ll focus on Exposure, Contrast and Clarity only. Adjust or redo as necessary until you get the look you like.
The Whites Of Their Eyes
Just as in previous versions of Lightroom, we’ll use the Adjustment Brush presets to brighten up the whites of the eyes.
When you’re happy with the look of the irises, choose a new Adjustment Brush state by clicking on the Adjustment Brush tool.

Then, hit the Effect drop-down and choose the Dodge (lighten) preset
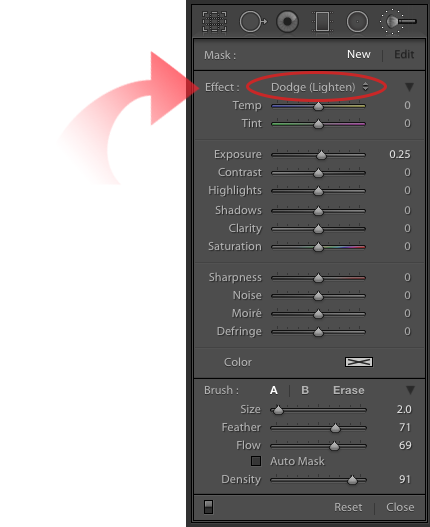
The defaults on the Dodge (lighten) preset may appear a little muted at first, so you might want to push the exposure up a bit to start to see what you’re doing. You can always go back and adjust it when finished. Paint the whites of the eyes and make sure the center ring of the tool stays in the white areas.

If the whites of the eyes are too bright and too perfect, they’ll look fake, so dial in the exposure little by little. The default setting of 23 might be all you need. Bring down the saturation just a bit to remove any redness or other color tints. I’ll say it again: subtlety is key—you don’t want your subject looking like a mannequin!
If you feel the whites need a little something more, leave the exposure at 23 and try adjusting the other sliders. Boost the shadows, highlights, and contrast—play around till you get whites you like.
Here’s a look at what my eye whitening recipe looks like for this image. It all depends on the eyes—each person is different, and you’ll have to adjust for each, but this is a good place to start.
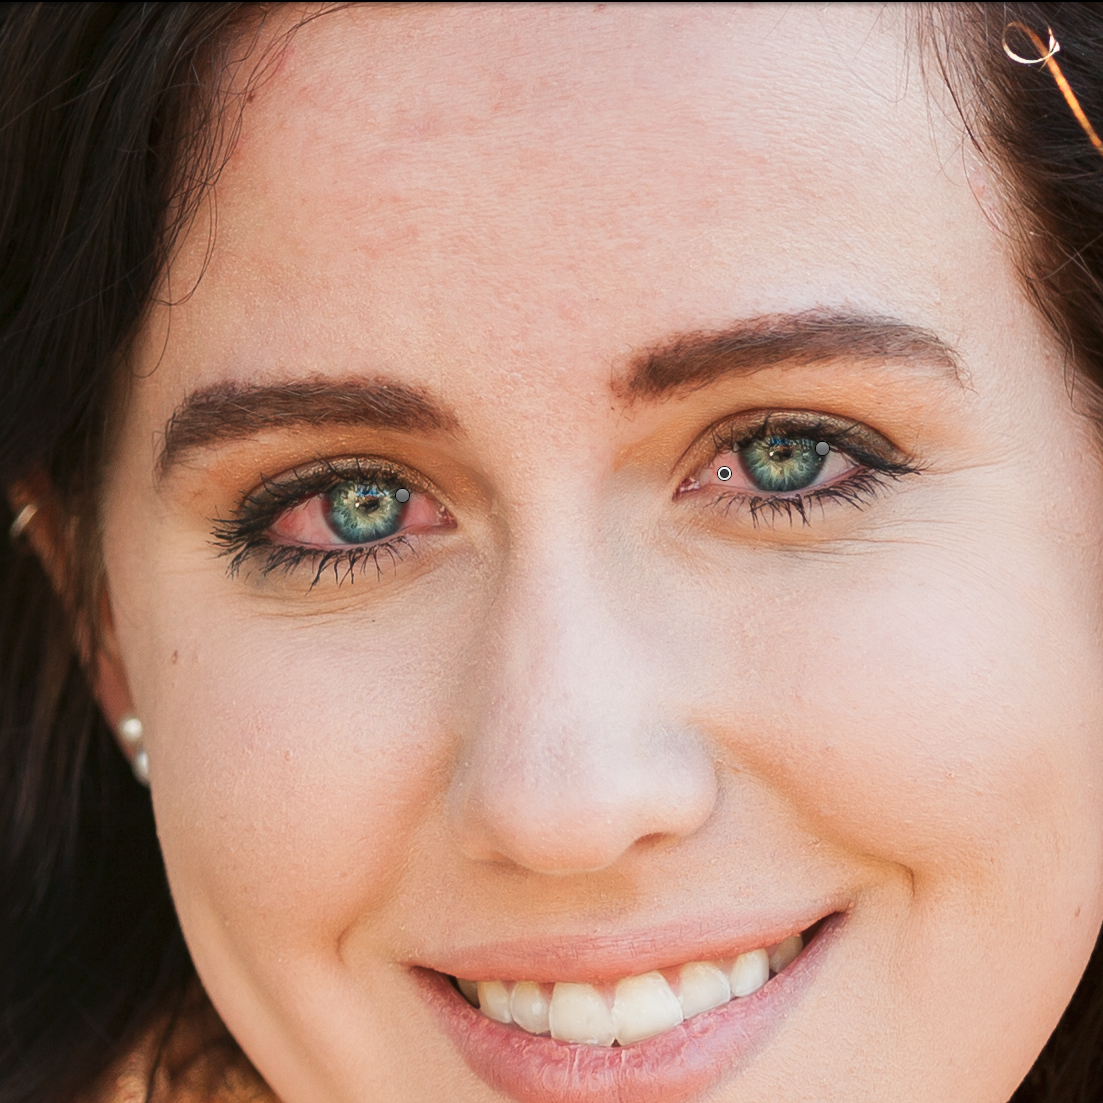
That’s it. The eyes are poppin’!
Here’s my before and after:
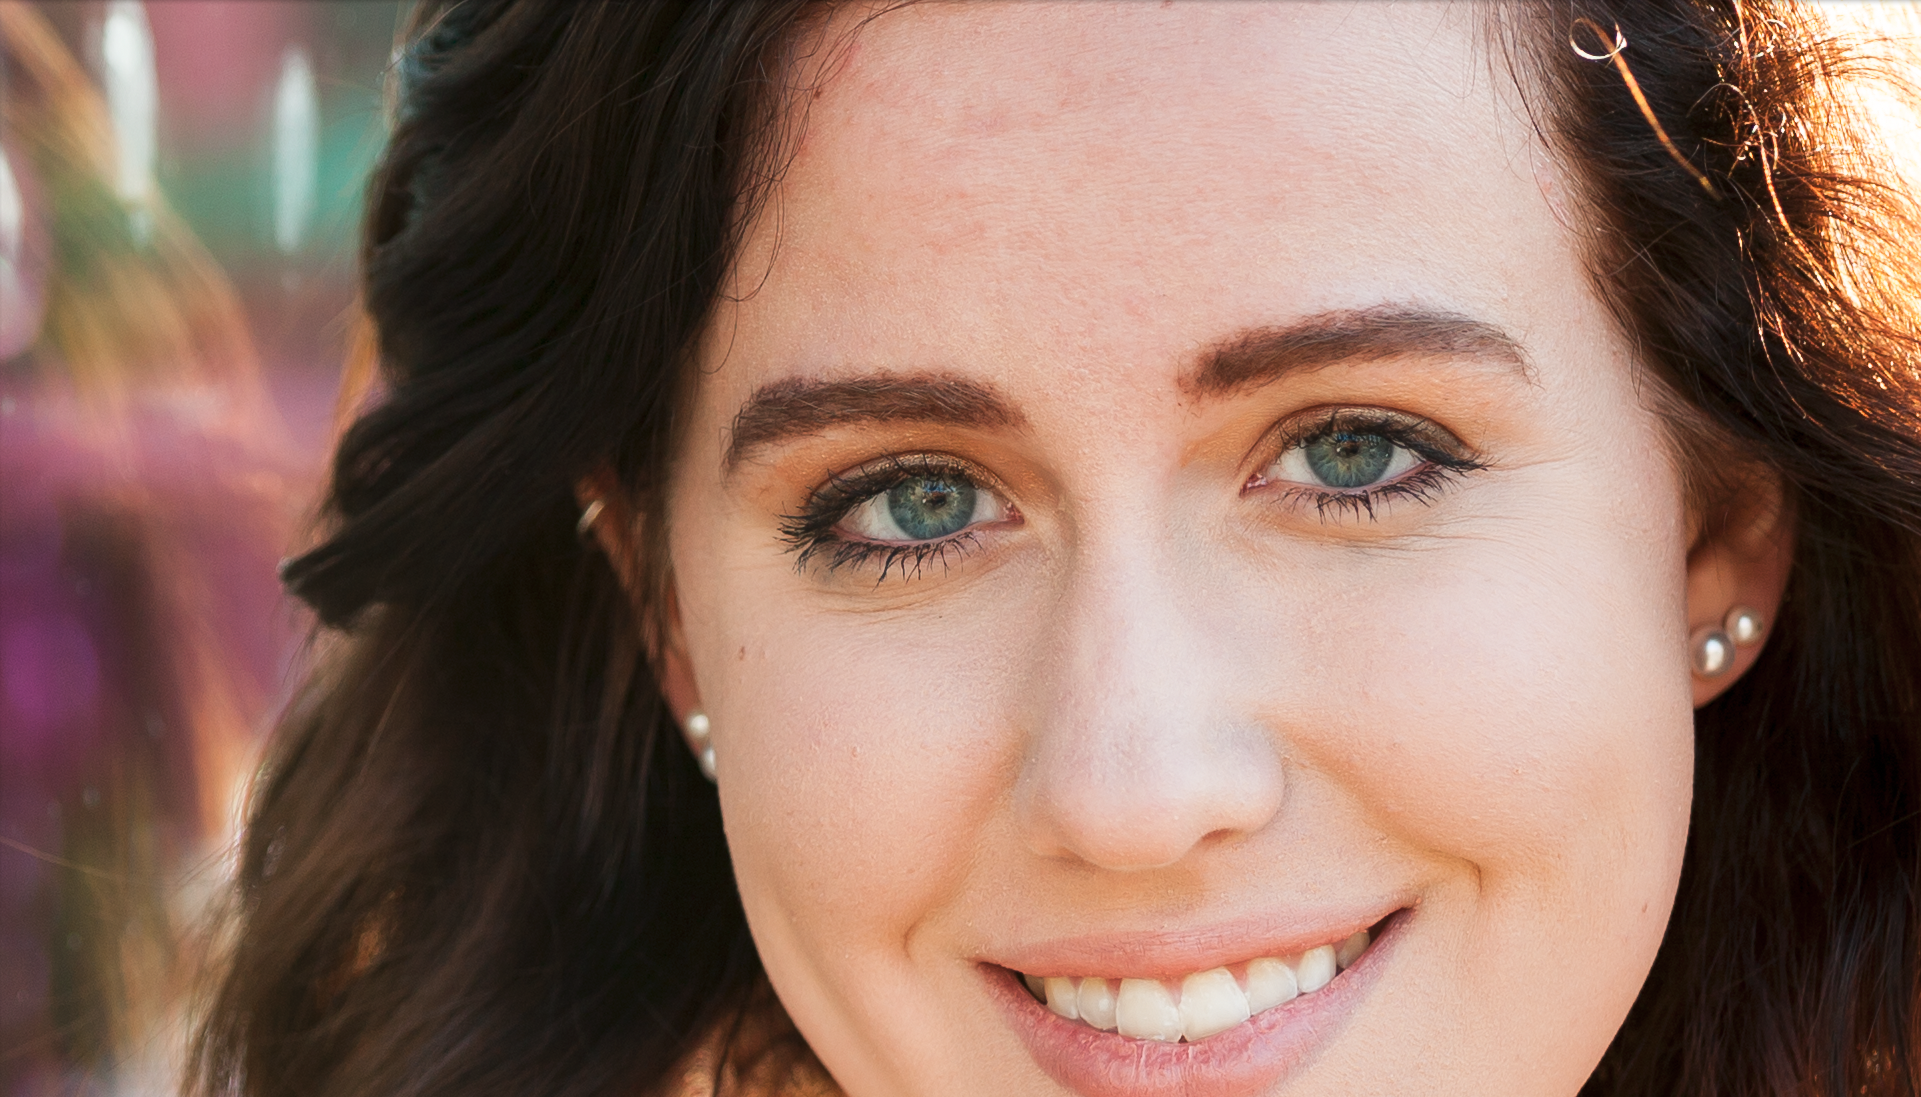
Before

After
Apply To Multiple Photos
Don’t forget that you can add these same adjustments to multiple images by syncing them and selecting the Radial Filter and Adjustment Brush options in the Sync dialog box.
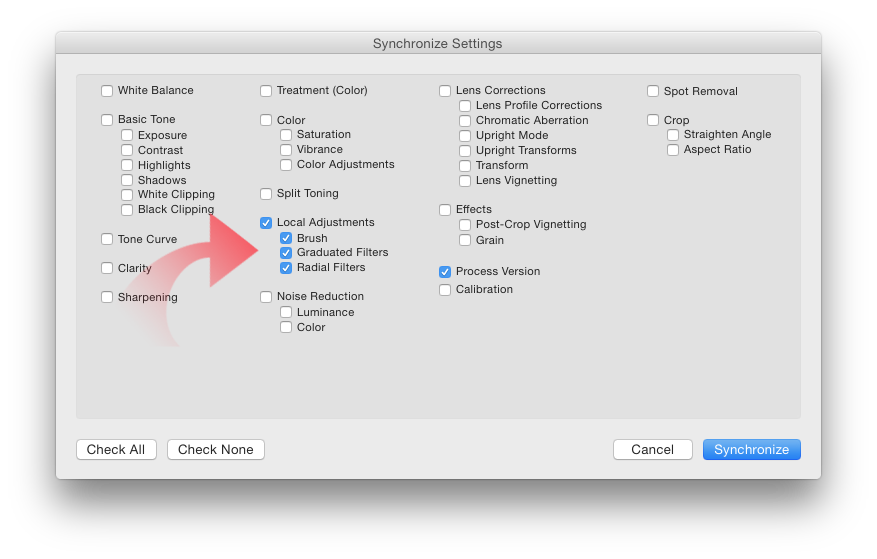
Once synced, you can move the adjustment around, resize and edit as necessary. I find that it’s most helpful to copy the iris portion only, not the whites of the eyes. It’s often easier just to lighten the whites with a new Adjustment Brush state than it is to edit an existing one by erasing.
The best part of this enhancement method, like everything else in Lightroom, is that it’s a nondestructive process that allows for fine tuning and tweaking at any time. If you come back to your photo and find that you need a little more contrast, no problem. Decide the iris color to be a little deeper? No problem.
If there’s a human as the main subject of your photograph, the eyes need to be crisp and clear.
Because you don’t want any fog on the windows of the soul.
