In the past we’ve covered making the eyes pop in Lightroom 3 using adjustment brushes, but the introduction of Lightroom 4 has made the entire process much faster and less complicated. Now, using the adjustment brush too and new preset, we can achieve the same—maybe better—results than in version 3.
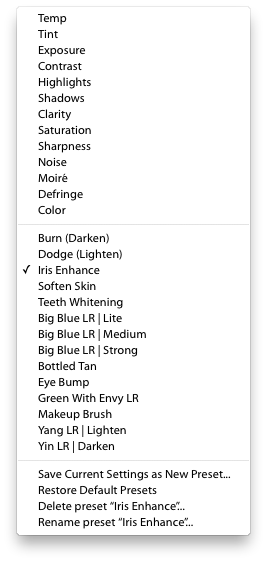
Lightroom 4 introduced adjustment brush presets to fine-tune things like contrast, temperature and exposure, but it also includes presets like Dodging, Burning, Teeth Whitening and Iris Enhance. This article is going to focus on the Iris Enhance and Dodge (lighten) brush presets.
First we’ll take care of boosting the color in the irises, then we’ll clean up the whites.
Pop the Color in the Iris
To start, zoom in on the eyes of your portrait. Then select the adjustment brush tool, and choose Iris Enhance.
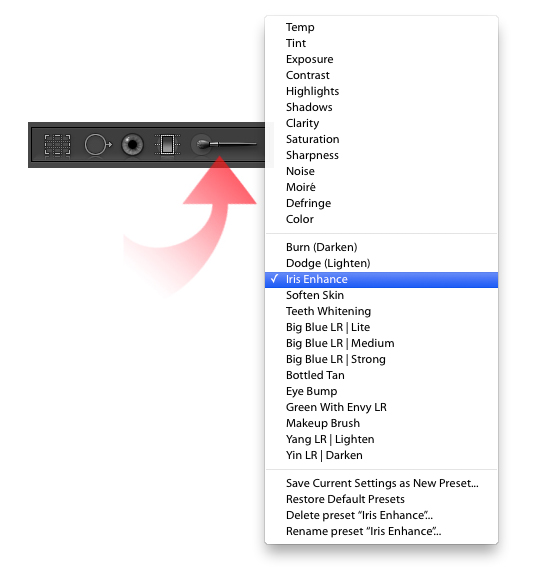
With the Iris Enhance preset selected, paint the irises of your subject. Make sure the inner circle of the brush tool stays inside the colored portion (iris) of the eye to keep the adjustments only where you want them. You should see an immediate and noticeable difference—sharpness, saturation and overall pop!
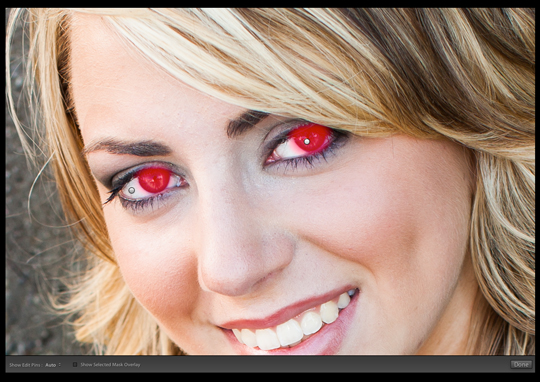
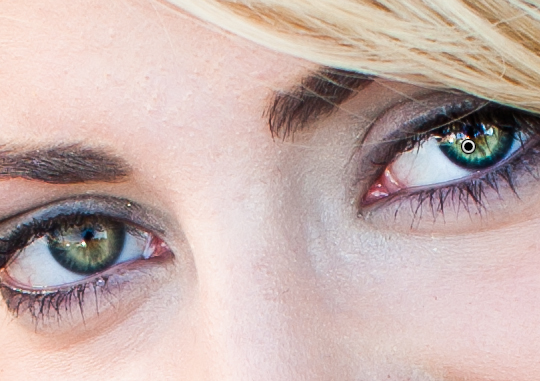
In this photo, the eye on the right has been hit with the adjustment brush using the Iris Enhance preset.
The default settings on the Iris Enhance preset are pretty strong for my taste, so I pull back the saturation and exposure sliders just a bit so the eyes remain realistic looking. Too much saturation and exposure can make them appear fake.
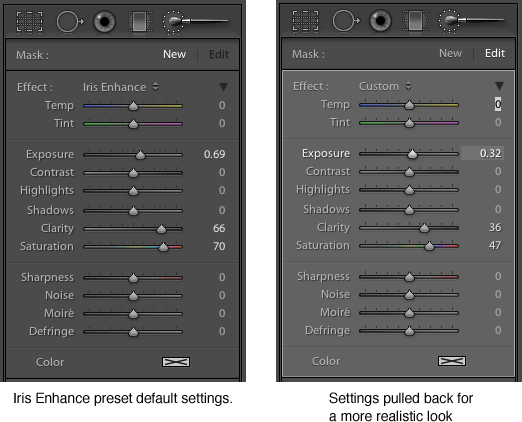
Play with the default settings to find what you like best. Don’t be afraid to slide everything down the whole list just to see how each slider affects the iris. You can always bring sliders back to zero by double-clicking the name (for instance, double-click the word Exposure to return the exposure slider to the zero setting).
The Whites of the Eyes
Once you’re happy with the look of the irises, it’s time to clean up the whites of the eyes. Choose a new adjustment brush state by clicking New in the toolbar.
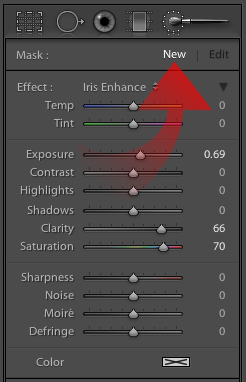
Then, hit the Effect dropdown and choose the Dodge (lighten) preset.
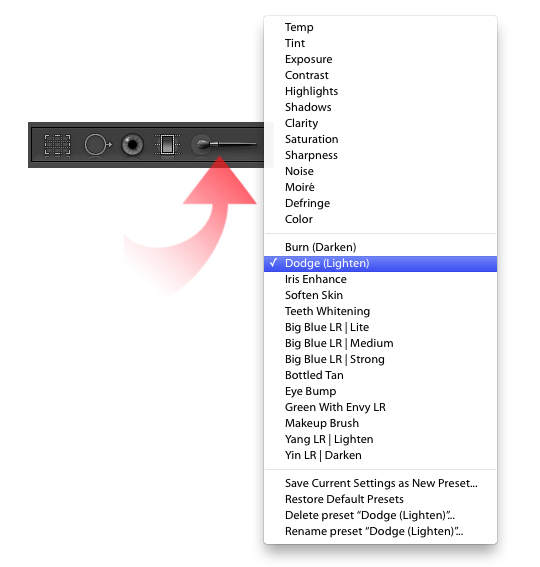
The defaults on the Dodge (lighten) preset may appear a little muted at first, so you might want to push the exposure up a bit to start. You can always go back and adjust it when you’re done painting. Paint the whites of the eyes and make sure the center ring of the tool stays in the white areas.
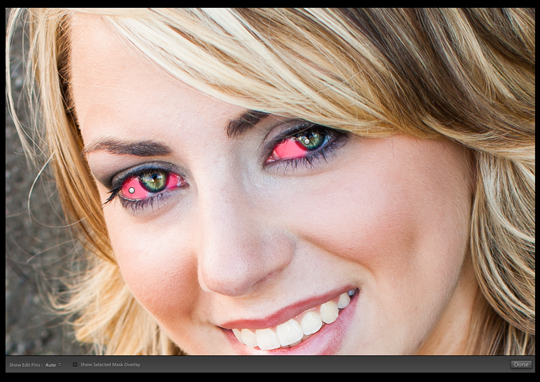
If the whites of the eyes are too bright and too perfect, they’ll look fake, so increase exposure little by little if you need to. The default setting of 23 might be all you need. Subtlety is key here.
If you feel the whites need a little more pop, leave the exposure at 23 and try adjusting the other sliders. Sometimes I’ll drop the saturation (to remove some of the redness or other tints), then boost the shadows, highlights and contrast. Here’s a look at what my eye whitening recipe might look like. It all depends on the eyes, each person is different and you’ll have to adjust for each.
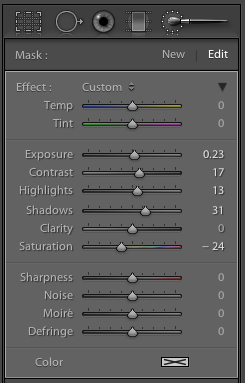
Here’s the before and after. Nothing too overpowering, but that’s by choice. You can go crazy and make the eyes look perfectly white and saturated, or you can go the realistic route like I did here. The point of enhancing the eyes is to give them a little pop to draw viewers in, not make them look unrealistically perfect.
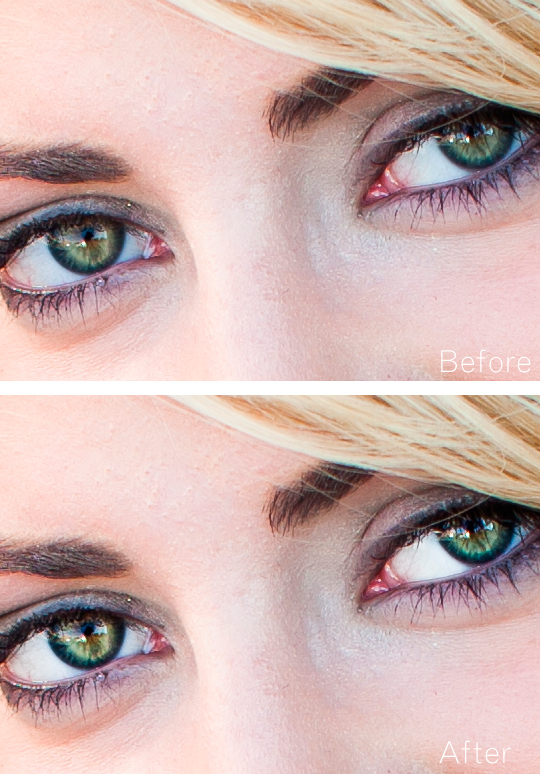
That’s it, you’re done and the eyes are poppin’! Don’t be afraid to play around with all the settings to see how each slider changes things. You’re working in Lightroom so you can always go back and change your adjustment states because it’s all non-destructive editing. Now start poppin’ those eyes!


