One of the most alluring parts of a portraits is the eyes. Just like meeting someone face-to-face, you search for the eyes first in a photograph as well. And since that’s where a viewer’s attention is naturally drawn, I say make them command attention. I retouch the eyes in my portraits just enough to give them a little something without looking fake or overdone, and I often do it all in Lightroom 3. Here’s a look at how I do it.
First, process your image to the point where you’re happy with it—exposure, white balance, contrast, saturation, split toning, clarity, curves, sharpening—all the normal processing you do. You want all that in line before doing the eyes so you don’t alter your eye edits with normal processing.
Once you’re happy with your processed image, zoom in on the eyes and open up the Adjustments Brush tool in the Develop module.
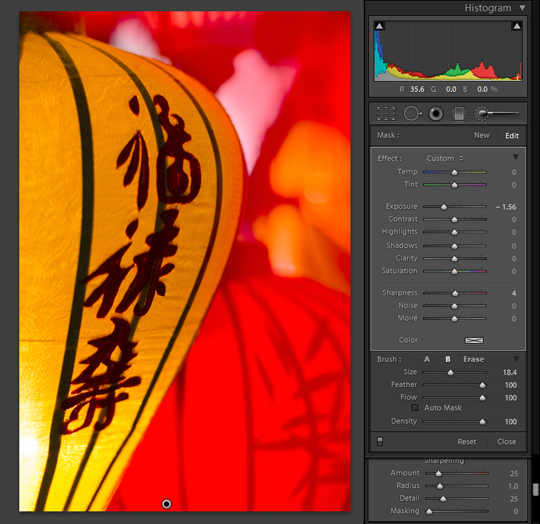
Let me say at this point that working with a pen tablet like a Wacom makes working with the Adjustment Brush simpler and more accurate than using a standard mouse, but you can use either. I prefer a Wacom tablet and pen.
We’re going to start with the exposure of the entire eye. (You can do both eyes at the same time, or separately if they need different treatments than one another.) Push the Exposure slider up to a noticeable level, like 0.60, make sure your Feather is fairly high, around 90. Set Flow to around 90 or 100 and Density to about 80, and start brushing the entire eye—color and whites.
It’s easy to overdo the eyes and make them look fake, so once you’ve brushed the entire eye, scale back the exposure slider to a realistic level. Subtlety is key here. Whites should be bright, but not blinding white with zero color. Never make them pure white—doing so instantly makes them look fake and obviously retouched.
If at any point you get sloppy with the brush, hold your mouse over the adjustment pin to see a mask of the area you’ve brushed. If necessary, clean up the area by using the erase brush, or you can hit the delete key and start over.
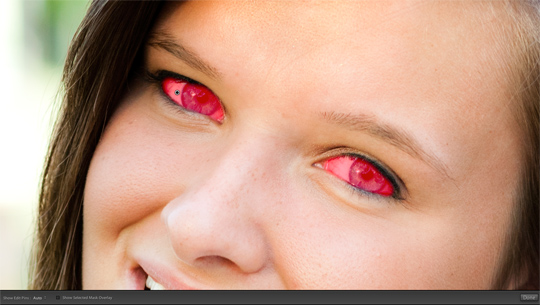
Next, let’s focus on the iris, the colored part of the eye. Since we’re editing a different part of the eye now, add a new Adjustment Brush state.
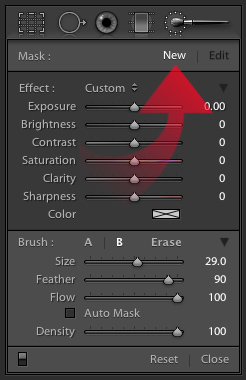
This will add a new adjustment pin so you’ll see two pins now; hit the H key on your keyboard to hide/reveal them. Depending on your image, you may want to increase the Exposure even more here, or decrease it. For this particular image I decreased it. Once I’m happy with the exposure of the iris, I go down the list of Effects and determine what the eyes need. Usually I’ll add just a touch of Brightness, Contrast, Saturation and Clarity. There’s no magic number for what works best, it’s what you like and looks right.
After the iris looks nice and lively, I do a few more things to add just a bit more pop. Add another adjustment pin and set the Exposure, Brightness and Contrast in the negative numbers. Then push Clarity up a bit. With a very small diameter brush, paint a thin line around the very edge of the iris (make sure your brush has a good feather to it). The iris naturally gets darker near the edge, we’re just giving it a bit more contrast to make it more noticeable.
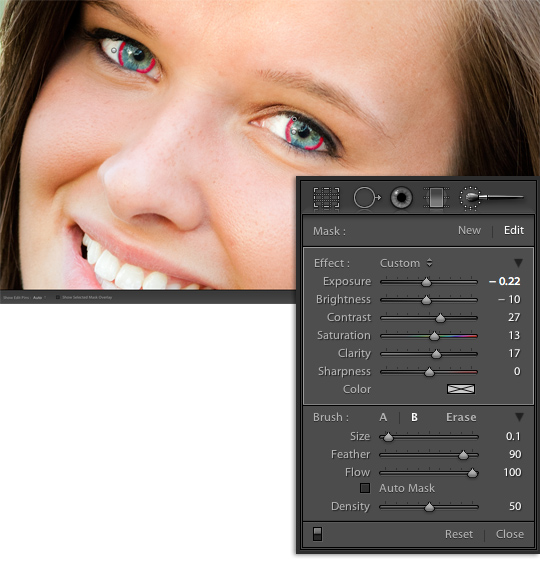
As with all these adjustments, use the sliders to fine-tune the look. You can even add some color if you want. I prefer to enhance the eyes as they are and rarely add color.
You can add a reflector highlight if it works for your image. I don’t do this on every image, but sometimes I like to add a subtle highlight in the lower part of the iris to mimic a reflector that has bounced light into the subject’s face. To do this, add a new adjustment pin and push the Exposure to about 0.10 and Brightness up to about 40. Move the Density slider to 50, make sure your brush is very soft and fairly small and paint a small downward curved line (like the letter U) in the lower part of the iris. Adjust your Exposure and Brightness as necessary.
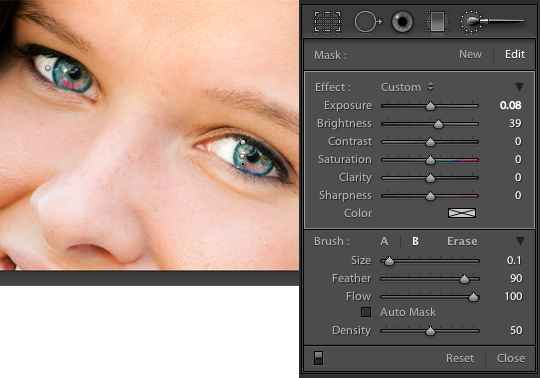
Last step, enhance (or add) the catchlights. Catchlights are what make people look alive. Without them, their eyes look dry and dead. But sometimes a natural catchlight doesn’t exist because the angle of the light source, or it’s small and unnoticeable. Lightroom 3 makes it easy to use the adjustment brush to either add a catchlight or enhance a puny one. Add a new adjustment pin with a fairly soft feathered edge and push the exposure up to the 1.0 range so you can see what’s happening. Set the Density slider to 40, click several times in exactly the place on the eye that you want your catchlight (if one doesn’t exist), or click on the existing catchlight to enhance it. Adjust the Exposure and Brightness as necessary to make it believable.
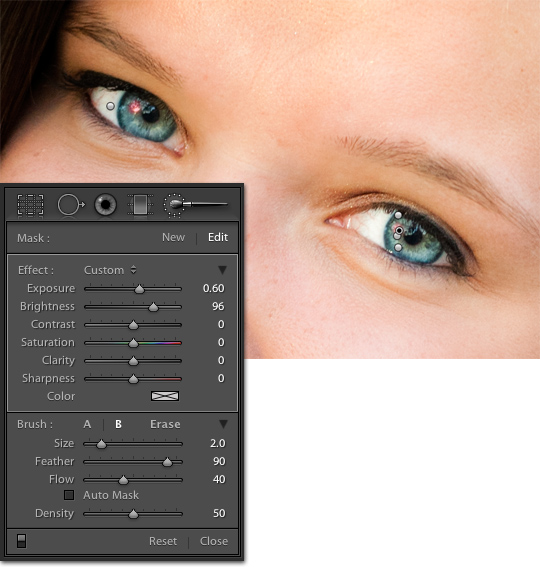
That’s it. We’re done.
Here’s the before and after:
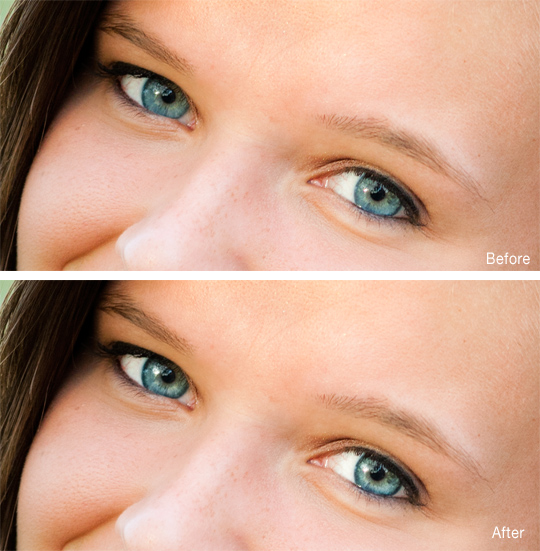
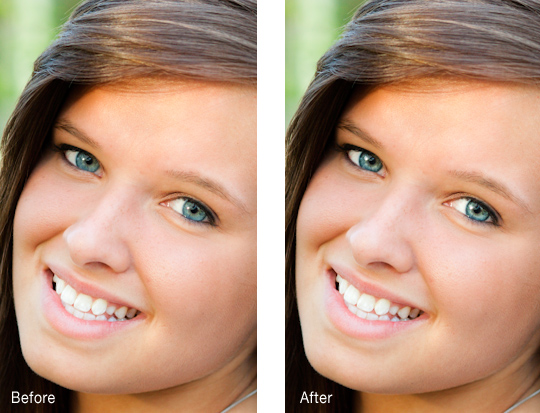
All Photos © Ryan Klos
The beautiful thing about making these adjustments in Lightroom and non-destructive editing is that you’re able to intensify or diminish the amount of your adjustments. If, after making your edits, you come back to your image and realize things are a little too poppy, you can easily scale back the Exposure or Brightness.
Gotta love non-destructive editing.


