A few months ago, one of my friends who is working on a book on surrealist Paris saw a photo of mine, one of the Paris shots I featured in the series of long-exposure articles. He liked the ghost effect with the Parisian backdrop, and asked me for some photos to illustrate his book.
My first attempts used the long-exposure ghost techniques I mentioned in that same article, but it didn’t exactly fit his needs. I went back to work with two words as inspiration: Magritte and bowler hats (well, three words then.)
The important thing to keep in mind when you shoot for a cloning project is that you can never go back.
I decided I wanted to try cloning to obtain a repetition of characters as often portrayed in Magritte’s paintings. The process in photoshop is actually fairly simple (and I’m going to explain to you how to do it below), but in the process of working on this I had to think a lot about composition in abstract, since the final picture can only be assembled in post-processing.
Successful Shoot
The important thing to keep in mind when you shoot for a cloning project is that you can never go back. If even one of the shots your rely on is wrong, for whatever reason, you cannot go back and shoot just that one, you need to redo the whole shoot.
So it’s important to plan ahead and know what you need as precisely as possible. It’s also important not to forget any of the important steps in the actual shoot.
In terms of gear, you will need a tripod and a trigger (wired or remote, it doesn’t matter, although with a Canon camera like mine, you might want to favor a wired one as the remote is on 2 second timer, which makes it less easy to control exactly the timing of your shoot.
If you’re working inside, you need whatever lighting gear you would normally use. If you’re working outside, you don’t need anything special except maybe a reflector, and an assistant to use it on your subjects. I worked outside on one of the paved banks of the Seine in Paris. I needed a location that would look as if it had been the same in the 1930s.
The most important thing to remember when shooting for cloned shots is that all the components of the exposure need to be exactly the same: shutter speed, aperture, ISO sensitivity, focus, exposure compensation (if any), and of course lighting.
When shooting outdoors this can be complicated to factor in at dawn or dusk (as the amount of light varies greatly) or on partially cloudy days. Be sure to keep it in mind.
Your shoot should go something like this
1. Frame your shot the way you want it, with the subject in it at one of the locations where you’ll need him for the final composition.
2. Do a test shot to determine your best exposure.
3. Set everything to manual (including focus) and proceed to do your other shots.
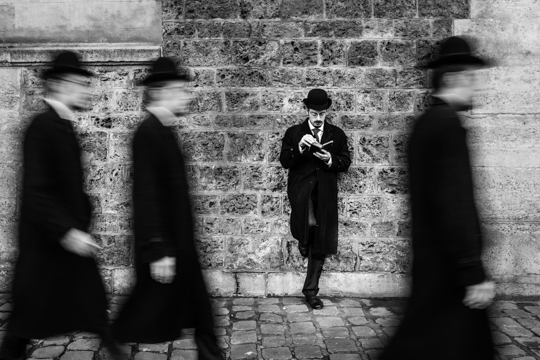
Bowler Hat Army, f/4, 1/15s, ISO 400, processed in Photoshop and Lightroom with the XEQUALS Bundle.
The hardest part about composition of a cloned shot is that you only see one version of your subject at a time. Ideally you should think up your composition ahead of time and maybe even sketch it on paper. You should take multiple shots with small variations so that you have various shots to choose from in your final assembly of the shot.
In the example above (Bowler Hat Army), I had originally planned to have the version of Achille (my model) leaning back on the wall and one moving version of him on the left to balance the composition. But I shot a number of moving ones, not knowing exactly which one I would use. In post-processing I realized I could use more than one and that the effect was great.
Post-Processing
I am going to teach you how to post-process a cloned shot in Photoshop. I should stress that I’m no photoshop expert (that’s an understatement) and I still found this to be really easy. For your first attempts, start with a simple cloning with the same subject appearing twice, and ensure there’s no overlap between the two clones.
These can be dealt with, but it’s trickier (see below). I’ll show you how I processed the original shot I had in mind for the bowler hatted clones.
First you need to determine which one is your background picture. Not that it matters a lot, any of them can be the background, but maybe it’s easier if one of them (that more naturally feels like background) should be used.
In my case I decided it would be the one with Achille leaning on the wall. The layer above is one of the shots of Achille walking.
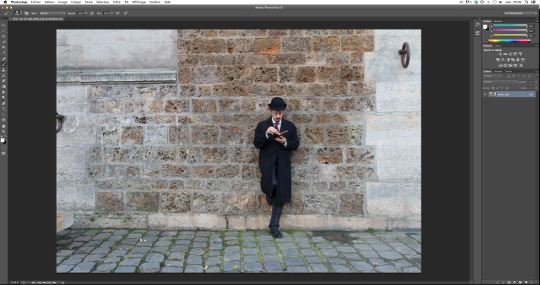
Background
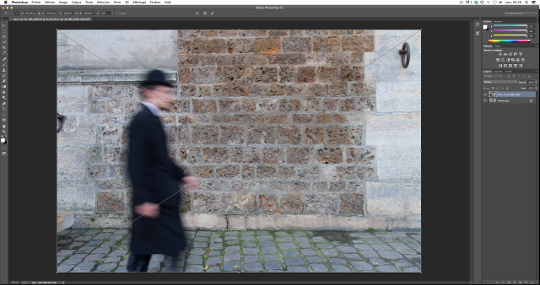
Walking Achille Foreground
Here’s a quick step by step
1. Open your background (File / Open) in Photoshop. In the layer window on the right, it’ll show (conveniently) as ‘background’.
2. Instead of opening the second (and subsequent) shots, you need to Import it (File / Import). This has two important consequences: the second photo is perfectly aligned with the first, and it appears as a layer on top of the background layer. Don’t forget to press enter after you’ve done this so that you accept the layering.
3. Unlock your background layer. Just double-click on the layer in the right-hand window. A window will appear that asks whether you want it as a new layer. Just click OK and you’re good. Where it previously said ‘background’ in the right hand window, it now says ‘layer 0’ (or whatever else you decided no name it).
4. Add a fusion mask to your top layer. To do this, select the top layer in the right hand window, and click on the icon at the bottom of the window that looks like a white rectangle with a black circle in the center.
5. Select the paintbrush tool. From now on, whenever you paint in black you erase the top layer to reveal the background layer. Whenever your paint in white you refill the top layer, hiding the background layer. If you have no overlap between your subjects, it’s very easy to reveal your clone!
6. Any traditional processing (Black & White editing, cropping, etc.) should be done after you’re happy with the cloned shot.
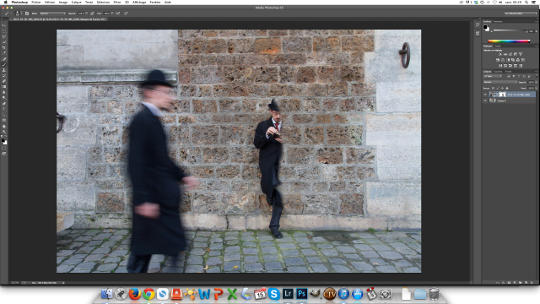
Partially Revealed Background Clone
A few more tips for you
I cannot stress enough the need for everything in each successive shoot to be absolutely identical, except the cloned subject, of course. Even a microscopic movement of your tripod can ruin your cloned shot, so be careful.
When cloning more than two ‘subjects’, and/or when the clones overlap, you need to think about what should be at the front. For the ‘Three Monkeys’ shot of Guillaume below I cheated: I didn’t think the clones overlapped when I shot it, but they did.
As a consequence, I had to decide which one to pull artificially “in front” and be consistent when cloning so that he was always “in front”.
If you have directional shadows in your shoot, you need to be careful that the shadows (or absence thereof) don’t look too bizarre once you clone: if clone A casts a shadow to his right, where clone B stands, then clone B will not cast a shadow in that place, and when you reveal clone B the bits of background behind him will be clear of shadows.
You need to decide whether to keep the shadows or not, and do some careful painting around the clones either way.
It’s a really fun and easy technique, and I encourage you to experiment with it. Here are a couple more cloning example shots from the same session as the ones above.
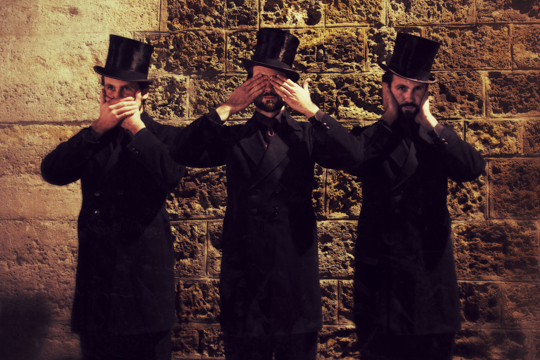
Three Monkeys in Top Hats, f/8, 1,3s, ISO 1000, processed in Photoshop, Lightroom and Snapseed
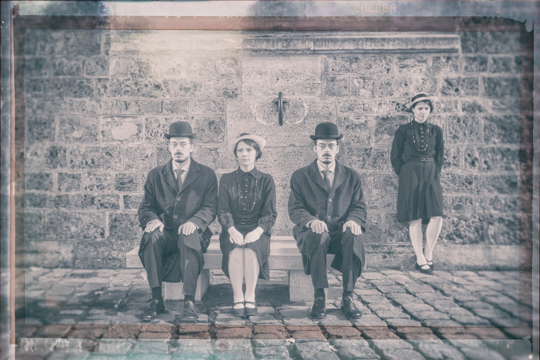
Good Company, f/5.6, 1s, ISO 1000, processed in Photoshop, Lightroom and Analog Efex Pro
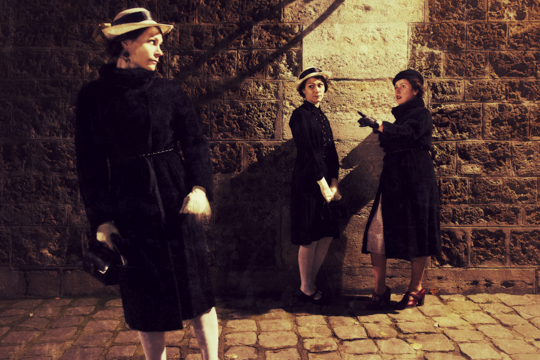
Isn’t that you?, f/8, 1,3s, ISO 1000, processed in Photoshop, Lightroom and Snapseed


