Previously in Part 1 and Part 2, we created a composite image utilizing Smart Objects and layer masking in Photoshop. From those previous two articles, you are armed with the required tools to create dynamic images easily in Photoshop without having to lose the versatility of Raw. Today we will finish the images created, covering the application of smart filters and rendering the Smart Objects as raster layers, preparing the image for output.
So, go ahead and open up one of the images you had been working on in the previous chapters. I am going to bring back my color image made from blending three color film presets together.
So often in Photoshop you find the need for a Photoshop filter or Plug-In, but when dealing with Smart Objects in your image, your options are limited. With my image open I am going to click on the Filter menu to see what my options are.
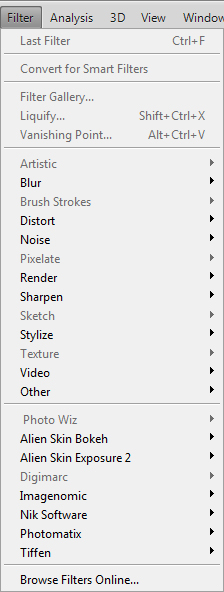
Any filter or plug-in that is grayed out is not available for use on a Smart Object layer. Any filter or plug-in not grayed out can be readily used as a Smart Filter. Now here is where it gets cool, Smart Filters function much like Smart Objects, you can go back and edit and redo the filters settings at anytime while it is a Smart Filter.
However, it must be noted that a Smart Filter can only be applied to one layer, not to the entire image. This can be a letdown, but can be utilized creatively as well!
Also, some plug-ins will report that their effect can be applied, only to let you down once you click OK.
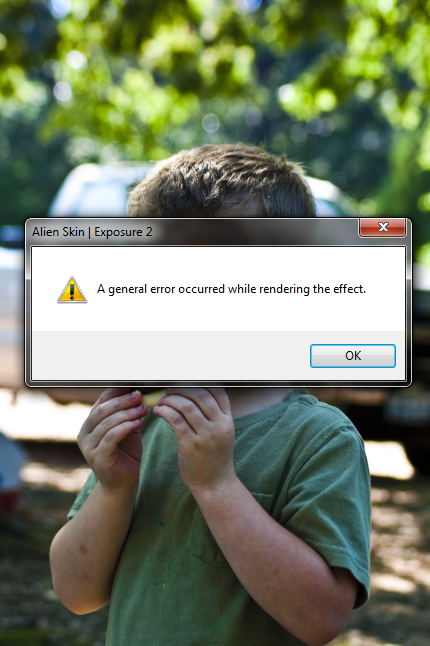
When this occurs, you will have to wait until later to use that filter, until after the Smart Objects are converted to raster layers.
I am going to apply Gaussian Blur to my image to demonstrate Smart Filters.
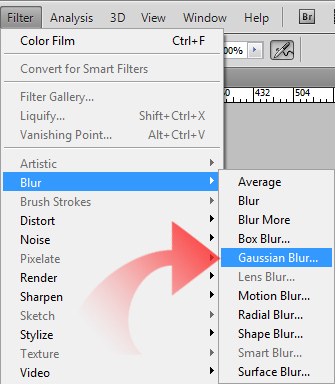
I select Filter, and the Blur followed up by a click on Gaussian Blur.
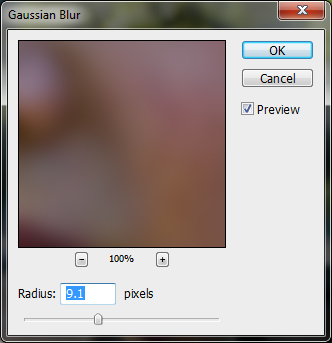
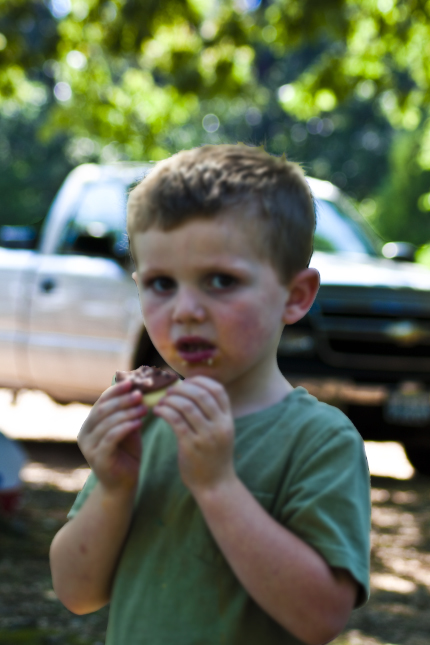
I am applying a heavy blur, making my image appear out of focus.
Now, by taking a look at the Layers Palette, you can see how the Smart Filter is applied.
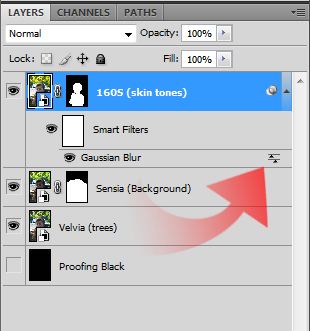
The Smart Filter control icon is depicted by the arrow in the image above. A simple double click on that icon will re-open the filter’s control dialog, allowing you to make alterations at any time.
However, I have no need to use any filters on this image, so I am going to delete the Smart Filter. To do this, simply select the Smart Filter in the Layers Pallet, and right-click {ctrl-click} to bring up the contextual menu for the Filter Layer.
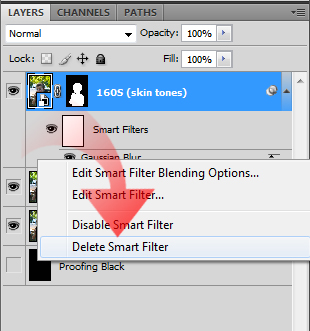
From this menu, I will select Delete Smart Filter. One click and it is gone.
Now that we have discussed the basics of Smart Filters, we have pretty much exhausted the need for Raw format compatibility in this image. It is time to prepare the final image, and time to apply any non-smart filters needed.
To convert layers to raster layers, all you must do is select the layer you wish to convert. After the layer is selected, simply right-click {ctrl-click} to bring up the contextual menu. From here, simply select Rasterize Layer to convert the image from a Smart Object into a standard Photoshop layer.
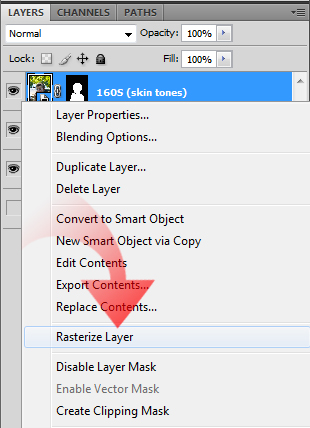
Now the layer will be receptive to traditional filters.
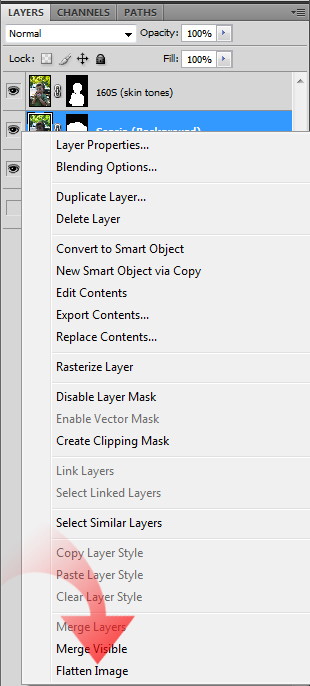
This process can be repeated for every layer in the image, if it is important to maintain layer masking in the image. If not, you can always select Flatten Image from the menu in any of the layers to bring everything into one layer.
And with that, we have just covered the basics of using Smart Objects in Photoshop.
Using Smart Objects really opens up the capabilities of Photoshop by adding in Raw compatibility. Using this basic framework, you can easily expand out from this process and enhance your images non-destructively, accomplishing much of what Photoshop can offer you in its editing prowess.


