Previously I introduced X-Equals readers to Smart Objects in Photoshop as a method by which you can maintain the capabilities and quality of RAW, but still utilize many of the stellar features of Photoshop. In this series I am going to outline my RAW workflow within Photoshop, leveraging Smart Objects and Adobe Camera Raw to maintain RAW images while performing tasks upon the images that cannot be done in Lightroom or ACR.
Here in Part 1, I am going to cover blending multiple renditions of an image, of varying exposures created in Lightroom, into one image with excellent range. Since this exercise is primarily focusing on exposure, I will be working with monochrome images. In part two and three of this series we will work with color images, but monochrome makes it easier to focus on the basics.
This exercise will effectively simulate dodging and burning the image in Photoshop without using any of the traditional techniques provided. The goal is to maintain a RAW workflow as far into the image processing as possible, allowing you to make subtle exposure changes on the fly in ACR to individual Smart Objects. We will be operating on an array of smart objects derived from the same raw file. I know the same general effect can be created in Photoshop without utilizing Smart Objects and their inherent system overhead.
This workflow is designed to keep you image as close to the original RAW file as possible for as long as possible, keeping all the tools you utilize in Lightroom at your disposal.
This is by no means the quickest method to utilize, but this workflow combines raw abilities and image quality with Photoshop’s image mastering prowess. You do no damage to your pixels in this workflow, whereas Photoshop usually take quite a few liberties with your image. This workflow just gives you more control.
So, starting in Lightroom, go ahead and select an image that you are going to give the Photoshop Raw treatment.
The first step is to take convert the image to Black and White. Next, you are going to correct the image for a proper exposure on the subject and do my basic image sharpening and tweaking. At this we are going to create two virtual copies {Ctrl/Cmd + ‘}.
With the first one we are going to focus on bringing out shadow detail, the other focus on highlight detail.
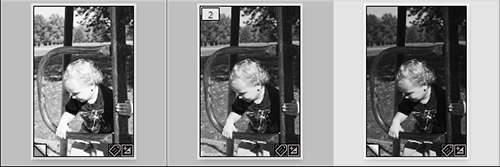
You can make as many Virtual Copies as you need to properly expose all parts of your image, I am sticking with three for article length considerations, by more virtual exposures will allow you even more depth, but will take considerably more time to do.
Also, do not get too hung up on making “perfect” exposures, the strength of this workflow is being able to utilize ACR at any time to redo your RAW processing. Once your set of exposures is complete you are ready to bring them into Photoshop as Smart Objects.
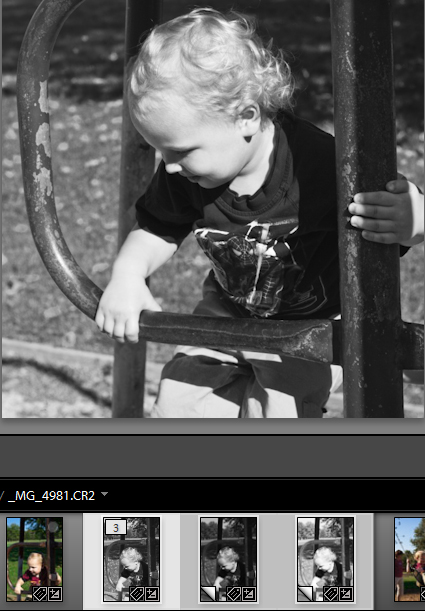
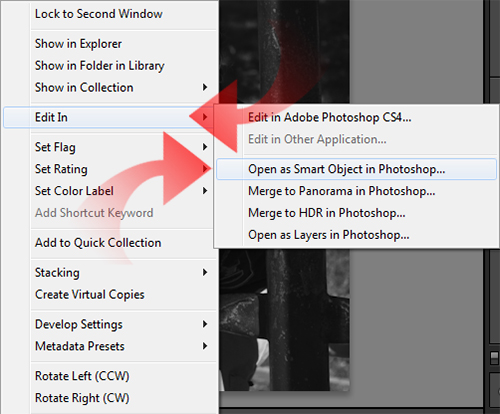
Now I will select all three of my processed iterations of my image in the filmstrip together. Right-click {cmd+click} the selected photos to bring up the contextual menu, and select Edit In and then proceed to click on the Open as Smart Object in Photoshop…
Now Lightroom hands off the images to Photoshop, which opens each Smart Object in their own image.
This next part is a pain; you have to pull all the smart objects into one image inside Photoshop. There is surely an automated method by which to do this, but I have not uncovered it of yet.
First you tear down one of the images from Photoshop’s tab bar,
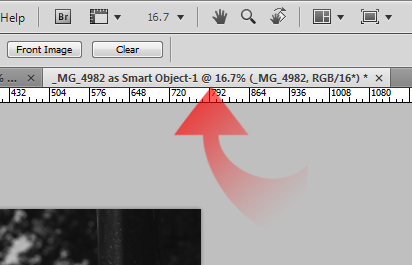
by clicking and holding on the images tab and pulling it off the tab.
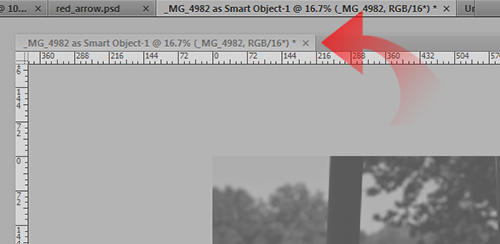
This places that single image inside its own child window.
Now, with that image on top of the other two, click and hold the Smart Object shown in the Layers palette.
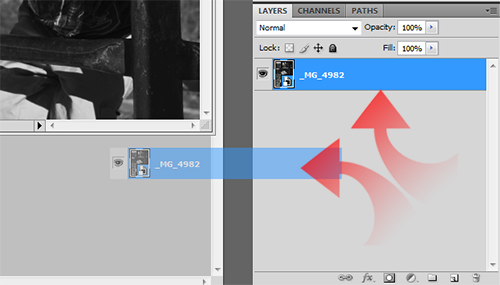
Now simply drag that Smart Object to the image that is present behind the current child window. Close the child window to get it out of your way.
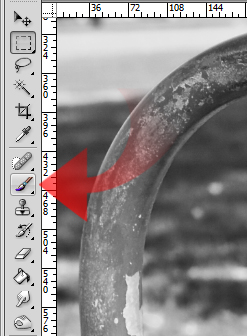
Now you have to line up the Smart Object you just dropped into the other image. When you transfer it, it kind of drops where it may, you need it perfectly aligned. You need to enable Snap from the View menu {or use Shift + Ctrl/Cmd + ;}, then select the Move tool {V} from the toolbox.
Click on the Smart object you just dropped in and move it until it snaps into the image canvas.
Repeat this process for the other Smart Object in the remaining image. Just do not close that last child window; we may need to add another Smart Object layer later so it is handy to keep one around just in case.
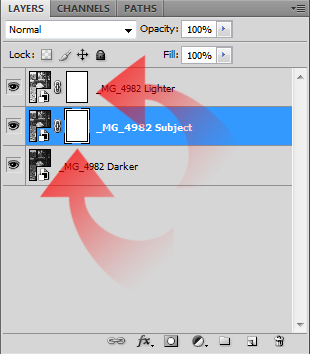
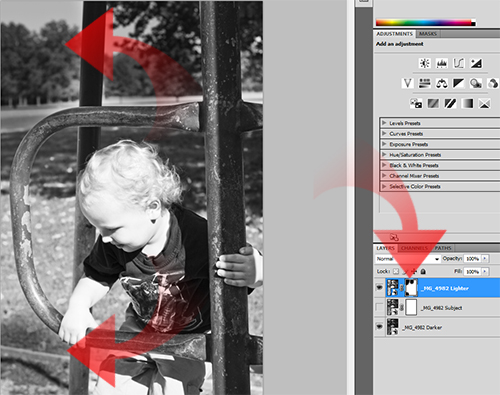
Once all three Smart objects are layered together, arrange the layers in the Layers palette as you see fit. I generally prefer to order my layers from the Lightest on the top, to the darkest on the bottom, with my subject layer in the middle. Do what works best for you; it may take some experimenting to get it down to what best suits your taste. You may also want to take the time to rename the layers if you like to be organized.
Now that everything is lined up, we need to add in layer masks. Select the top layer in the Layer palette, and then select the Add Layer Mask icon at the bottom of the Layer palette.
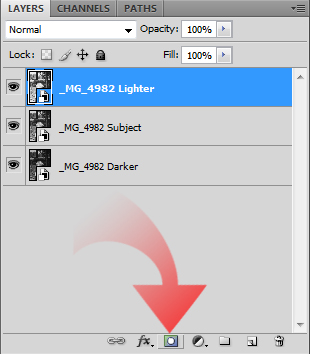
This creates a layer mask on the top layer. Repeat this for the second layer and any other layers you may have, except for the bottom layer.
Now, with all the Smart Objects and layer masks in place, the Photoshop image is ready to be further edited upon. At this stage, you may want to save the file. I recommend you to select Save As…{Shift + Ctrl/Cmd + S}. When saving, make sure to save as a Photoshop PSD file.
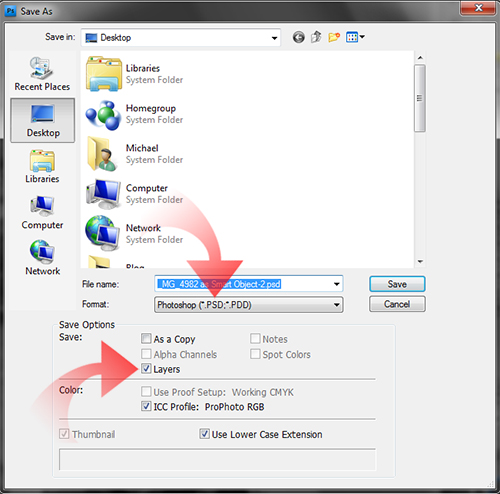
Make sure you check off the Layers option in the save dialog, to keep everything nicely saved together. The save takes a while and eats up a lot of disk space, but it keeps your layers safe and links to the images RAW data intact. If you are working on a large, complicated file, you will want to save.
Now that all the preliminary setup is complete, let us start digging into the real editing of the image.
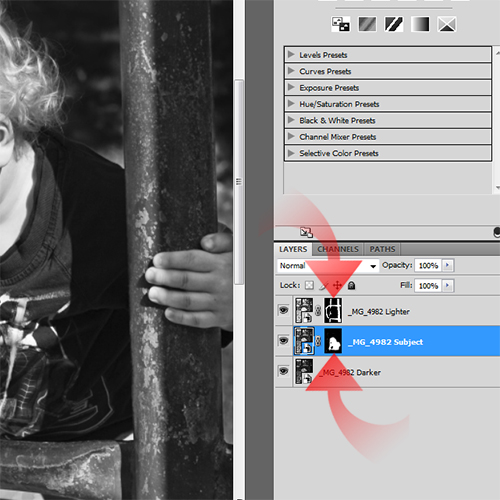
Since I layered my Smart Objects from lightest to darkest, we are going to start our masking out on the light layer.

In the Layers palette, click on the mask next to the top layer and then select your Brush tool {B} from the toolbox.
You can use whatever masking selector you want, but I have a preference for a brush since it feathers out a bit. Make sure your active color in the color palette is black which punches through the current layer, exposing the layer beneath. If you need to undo a masking selection, just switch the color to white and paint over your erroneous selection.
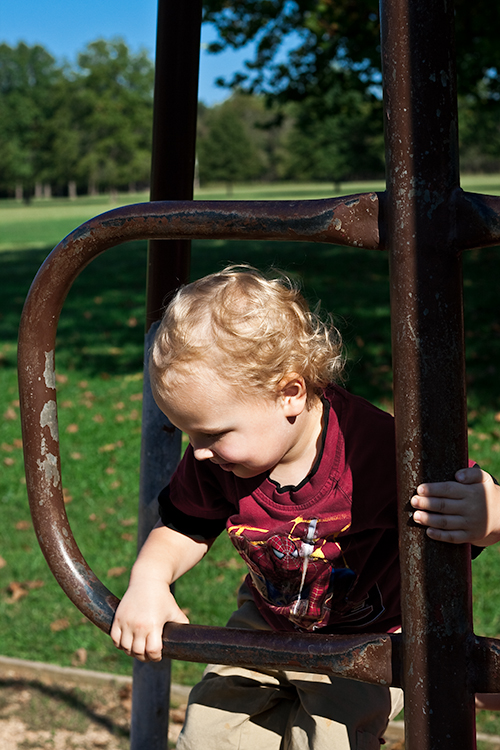
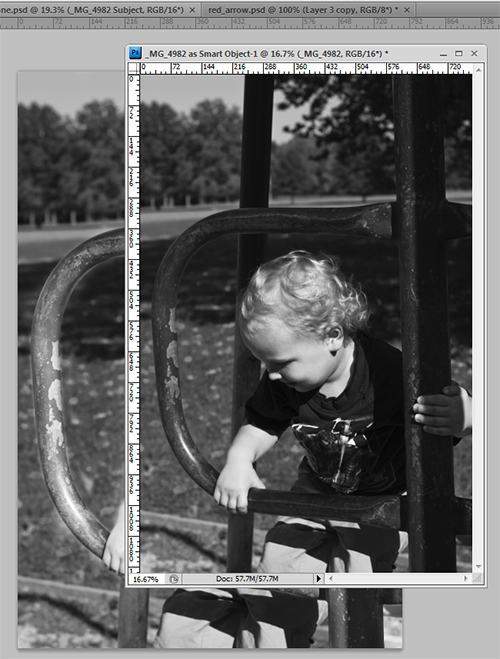
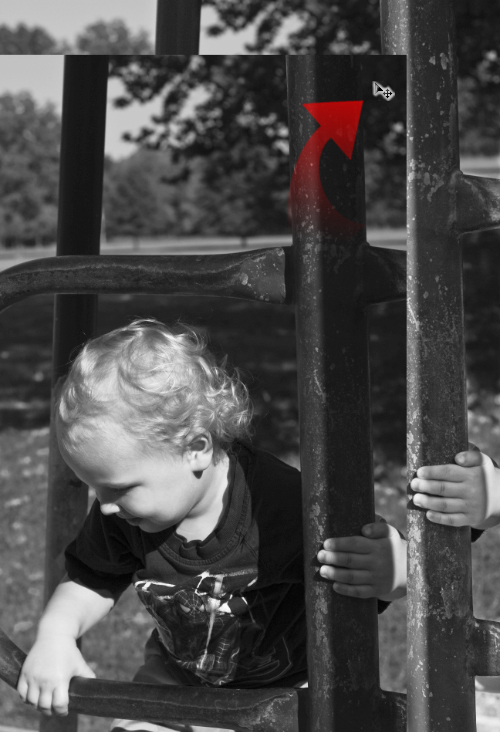
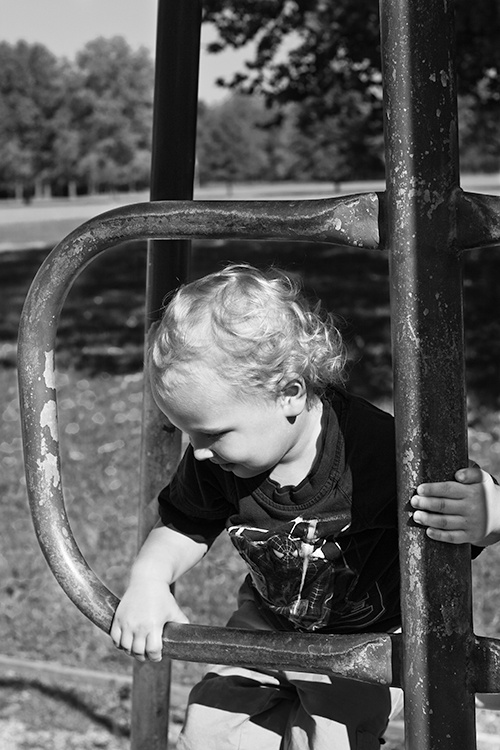
In my image, the toy my son is climbing on is the part of the image I want the lightest exposure on. So I am going to mask off the rest of the image, both my son and the background. All that should be left showing of the top layer is what you want to be very light, which is the toy in my image, to keep it from being virtually black and to bring out the texture of the peeling paint.
Remember to zoom in to do fine detail work, otherwise you could end up creating a halo effect on lines of high contrast.
After you have masked out the first layer, simply click on the mask on the second layer to start bringing out the darker layer. Remember here that you will only see the back layer in the final image where both prior layers are masked out. In my example, I am going to mask out the rest of the background, bringing a darker exposure to the back ground.
Again, pay attention to fine edges, undo mistakes with a white brush and feel free to jump back to the other mask if you see you missed an area.
If you can’t tell, I am really skimming over layer masks here as it is pretty basic Photoshop. If you have not dealt with layer masks before, just follow what I have done and you will figure it out with ease. Masks are not a hard tool to use, in fact they are insanely easy, but you will spend years mastering their use, I’m still trying to.
Now that all the layer masking is complete, the image is done. Sort of. I am really not happy with how dark the background is. If this was a normal Photoshop file, I would be utilizing a multitude of tools to brighten that portion of the image, consuming much time. However, since we are using Smart Objects and layer masks delineate what is visible there is a better option for such a simple adjustment. Adobe Camera Raw.
So to fix the bottom layer in ACR, all we must do is double click on the Smart Object icon showing in the Layer palette.
ACR is automatically launched, and the controls are oh so familiar to a Lightroom user.
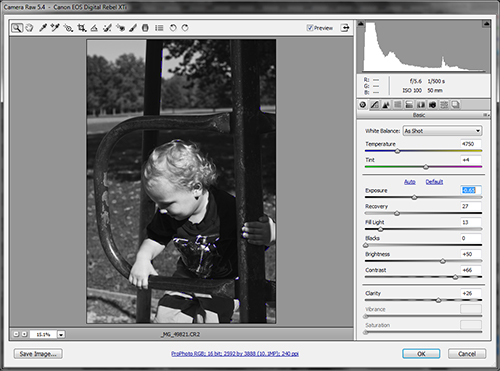
To make my fixes, I am going to bump up the Exposure a shade and kick the white balance Temperature up a bit towards the yellow zone. Notice that the image you view in ACR is not of your layered masked image, but of the original RAW file.
Once you click OK the RAW file is interpreted and the image in Photoshop is updated. And only the parts of the layer that have been masked to be visible will show the alteration.
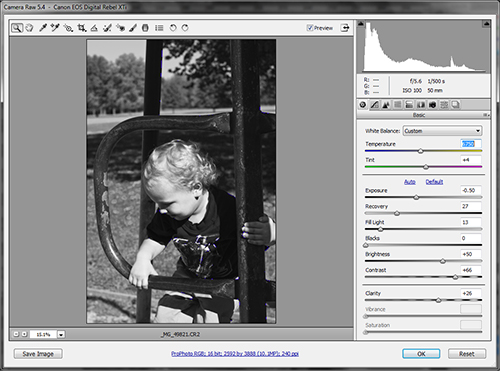
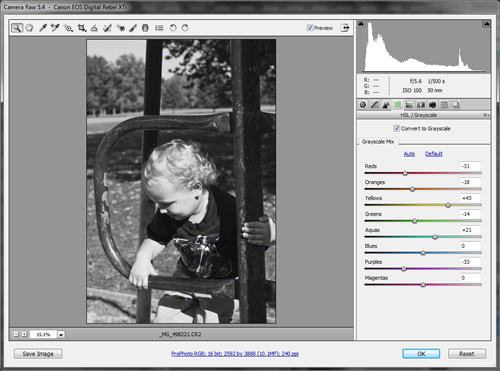
Now, I am not happy with the skin tone. So again I double click, but this time on the icon for the middle layer, which controls the appearance of the skin in the image. I click over to theHSL/Grayscale tab in ACR and I’m going to drop the Orange saturation down until the brightness of the skin fades a bit and starts showing a little texture.
I click OK and it is applied.
And that is what all the work setting up in the image is for. We want quick easy fixes in ACR that would otherwise require selection and adjustments that smear and distort pixels when utilizing Photoshop’s normal pixel editing tools. Smart Objects and layers used together give use those quick, on the fly adjustments. All the effort is place at the front end of this workflow, after the masking is complete a world of opportunities open up before you.
As I said earlier, today was about basic layers and masking to blend multiple renditions of a file together. It is fairly simple and straight forward and it can be argued that this can be done more easily without the added complication of Smart Objects. However, this is just the introductory piece of this series. The next time we discuss this particular workflow, we will be dealing with color, presets and local adjustments in ACR. This brings a slew of new options to the table, and it cannot be done as easily otherwise.
So in preparation for the next article in this series, think about preset you utilize in Lightroom. You will need them for the next session, but you will need to convert your Lightroom Presets to Adobe Camera Raw presets. To do so, please refer to Presets and Adobe Camera Raw – A Match Made in Heaven, where we cover the process of migrating Lightroom presets to ACR.
Next, let’s move on to Part 2.


