Snapshots in Lightroom are a little discussed feature, underappreciated and often undervalued in many a workflow. Most often, Snapshots are overlooked in favor of Virtual Copies, but in certain situations Snapshots can be useful.
A Snapshot in Lightroom is like a picture of an images development settings. You can process an image, create a Snapshot and then revert back to the image as it was upon import. Then you can proceed to reprocess the image and save your new version. Many photographers and their respective workflows do without Snapshots, utilizing Virtual Copies instead.
In general, Virtual copies are more versatile and as they create a second version of an image in your catalog, are generally more visually appealing.
Virtual Copies are treated much like separate images in Lightroom, containing its own develop settings, referring only to the original RAW file for its content. This is an advantage as you can have your original version and the virtual copy both active, to compare and alter side by side.
The downside is, you can clutter up a catalog rather quickly if you need to produce multiple versions of the same image. This is where Snapshots improve upon Virtual Copies, you can have multiple image revisions inside the metadata of a single image and spawn Virtual Copies of said revisions as needed.
I am going to briefly cover the process of creating and using Snapshots in Lightroom and afterwards present a few situations I regularly utilize Snapshots in.
Making a Snapshot is a simple matter. Once you have an image process to a state where you wish to save your develop settings, look to your left pane in the Develop Module. Look between the Presets and History tabs and you will discover the Snapshots tab.
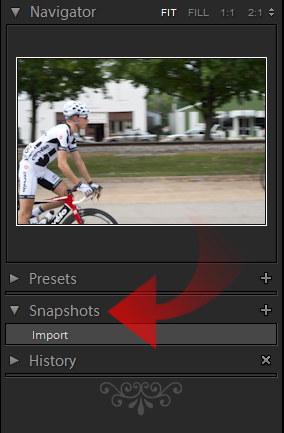
Normally you will find a single shortcut already populated in the list entitled Import. This snapshot is created automatically by Lightroom upon import with no edits (or your develop preset applied on import). To create a Snapshot, simply click the plus icon on the right side of the Snapshots tab.
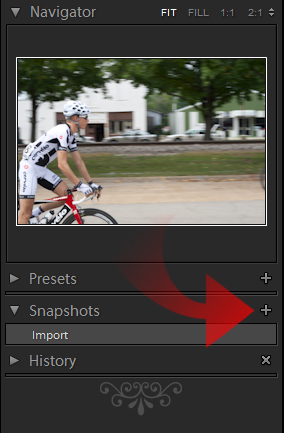
The keyboard short cut to create a Snapshot is Cmd+N on Mac and Ctrl+N on Windows. Once you click the plus icon or invoke the keyboard shortcut, you will be prompted to name your new shortcut. Click Create and your Snapshot of current develop settings is saved.
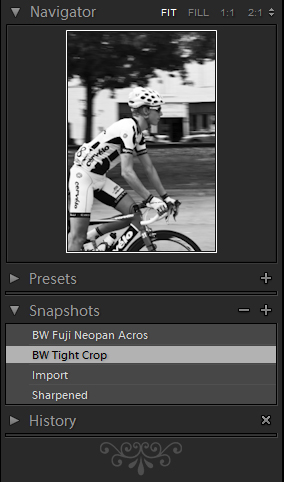
Now to revert to your original image, click on the Import Snapshot. Now you are back to a virtual clean slate, and you can develop the image again and save another Snapshot. You can add as many Snapshots as you desire.
Now to cover the situations in which I utilize Snapshots on a regular basis.
Weddings and Other Large Events
As a wedding photographer, I find Snapshots incredibly valuable for my workflow. I can process my images in a color and monochrome version and then produce my most common print crops for each. So for any given image I may have a 5×7, 8×10 and 4×6 crop saved as a Snapshot for both the color and Black and White versions.
I find Snapshots superior to Virtual Copies in this situation as it reduces clutter in my thumbnail filmstrip and has all my needed versions of the image in one nicely organized menu.
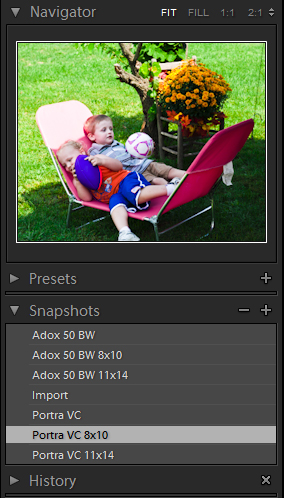
Another upside in this situation is that I have all of the versions saved in case a copy or reprint of the image is requested. No need to recreate the original editing and export a new copy, just select the Snapshot and export. This also is handy for other large events with a large number of images. If there is a need for extensive editing on any given image, you can always create a Virtual Copy. There I no need for a copy for each revision.
They key advantage of Snapshots here is Organization.
Post Processing for Clients
Another job I frequently perform is post processing for other photographers. With Lightroom I am times faster than others who rely on the old Bridge/ACR paradigm. Try as I will, I cannot get some of the local photographers to change their ways. So they solicit me for assistance in editing their photos, and often request multiple revisions of particular files implementing different effects from my film presets.
In this situation I import their RAW files into Lightroom and convert them to DNG if they are not already. I process the images as requested and save each revision as a Snapshot. These Snapshots are saved directly inside the DNG file (or in sidecar files if working with native RAW images). After I process all their images, I can deliver them the edited DNG files with the Snapshots built in.
Back on their end, all they have to do is open the DNG file and they will discover that all my Snapshots are present in ACR in the Snapshots tab.
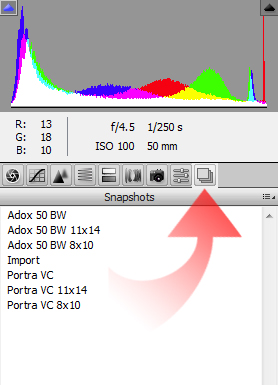
No need for multiple copies of the same RAW file to have multiple versions of the same image. So if you are collaborating with another photographer who still depends on Bridge/ACR or has drank Apple’s Kool-Aid and relies upon Aperture you can still share your work with them, Snapshots intact, if they Have Photoshop and ACR.
In this situation the advantage of Snapshots is Portability.
Extensive Processing
We have all been in this situation. You have your image in front of you and have no idea where you want to go with it. So you start adjusting the image, and you have another idea and back up the History and start adjusting again. Snapshots can come to your rescue here. When you decide you are ready to start over, make a Snapshot of your last state. As you continue to play with the image, you will always be able to look back on your previous attempts and see if you are improving or not. By creating Snapshots along the way, you are leaving a paint trail you can retrace your steps with. If you simply use the History to reset your processing, it’s like leaving a crumb trail and birds eating the crumbs…it is hard to retrace your previous steps.
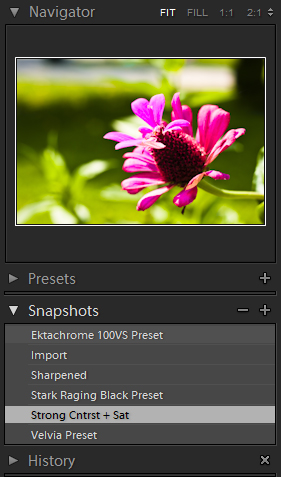
After you have ran through a couple iterations of development, you can click through the snapshots you created and see which one you like best. Then you can proceed to edit further from that point or spawn off a Virtual Copy for further editing. Snapshots give you the flexibility to jump between different development settings with ease. I often find my first attempt was the best, but I had to see my other options before I decided that. Snapshots protect the integrity of that first try without having to remember the recipe to get there.
In this situation the keyword is Flexibility.
Overall, Snapshots may not be anyone’s most used feature of Lightroom. However many people ignore its very existence, and in doing so may be hindering their workflow by over-complicating or obscuring their processes. To me the biggest feature is the ability to transfer the Snapshot generated in Lightroom into ACR. However to utilize this capability you must either enable Writing to Metadata or manually write to metadata before you burn your copies.
Hopefully this might have opened your eyes to what is capable with Snapshots. They are a nifty tool, but nowhere near as useful in most situations as Virtual Copies, but they do have their place in any Lightroom professional’s arsenal.


