Lightroom and Photoshop, along with the myriad of other photo editing tools at a photographer’s disposal, are all amazing tools. They allow us to manipulate our images in ways never before imaginable or extremely time consuming to perform. These applications allow us to take a good photo and create amazing art from it.
However, these tools can only do so much. Photoshop is not a miracle worker, Lightroom cannot rescue every over or under exposed photo you may take. Sure, you may be able to salvage an errant image, making it useful, but rarely is the image ever as good as you visualized it with the camera in your hands.
Many of us have become lackadaisical photographers; we let the camera do too much work for us. Often we feel that Photoshop or Lightroom can be our savior and that we can “fix it in post”. “Fix it in post” is one of those cliché statements that many often use, but there is a more appropriate catchphrase covering the same concept … “polishing a turd”.
Our computer tools are only capable of so much, and all they can work with is the information that they are given. There is truth to the phrase “garbage in, garbage out”, if you present Photoshop or Lightroom with an inferior image you are going to get inferior results. Sure, you can salvage images, but do you ever find an image you “rescue” to be worthy of your portfolio? Unless it is something completely unique then the answer is usually no.
Oftentimes we find ourselves focusing on the computer side of our workflow. However to get the most out of a digital workflow, including presets and actions, some though must be given to the earlier parts of the workflow. Namely, before the image is captured.
I myself have three distinct phases to my pre-processing workflow. Phase 1 is camera preparation, making sure all settings are just right to ensure quality images. Phase 2 is the shot itself, focusing on technique and best practices with the camera in hand. Phase 3 is at import time, where I make sure all of my prior efforts are being utilized.
“Fix it in post” is one of those cliché statements that many often use
Phase 1 – Camera Preparation
The primary reasoning for this phase is that your camera is ready at a moments notice. It is insanely easy to neglect to change settings before taking a picture when you are in a rush. These steps help ensure that your camera is ready when you are.
- Set your camera to RAW mode – You are using Lightroom, right? If so, you want to ensure that you are giving the program all the information it can use to render your carefully crafted images. JPEG does not afford you that luxury. If you find a need to shoot JPEG for some reason, always change it back when done. Read more here on the RAW Vs JPEG issue.
- Set your Color Space – This is vitally important is you choose to shoot JPEGS, either on a regular basis or occasionally. Most DSLRs default their image color space to sRGB. While sRGB is the most common color space, it is also the most limited. Set your color space to AdobeRGB or ProPhoto. Both allow for a wider color gamut, which gives you more wriggle room in Photoshop. Learn more on Color Spaces here.
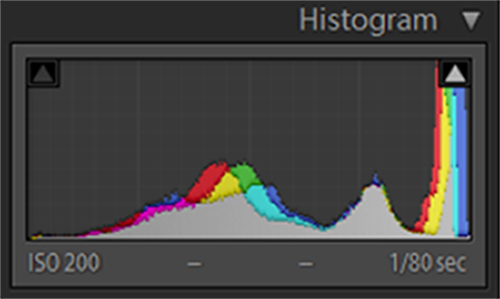
- Create a Neutral Picture Style – When you are shooting, it is vital to get an accurate representation of exactly what you are getting. Even if you are shooting RAW, your image preview is a rendered JPEG, and its look is defined by the active picture style. By adjusting your picture style, the image and histogram generated can be more in-line with how the RAW file appears when imported into Lightroom. This will allow you to check for blown highlights and clipped shadows that will be in your RAW file from the back of the camera, facilitating your ability to expose to the right. Read more on this technique in our overview of the Lightroom Histogram.
- Decide on Your Personal Defaults – By defaults I mean the settings you want your camera to be set at when you pick it up. I personally set my camera to Aperture Priority, Aperture to f/8, ISO to 100, Single Shot mode, Evaluative Metering and a +½ Exposure Compensation. Anytime I am done using my camera I change all settings back to my default and when I pick it back up I will check to ensure it is still set the same. By making this a habit, you automatically know what your camera is set to when you pick it up. Why Aperture Priority and f/8? I tend to shoot like a photojournalist, I live by the adage “f/8 and be there!”
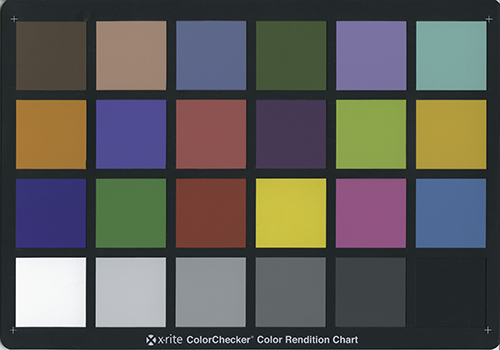
- Profile Your Camera – This is more on the Lightroom side of things, but by profiling your camera you can expect consistent, natural results. Grab a Color Checker, the DNG Profile Editor and your camera. Find nice, even light or set up under your normal studio lighting conditions and carry out the profiling process. Do this for all your DSLR’s. After you make the profile, install it in Lightroom and use it on import every time. Regardless of camera make and model, profiles will allow Lightroom to render each camera similarly, with natural color. Then, with proper exposure, all your presets will perform predictably and consistently. Learn how to profile your gear in our overview of the topic.
- Profile Your Lenses – While not as vitally important as the Camera Profile, Lens Profiles can drastically improve your images, allowing Lightroom to correct for lens characteristics such as distortion and chromatic aberration. Taking care of chromatic aberration alone is reason enough to consider adding this into your workflow. It’s a bit of work, but once all your lenses have been profiled you won’t have to worry about it again. Plus, by utilizing EXIF data, Lightroom can automatically apply the profiles on import if you desire. Sure you can use the built in profiles, if your lens made the list, but each unique lens is different and it won’t hurt to make your own custom profiles. We haven’t covered this in-depth yet, but plan to. In the mean time check out Adobe’s instructions on the process.
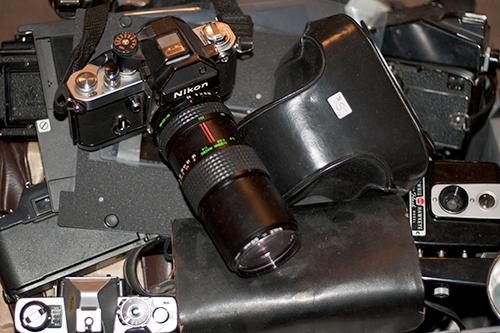
- Keep Your Gear Clean, Organized and Properly Stored – Duh. If everything is clean and ready to go, then you are ready to shoot at a moments notice. Do not store your gear as depicted below.
- Follow the rest of the above recommendations and you should find your shooting experiences more enjoyable and results more consistent.
Phase 2 – On the Shoot
So, your camera is now ready at a moment’s notice. It has been optimized to record the most data possible, give you accurate feedback and you have even told Lightroom how to handle your shots. Now, the focus is off the camera and the lens is now on you, the photographer. Is your technique giving you the best possible images that are easily digestible by Lightroom? Consider some of these techniques and see if adding them to your practices makes a difference. They did for me.
- Know Your Lighting and Subject and Prepare – By being cognizant of your lighting conditions and knowing your subject, you are able to fine tune your camera and gear to make the most of the situation. Get a feel for light; know where you high-risk areas are in your viewfinder. Look for your brightest and darkest parts of your scene and adjust accordingly. Adjust for the subject; fast moving kids need a higher shutter speed, landscapes need a tripod and slow shutter. Adjust your focusing, metering and shooting modes as needed. Be prepared and adjust accordingly.
- Pre-visualize and Compensate – Have an idea of what you are going for and try to expose the subject with that in mind. The closer you are to your final vision, the less work has to be done in Lightroom. The less extreme the adjustments later, the better the overall image will be.
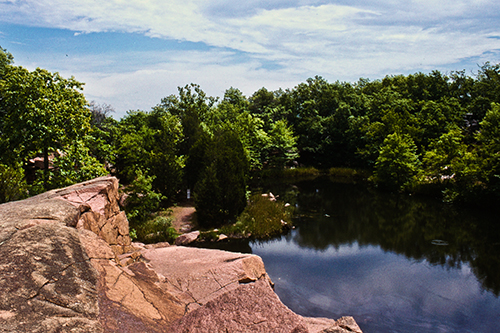
- Understand Exposure – And make sure to be as accurate as possible. Take your time when possible, pay attention to your light meter and be ready to override the recommended settings when need be. The more you think about your exposure, the more consistent it will be and will lead to less work later on. You don’t always get time to consider and some times exposures can be tricky to figure out. Fast motion will cause your exposure to err, and with digital it is best to err on the side of a slight overexposure. Tricky lighting and high contrast scenes can also create challenging exposures, but the next two tips can remedy that issue as well.
- Bracket Your Exposures – Bracketing is a time honored photographic tradition. Under-expose, proper-expose and over-expose. Hopefully one of the three will nail your desired exposure. Some cameras allow for more than three exposures, most allow you to set the EV interval between exposures. Make sure motor drive is enabled and you can snap the three in rapid succession. Almost always, one of the three will be close to your intended exposure. Added bonus, if none of the exposures nail it, you can always go the HDR route and combine the exposures to create the desired look later.
- Expose to the Right – This is another trick to help you nail tricky exposures. You may even like it enough that it becomes your default method of shooting. The concept is simple; overexpose your images to just before the point where highlights clip. This will capture all need highlights and pull in more shadow detail than a normal exposure. Lightroom can reduce exposure much better than it can increase exposure. Increasing exposure creates more noise, by overexposing you can negate the noise and save shadow detail. When you clip either highlights or shadow on your sensor, there is no getting that information back. Exposing to the right maximizes your data collection, giving you more room to work the image in Lightroom. To learn more, read our Histogram article again, it’ll put you on the right path.
- Set Your White Balance – White Balance is one of the few camera settings that will make it through to your RAW file. Lightroom respects the White Balance EXIF tag. Use this to your advantage. Take out the Gray Card and follow your camera’s procedure for setting a custom white balance. Your RAW file will be rendered more accurately in Lightroom, removing an unneeded step and allow you more wiggle room for creative White Balance manipulations later. Just remember to shoot it again if you have a major change in light!
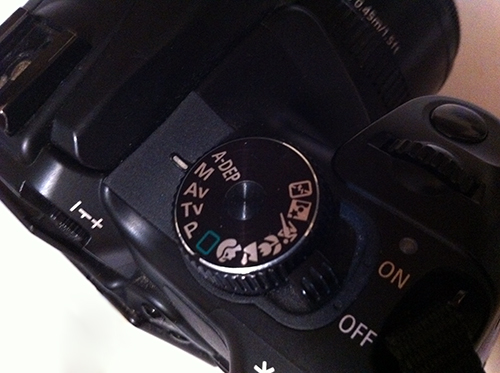
- M means Magnificent – Manual mode. Learn it, use it, love it. I know that my default settings call for me to put the camera in Aperture Priority, but that is merely to facilitate the need for last second shots. When things get serious, manual mode is where you need to be. Your camera has an onboard computer that processes a litany of data to produce its opinion of the best exposure. However, you have a better onboard computer with your brain and access to the best optical sensors on the market, your eyes. When you use manual mode, you are in total control. You don’t need the onboard computer anyways … that’s why you have Lightroom, right?
- Consider A Custom Camera Profile for Your Shoot – Yeah, you already have profiled your camera and you just set a custom White Balance. Why would you need a one time use camera profile for? Well, if a paycheck is on the line, you want the most accurate images possible and a custom profile will do just that. Shoot the color checker in the lighting you will be working under. After you upload create a new profile just for that session. Lighting and environmental conditions do have an effect on your camera’s response. Creating a custom profile for vital shoots is like buying insurance, it costs but its worth it. So break out the Color Checker (or better yet Color Checker Passport, it has a built in Gray Card) and profile. When money is on the line you will be glad you did.
- Try a Tripod – Consider using your camera accessories. I have to be the worlds worst photographer when it comes to carrying a tripod, but when the shot counts and you need a long exposure to meet your needs, you will be glad you did. You can’t fix the shakes in post. Consider a cable release or trigger remote as well, which will further reduce vibrations. And you can always enable mirror lock-up. You can’t shoot ISO 100 at f/11 and ½ second without this gear. And if you have a hand held Incident or Ambient light meter, use it too. It never hurts to second guess the meter in your camera.
- Clip Away (Within Reason) – It never hurts to clip a bit. Especially when you are learning and it is really important when you are exposing to the right. Enable the clipping warning option on your camera (the zebra stripes as some call them). This will further enable you to get vital data from clipping, not only will you know if the shot looks right, but you will know if you have lost any information. Just make sure you create a neutral picture style for your camera as I mentioned earlier, otherwise the data you see is inaccurate.
- Practice – Duh. Mastering the manual mode and exposure in general require a fair amount of practice. Not all of us grew up with manual film cameras. And some of the other techniques take practice as well. Exposing to the right is an art unto itself and learning to read light and pre-visualize your shot takes years of experience as well. You can’t learn if you don’t do, and photography requires a lot of on the job training. And keep practicing, as the old adage “if you don’t use it, you lose it” holds very true for many photographic techniques.
Phase 3 – Import and Pre-Processing
Save the easiest for last. Now that you are ready to import your carefully crafted images, you just need to make sure some Phase 1 settings are in place. Many of these hints should already be common practice.
-
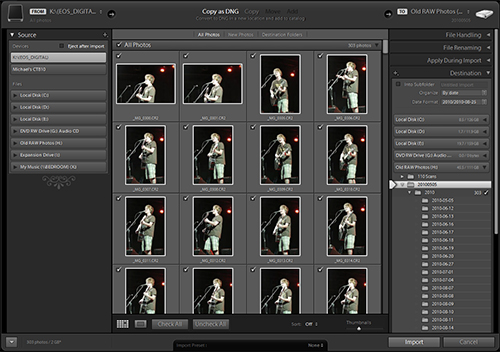
- Know the Lightroom Import Module – Why keep beating the same dead horse? Once you are familiar with the Lightroom Import Module, you will know you can create custom develop presets that can be applied on Import. Make a preset for each camera you use, saving the Camera Profile setting. Then you can apply this preset on import and be sure that all your images have the correct profile applied before you start editing. If you aren’t completely up to speed on the Import Module, we got you covered.
- Make that Develop Preset – Make sure you make that custom develop preset I just mentioned. There are ways to make sure the correct Camera Profile is applied to the correct camera, but I feel its best to take the responsibility upon myself. Jump in the Develop Module and make that preset yesterday! If you don’t know how, learn the basics here.
- Go Ahead and Make that an Import Preset – Since you have went to the trouble to make a Develop Preset that will change your Camera Profile, you may as well roll that into an Import Preset. Set up your import session as you desire, apply that Develop Preset you just made and save it all as a new Import Preset. If you don’t know how, we can help!
And with that, we are done. You should now be creating images that are tailor made for Lightroom. You either nailed your exposure, or you took advantage of Lightroom’s capabilities to ensure a proper exposure in your final image.
The harder you push an image, the more its quality degrades.
Most importantly, images created using these tips are very Lightroom friendly. Since the exposure is reasonably close to the desired goal, if not dead on, most adjustments you will commonly make do not require pushing the image too hard. The harder you push an image, the more its quality degrades. By doing as much in camera as possible, you can avoid over processing your photos, retaining as much image quality as possible.
The other benefit of accurate exposure is that most all presets will function properly and consistently. All of our presets, from the new XeL, to Cold Storage and Creative Production Presets were developed to be used on well exposed images. Using these tips you can consistently produce good exposures and setting white balance and utilizing camera profiles produces consistent color palettes, even between cameras.
When your colors and exposures are consistent, you will find your presets will work better in general and your results will be excellent and uniform from image to image in each shoot. A little extra effort with the camera in your hands can save you a lot of time sitting in front of a computer. Less time in front of the computer gives you more time to shoot. And you have to admit, the picture taking portion of the workflow is much more important than the processing portion. If you aren’t taking good pictures, all the Lightroom’s and Photoshop’s of the world are next to useless. Hopefully this got you thinking of your photographic habits and maybe you might find your technique improving by implementing some of these tips.


