When you’ve got yourself a tired subject, one thing that creeps into your shots can be those dark baggy eyes that often come from late nights at the club or too many Mimosas!
I know I don’t always have a makeup artist in tow. That being said, I have a very quick and effective technique I have used for years to remedy this issue.
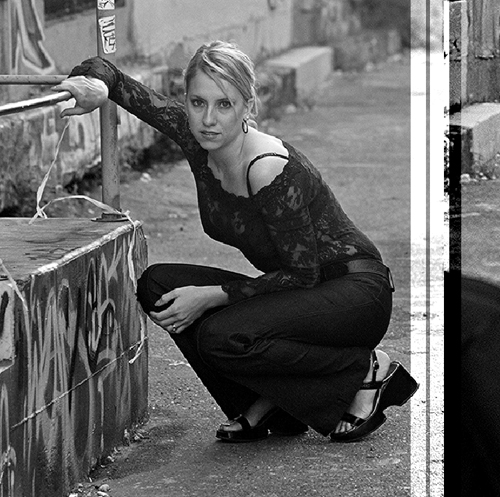
This example below is from a shoot done in minimal daylight which really accentuated the subjects eyes and skin tones. Keeping in mind this shoot purposefully had a very edgy and dark look to it, I didn’t want to polish the image too much yet I did want to fix the eyes and surrounding darkness.
This shot below is the final composited image, for use as a reference:

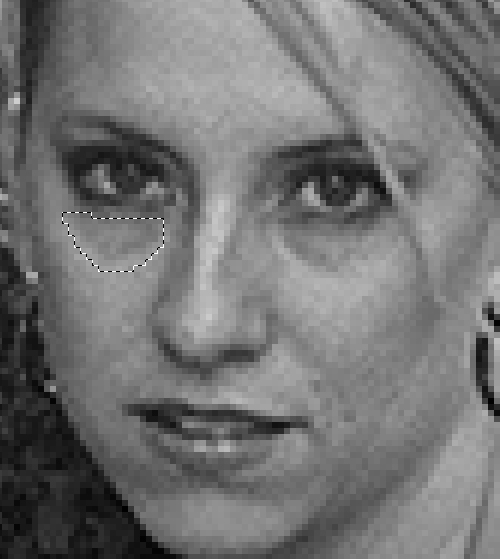
First, let’s zone in on the culprit:
Notice the deep dark circles under the eyes. I’ll zoom in and target the left eye first:

The noise present in this image can also be used to our advantage. So whether you shoot a high ISO, or naturally introduce noise into your images this technique works effectively. This is also true in the opposite sense for images with little ‘grain’ or noise in them.
Using the lasso tool with a feather radius of 2 pixels (px) in this example, lasso the area you wish to retouch. Keep in mind the feather distance is resolution dependent. In this example I am working on a 300DPI image, so 2 pixels on the feather is ample. For images higher or lower in DPI you will need to play with the distance to get the right adjustment for your particular project.

Lasso the specific area and the feather distance will also show in your selection.
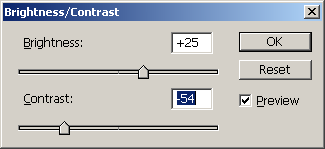
Next comes the bestpart; select the Brightness/Contrast control under Image>>Adjustments>>Brightness/Contrast. Slide the Brightness and Contrast controls to blend the dark texture(s) into the surrounding lighter tones.
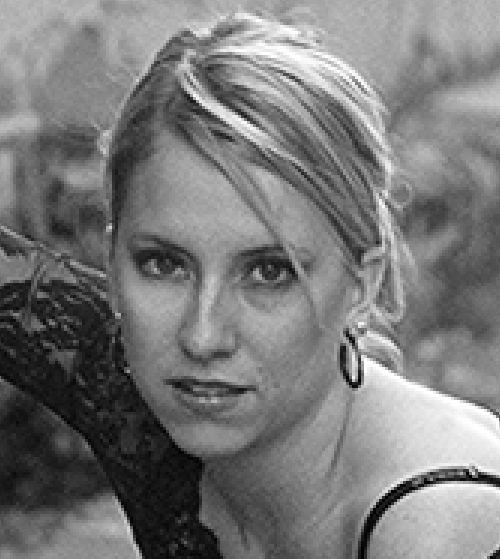
As you can see in the next image, we have not completely minimized the darkness, but that’s ok. The goal of this adjustment is to dramatically lighten and blend the area as we have done. Although, the softness of the selected area is a bit too much at this point, so let’s introduce back in the noise which will even out the overall texture of the effect so it blends much better.
We’ll do this by maintaining our selection and going to Filter>> Noise>>Add Noise

Keep in mind that just like the feather settings, the noise amount is resolution dependent. In this example I am working at 300DPI, so 7% uniform noise is ample. For images higher or lower in DPI you will need to play with the % to get the right adjustment for your particular project.
In this example I have only targeted the left eye. I rarely find I can do both eyes at the same time so repeat this cycle for the second eye.
In Lightroom, I have found I MUST bounce the image out to Photoshop to get this fine detail completed, so your workflow will include this step if you initially start your adjustments in Lightroom.
Best Wishes.


