In Lightroom, sharpening is a rather simple endeavor. While Lightroom’s built-in sharpening tool is excellent, it is a bit lacking when it comes to fine control of sharpening. Photoshop is a much better tool for doing fine sharpening, as it offers a myriad of sharpening options and the ability to use layers and masks to sharpen parts of your image selectively.
Many of the sharpening tools in Photoshop are simple affairs. The regular Sharpen filter is essentially a one-click ordeal that quickly applies a sharpening to your photo. Not much control there. Unsharp Mask proves a much finer level of control, with three options you can set to customize your sharpening even more.
However, Unsharp Mask can be finicky to use, especially if you are unaccustomed to its use, and unless you apply sharpening to a new layer, it applies the effect to the entire image.
Another option that is common to most Photoshop pros, but may be new to many photographers who developed their skills in Lightroom is High Pass Sharpening. Unlike the other sharpening methods in Photoshop, it is a multi-step process.
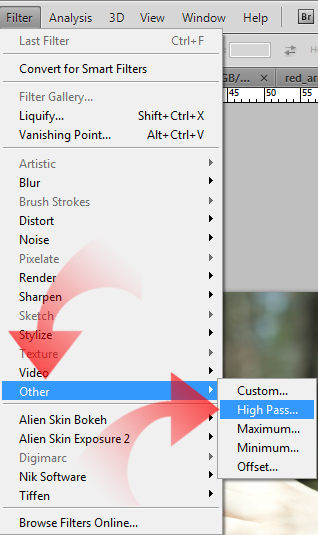
In fact there is no High Pass Sharpening filter in Photoshop at all, you are applying the High Pass filter from the Other sub-menu in the Filter menu. While High Pass sharpening is a multi-step process, it is simple and gives you an amazing level of control over an image’s sharpness.
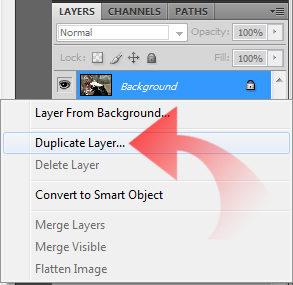
Start by duplicating your image into a new layer by highlighting the current layer and hitting Ctrl/Cmd + J. This duplicate layer will eventually become your sharpening layer.
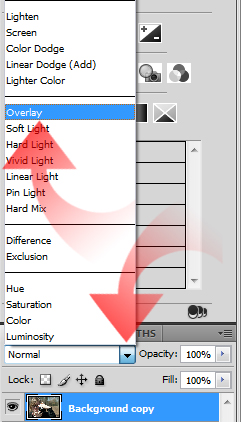
The next step is to change the new layer’s Blending Mode. For now we want to change it to Overlay.
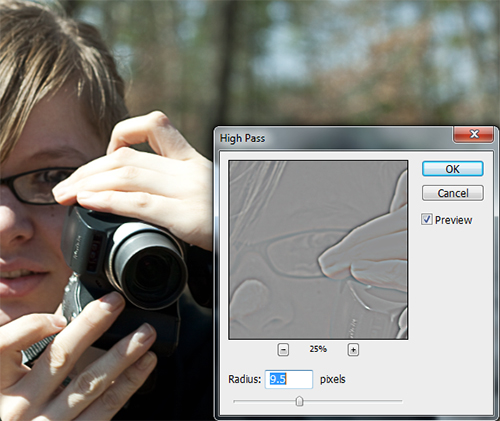
Now, the actually sharpening begins. We need to apply the High Pass filter to the new overlay layer. Apply the filter by selecting it from the Filter menu, Filter >> Other >> High Pass.
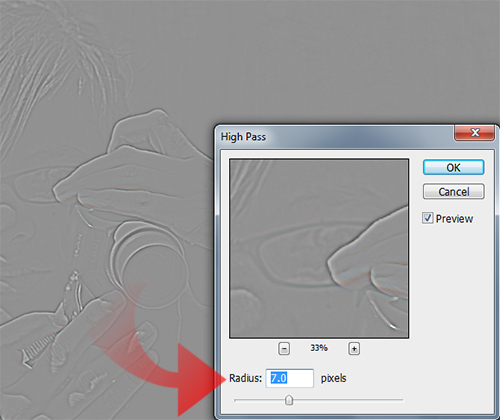
In the High Pass dialog you will find a single slider and your preview window. The slider is labeled Radius, and refers the the maximum allowable pixel range to apply the filter to. The filter essentially brings out any edges that fall within the radius threshold, while ignoring the edges that are wider than the radius threshold.
The effect will only be applied to “hard” edges, leaving the rest of the image alone.
Now, we want to increase the Radius level until the preview seems just a bit too sharp. Don’t go for perfect sharpening at this point, make sure you over sharpen a bit. Usually you will find you need a Radius between 0.5 and 10, depending on the resolution of your image. The bigger your image, the higher Radius you will need for effective sharpening.
Once you’ve got the High Pass filter adjusted to your need (remember to over-sharpen), go ahead and apply the filter to the layer.
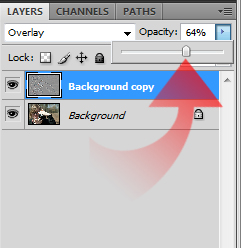
Once the filter is done, your image should now appear overly sharp. We want this. We are going to fine tune the sharpening from here. To lower the amount of sharpening applied, simply start to lower the layer’s Opacity level.
Normally a value between 40% and 70% is what you will find you need, but it can be changed to any level you desire.
But wait! There’s more!
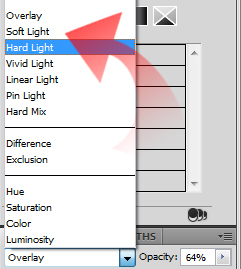
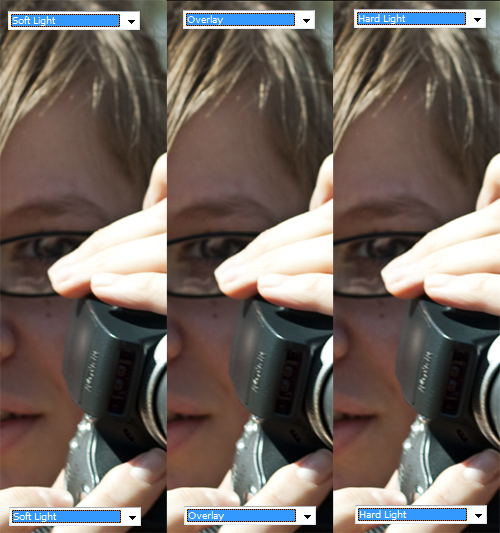
To further fine tune your sharpening effect, you can change the Blending Mode from Overlay to Hard Light or Soft Light. Changing the mode will alter the level of effect. Overlay is a nice, middle-of-the-road default to use for High Pass Sharpening.
Hard Light makes for harder, sharper edges. Soft Light, on the other hand, softens the edges while retaining the sharpening effect. Other blend modes can also create pleasing effects, but Overlay, Soft Light, and Hard Light are the best options for most sharpening applications.
The changes are subtle and hard to convey in a resized image, but be sure to try them all when applying sharpening until you know what you are looking for.
As a bonus, High Pass sharpening can also be modified to apply softening to an image. All you have to do is carry out the procedure as normal, but in the end, simply Invert (Ctrl/Cmd + I) the high pass layer. Doing this softens detail in your image just as the process normally sharpens detail.
Finally, since all sharpening is done on a semi-transparent layer over the original, untouched image, you can selectively apply sharpening. Apply a Layer Mask to your image and mask out the areas you do not want to be sharpened. High Pass sharpening makes it easy to do selective sharpening in Photoshop with just two layers.
If you’ve never ventured into the waters of High Pass sharpening in Photoshop, you now have yet another powerful tool at you disposal!
