Busy photographers require an efficient workflow to do 4 important tasks:
- Importing
- Cataloging
- Processing
- Publishing
While much has been written about the first 3, the publishing side of things is often a weak point, with many photographers choosing just to export to a folder on their hard drive and then upload to their website.
Boring!
It works, but it’s not the most efficient use of your time.
Fortunately, Lightroom is here to save you so that a lot of this is easy, fast, and repeatable.
Let’s take a look at making this a smoother process.
In this session, we’re going to make use of a combination of Lightroom’s Filters, Publish Services and Smart Collections to streamline this procedure.
To begin, we need to set up each of the 3 features.
Step 1 – Setup Your Filters.
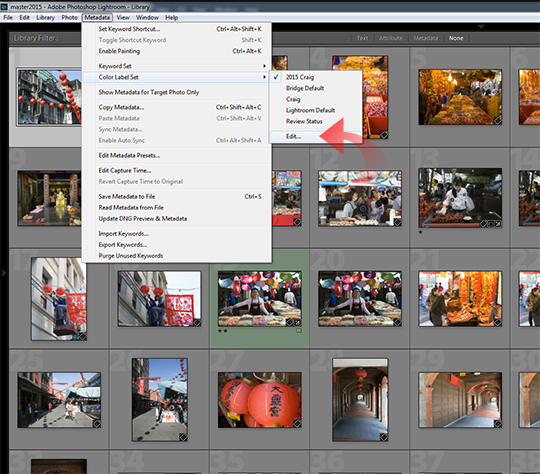
I make use of the color labels for this purpose. If you already use these in your selection or develop workflow you may instead choose to use the flags or star ratings for this. In the Library module, open the Metadata menu and move to the Color Label Set option. From the flyout menu, select Edit.
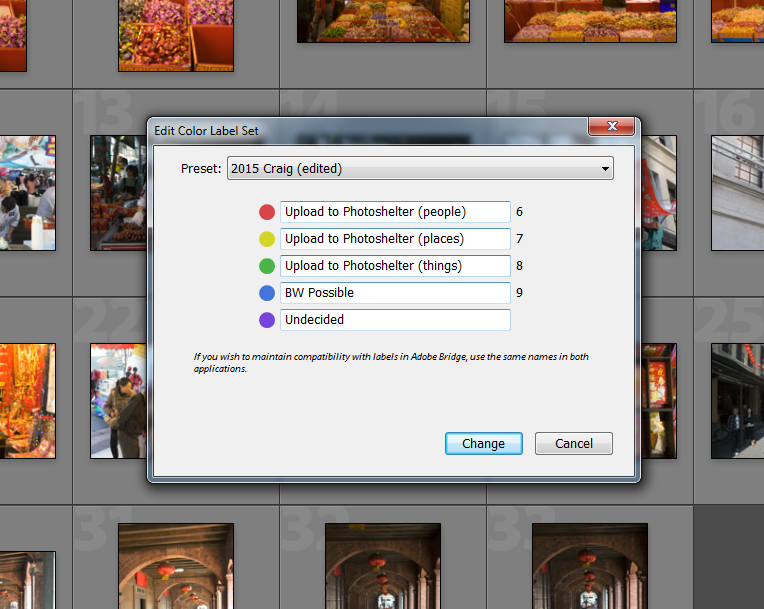
In the Edit window you have the ability to give the colors custom names. As you can see below, I’ve elected to use three colors for my uploads, one each for people, places and things.
You could use only 1, or you could use 5. It depends on how you have your website and galleries organized. I use Photoshelter for my website and so that’s reflected in my naming. I could just as easily have called it Upload to Website or something similar.
Step 2 – Setup Publish Services
The first step for that will be to download the relevant plugin from your website provider.
Photoshelter and Smugmug both provide plugins on their own sites that you can download for free.
For others, Adobe’s Add-On site has options for WordPress, Zenfolio and more. Once you’ve downloaded your desired plugin, it’s time to install it.
Installing the Plugin
Make sure Lightroom is closed, and navigate your way to Lightroom’s Modules folder, and place the plugin file inside.
This folder may be hidden by default or you may need to create it. Here’s where you can look:
- Mac OSX /Users/your-username/Library/Application Support/Adobe/Lightroom/Modules
- Windows Vista / 7 / 8: C:Usersyour-usernameAppDataRoamingAdobeLightroomModules
- Windows XP C:Documents and Usersyour-usernameApplication DataAdobeLightroomModules
Next, restart Lightroom …
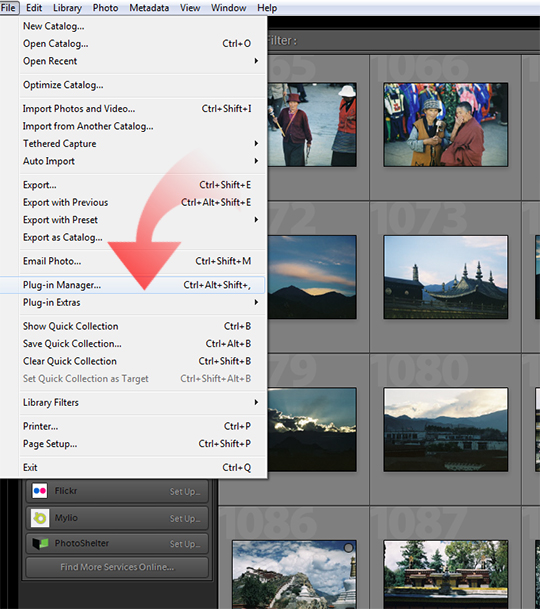
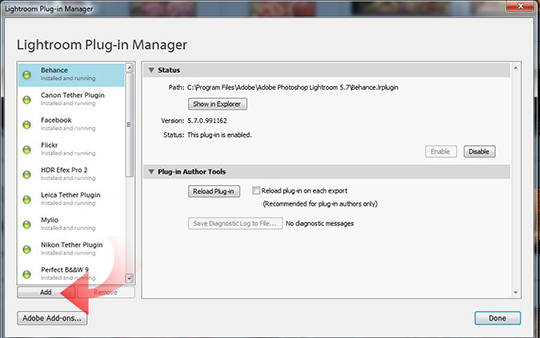
Now select File > Plugin Manager. Click on Add and browse to the location you saved the plugin and select it.
The plugin should now be installed and running.
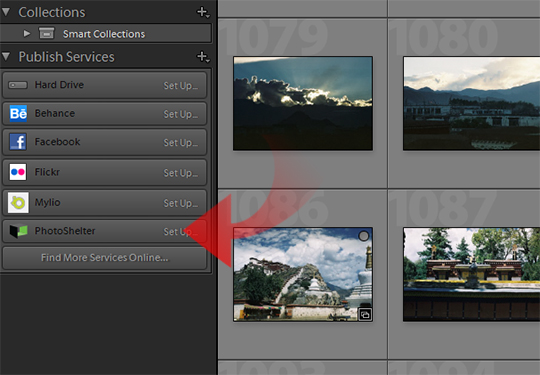
Once installed, open the Publish Services panel on the left of the screen, choose the service that you just installed. It will say Set Up, so go ahead and click on it.
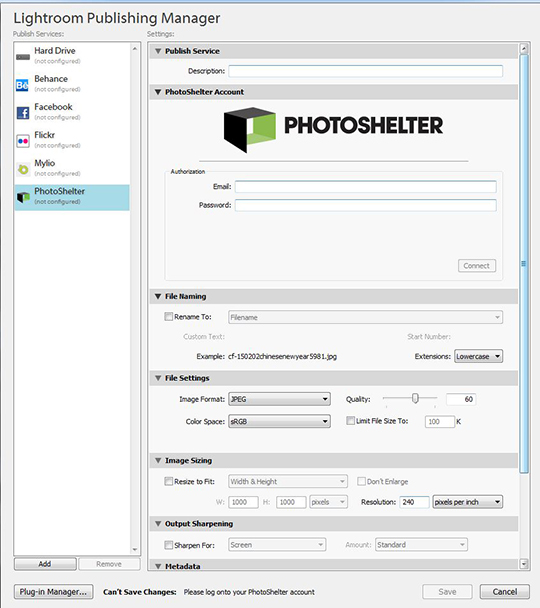
The Lightroom Publishing Manager will now open in a pop up screen. Here you can fill in your user name or email address and password for your site. Each site will look slightly different depending on what is required to log in to your account. Below that you will have the same basic functions as found in the export dialog including size, color space, renaming and so on.
Step 3 – Setup Smart Collection Rules
The final step in preparing Lightroom for this output workflow is to set up some Smart Collection rules. A previous post on Collections gave a lot of information regarding Smart Collections. Things are a little different here because we will be setting up the Smart Collection through the Publish Services panel instead of the Collections panel.
Head to your newly setup website service in the Publish Services website. For me that is Photoshelter.
Right-click on the name so that the options window opens as seen in the screenshot below.
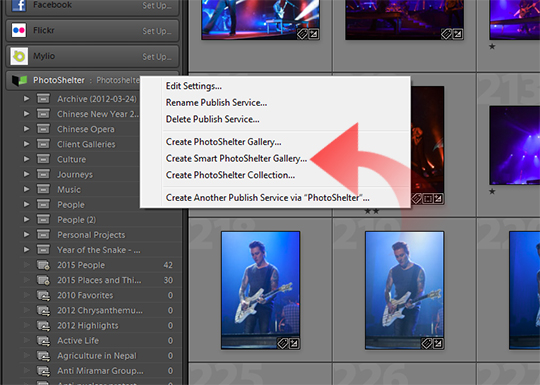
Photoshelter’s plugin calls it a Smart PhotoShelter Gallery but it behaves in the same manner as a Smart Collection, with the addition of some options that are unique to this particular Publish Service. Select this option and the Create Smart PhotoShelter Gallery window will open.
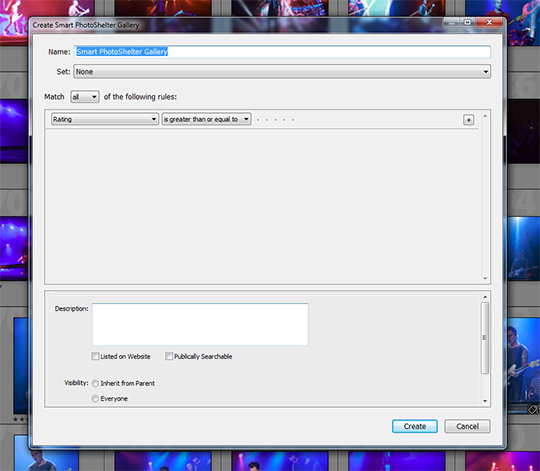
Give it a useful name that describes what the contents will be. Following the color label naming mentioned earlier is a good idea so for this first collection, call it “people photos” or something similar. From the pull down menu to set the rules, choose Label Color. We only need to set a single rule for this to work. When we set up the color labels, I designated the red label as people uploads, so in the right pull down menu set it to red.
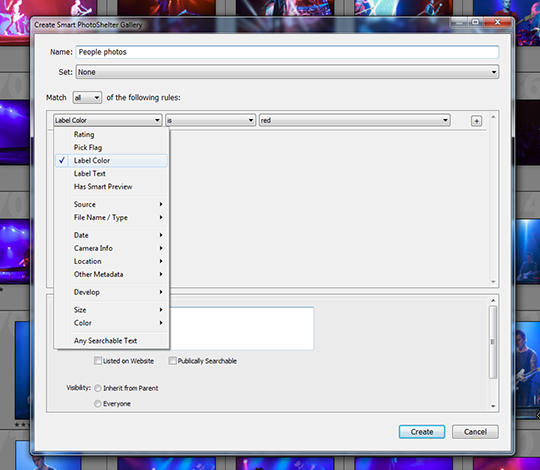
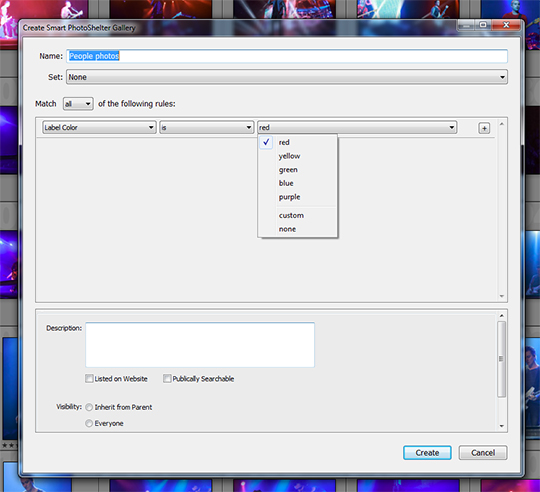
At the bottom of the window are some options specific to this particular service. We are creating a gallery that will appear on our website and so there’s the option to add a description, make it searchable, list it publicly and visibility. Your own personal preference will come into play here depending on how you choose to present your work on your own website. Click Create when you’re ready.
For this I choose to make the photographs publicly searchable and visibility open to everyone but I leave the gallery unlisted. Unless I’m specifically producing a gallery for a client and need the photos to stay private, all people shots will end up in here.
If I were to make it a publicly listed gallery, before long, my website would have galleries with hundreds or thousands of images in them, which is not a great way to present them. Instead, all of the photographs remain searchable, but I can choose the best one or two from a particular shoot to highlight in my portfolio or some other smaller gallery. This gives a better user experience on my website. Less is more.
Now if you look back into the panel under the Publish Service, you’ll see the newly created Smart Gallery. In the future, any photographs that I add the red color label to – my people designation – will automatically appear in this gallery.
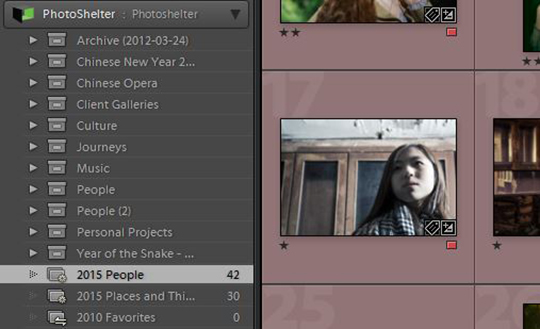
Click on it to show all the photographs you have with this specific label. They will be grouped according to their published status as can be seen in the below. At the top will be New Photos To Publish. In here you will find all photos you have designated with the label but have yet to send to your website. Below that is Modified Photos to Republish. This is one of the benefits of uploading this way.
After you have uploaded, if you make any further changes to the image such as adding extra keywords or other metadata, or adjustments to the exposure, you can republish them and the changes will be reflected in your photographs on your website. All you need to do for both new photos and modified photos is click the Publish button in the top right of the screen and your photos will be sent directly to your website. The third category is Published Photos which shows you the photographs you already have uploaded.
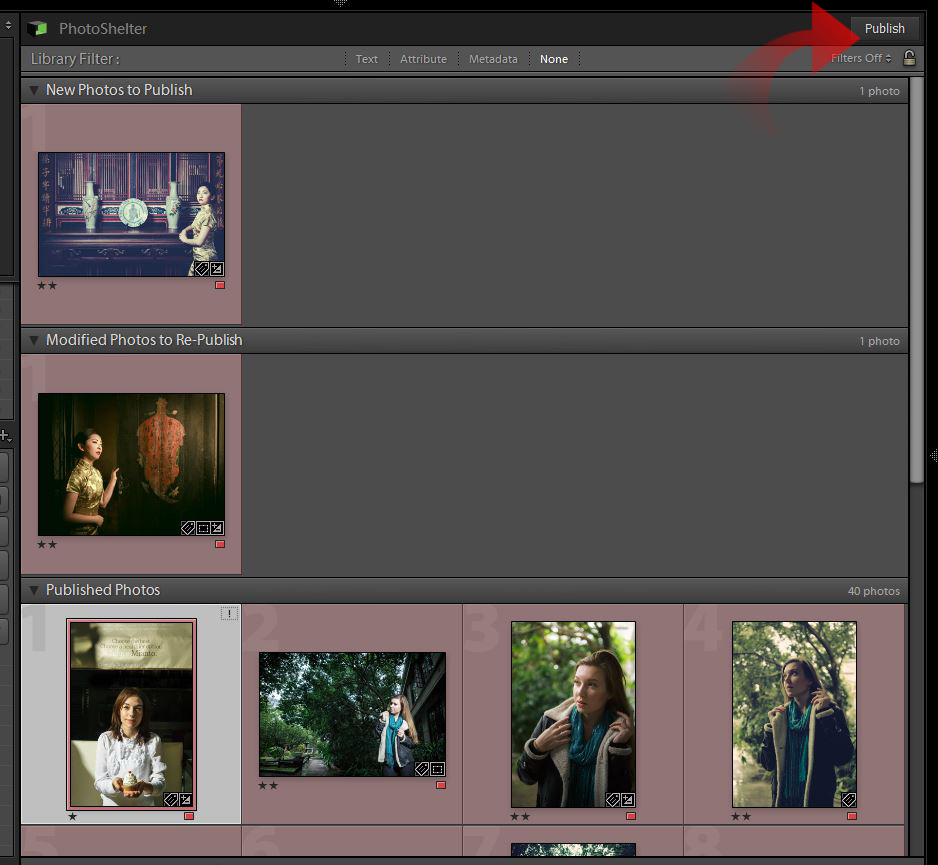
The great thing about this process is how simple it is. You only need to go through these setup steps once. After that, all you need do is assign the correct color label to your photos and click the Publish button.
At the end of the year when you may find yourself doing a review of all your work over the previous 12 months, filtering by the color labels gives you a quick way of seeing exactly which photographs you deemed good enough to push through to your website.


