Bringing photos into Lightroom without the new Import Module has never been one of my favorite tasks. Lightroom 1 and 2 both had an import interface that seemed like it was thrown in as an after thought. Personally, I never used anything but the Import from Folder option in the prior versions of Lightroom.
Never did I allow Lightroom to move my files from the card for me or do any other tasks on import. I simply did not like the interface and if I do not like it I will not use it.
With Lightroom 3 however, the days of manually copying images over in the file system before importing the folder into Lightroom were over. The new Import Module is miles ahead of its previous incarnations, providing more tools than just import images and apply basic processing. From the time I pop in my memory card until I am finally in the Library Module, I feel that the Import Module finally offers tools for my workflow that make it worth the time and effort to use.
So lets take a quick survey of the basic of the new and improved Import Module. Next time we will come back with some power user tips to help you get the most out of the time that Lightroom is bringing your new images into the Catalog.
When you first insert your memory card or start the Import process manually, you will be welcomed by one of two windows. The first possibility is the compact, Quick Import window, offering basic functionality and importing all photos on your media.
Now this tools can be handy, but we are looking for the real Import Module, with all the bells and whistles. If you see the Quick Import window, simply click as indicated below, to blow it up into the full module.
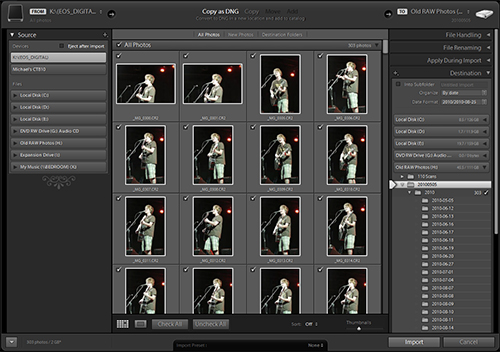
You know you are seeing the right Import Modules when it takes up most of your screen space.
Just notice the wealth of options the full Import Module offers. Lets break this window down piece by piece, seeing exactly what can be done here. First let us take a look at the top pane.
Running from left to right, the top bar lays out the basics of the import process. The import device is listed on the left, then you configure your import method to the destination location. As always, Lightroom offers a few options for your import; Copy as DNG, Copy, Move and Add. Copy as DNG copies your native RAW to your machine, converting to DNG along the way.
Copy strictly copies the RAW files as is from your device. Move simply moves the files from the input device to the destination, removing the files from the device as it goes. Add simply adds the files to the catalog from their existing location, with no file manipulations whatsoever.
The new Import Module is miles ahead of its previous incarnations
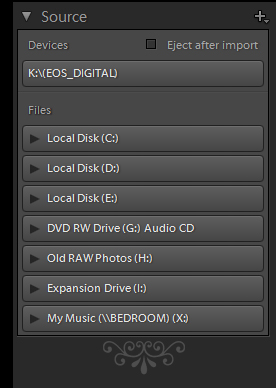
Pretty straight forward stuff so far. Now lets move over to the panel on the left side of the window.
As you can plainly see, this panel allows you to define to import device or import location. Any devices plugged in will appear in the Devices section, whilst the Files section shows all drives attached to your machine, allowing you to add, move or copy existing files.
When using a device, such as memory card, you can tell Lightroom to automatically eject the device after importing, un-mounting the drive for safe removal.
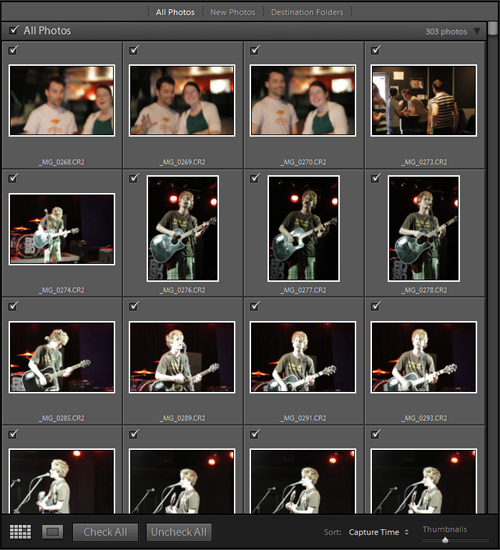
Moving to the central section of the Import Module, we will find the photo explorer. This tools feels and acts just like the Library Module, and can be a real time saver, as you can choose which file to import.
Looks familiar, huh? Well it is. Across the top of the panel, you can see All Photos, New Photos, and Destination Folders. Depending on your particular Import workflow, you will want to use these options. If you are like me, and fill your card up for one upload, choose All Photos. This will automatically select all images for import.
If you like to upload off a card after each shoot, not clearing the card in between, choose New Photos, as this will automatically select only images that have not already been imported. Destination Folders is an option that shows you where each image will be imported to.
If you have Lightroom set up to import images into folders based on their date of capture, it will break down the images by which folder they will fall into.
The next nice feature is that you can select which images you want to upload based on their previews. This can save a lot of time during editing by eliminating rejects at time of import, not later. Simply mark the check box on each photo if you want to import it, un-mark it if you don’t want it.
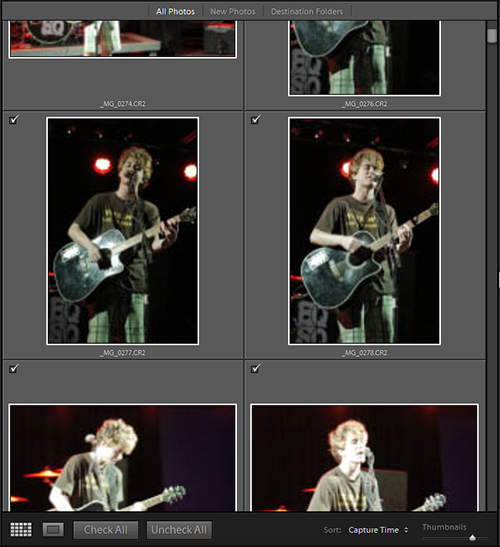
Remember to adjust the size of the preview to make sure you are not rejecting usable shots. The Thumbnail zoom tool is in the bottom right corner of the preview pane.
One caveat here, the preview is not going to really increase in quality, as the files are not being rendered. Do not base all rejections off these representations. Get rid of bad compositions, really out of focus image and so forth. If there is a chance it will be of use, import it. However, by eliminating known rejects at this time you will save time on import, especially if you like to render 1:1 previews at import time.
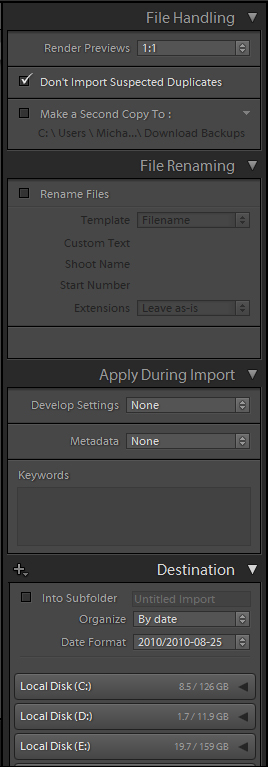
Moving along to the right toolbar, you will notice that it is divided up into many panels. This is where you will configure image processing for your import session.
The File Handling panel allows you to set basic file maintenance needs. First you can choose what type of preview to render; Minimal, Embedded & Sidecar, Standard or 1:1. Next, you can tell Lightroom not to import any files the software suspects are already in your catalog. Finally, you are given the option to define a second location to copy your images to, a built in backup, especially good if you have it set to an external drive.
File Renaming allows you some level of control of file names upon import. Its simple to use, and can make your organizational workflow a breeze.
Apply During Import is the panel that allows you to automatically apply a develop preset to all images in the import batch, handy if you have been shooting a lot of landscapes and want to apply our Fuji Velvia preset from the XEQUALS Complete Platform automatically. You can also apply a metadata preset and global key words at this time.
Destination is just as it sounds. From this panel you can choose the final destination for your imported files. Many may never need to use this panel more than one, but it is a lifesaver if you maintain multiple drives for different needs.
Once everything is configured, click on the Import button, grab a beer and watch a movie while you let Lightroom import all your newest images and render those time consuming 1:1 previews.
In 2 two of this miniseries, we will look at some of the tricks to getting the most out of the Import Module. Until then, you have the tools you need to make it work. Be thankful Adobe saw fit to pay some attention to the Import process, it makes life a lot easier.


