In Close to Home – Local Adjustments – Part 1, we discussed Local Adjustment presets and how to get the most out of their use. From that alone we can tell that Local Adjustment presets are a completely different beast than normal Develop Presets. They function differently, are created differently, edited differently and Lightroom handles their import and export differently as well. There is no easy, in application, method by which to install or export Local Adjustment presets.
There is no keyboard shortcut for creating new Local Adjustment presets and obviously there is no shortcut to save your edits to a Local Adjustment preset. We are all familiar in dealing with Develop presets, let us take some time and get up to speed on dealing with Local Adjustment Presets.
Creating a New Preset
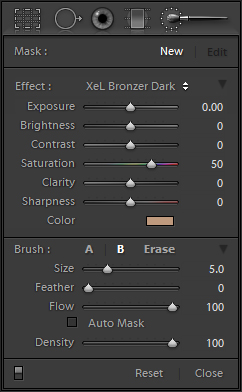
The first skill that many would need when it comes to Local Adjustments, is to know how to create a new Local Adjustment preset for use with the Local Adjustment Brush. First start by getting the Local Adjustment settings configured in the way you desire.
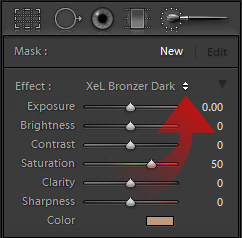
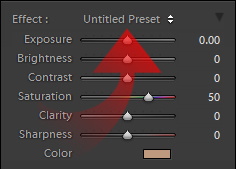
Once you are satisfied with your configuration of settings, simply click the Effect drop-box.
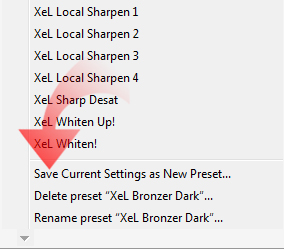
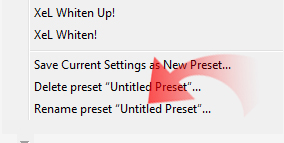
Scroll down the resulting menu to the very bottom.
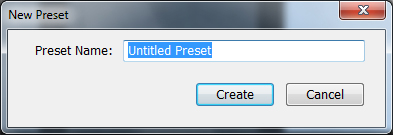
Simply select Save Current Settings as New Preset… This will open the New Preset dialog.
Simply type in your new preset’s name and click Create. Your new preset will be created and saved alphabetically in the drop down menu.
Renaming a Preset
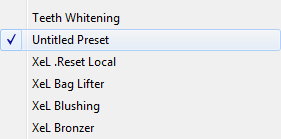
Sometime you may find you need to change a preset’s name, either because you didn’t give it a properly descriptive name or because you thought of an original title for the preset for public release. Renaming an existing preset is simple. First apply the preset you just created. In this case we will select the preset entitled “Untitled Preset” that we just created.
Select and apply the preset you wish to rename. Make sure its name is preset by the Effect option in the Local Adjustment panel.
Once you have selected and applied the desired preset, again click on the Effect drop box to bring up the drop down menu. Again scroll to the very bottom of the list.
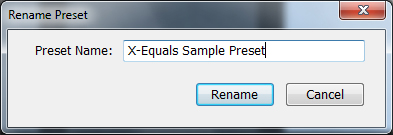
Select Rename preset “Untitled Preset”… This dialog will change based on the preset name, as it will be present in the parenthesis. Clicking this option brings up the Rename Preset dialog.
Change the name and click Rename, the changes will be reflected in the drop down menu. Do note, that you can only have one preset with any given unique name. If you attempt to give the preset an existing name, there will be a red letter warning “Name already in use” that will appear to the left of the Rename button.
Updating a Preset
Often the need will arise to alter an existing preset. You may find that a preset you frequently use needs to be tweaked to be more in line with your tastes, or if you are developing a preset for public release, you will often find that you have to make many alterations before you find the preset balanced. Either way, the process is extremely easy. First, apply the preset you wish to alter and make you changes to its settings.
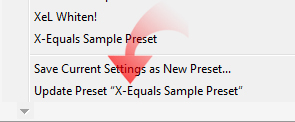
Once you complete your changes, click the Effect drop down as you have previously. Once again, scroll to the very bottom of the list.
Now simply select Update Preset “X-Equals Sample Preset”, again nothing that the preset’s name will appear in the parenthesis. Once you click on the Update option it will automatically make the changes, with no further dialogs or warnings. Apply another preset and then choose your altered preset again to be sure that changes were applied. With that, your updates have been saved.
Exporting Your Presets
Here is where things get a bit messy. There is no in application export or import options for Local Adjustment presets, they have to done manually via file system. Exporting a Local Adjustment preset is easy though, as you are simply going to copy the preset from its storage folder in the Lightroom folders to a new folder.
First you have to locate your Local Adjustment presets. These are located in the same location as Develop Presets when you do not save them with your catalog.
Windows XP – [systemdrive]Documents and Settings[your username]Application DataAdobeLightroomLocal Adjustment Presets
Windows Vista – [systemdrive]Users[your username]AppDataRoamingAdobeLightroomLocal Adjustment Presets
Mac – [systemdrive]/Users/[your username]/Library/Application Support/Adobe/ Lightroom/Local Adjustment Presets/
Once you navigate to the desired folder, you will be presented with a listing of files with the usual .lrtemplate extension.
To export a preset, simply select it in the file system and use your operating system’s Copy command {Windows Ctrl+C / Mac Command+C}. Then simply paste the preset to a new folder. From here you can e-mail or post your preset to share with others.
Importing New Presets
Importing presets from others requires you to navigate to the same location in your computer file system as you did for exporting a preset. However, instead of copying from the Local Adjustment Preset folder, we are going to paste the new preset from the origin folder into this folder.
So simply drag and drop the desired .lrtemplate file from the download archive or origin folder and place the preset into the destination Local Adjustment Preset folder. Once complete, you will have to close Lightroom out and reopen it for it to add the new presets to the Local Adjustment Preset menu found in the Effect drop-box.
With this knowledge, you are ready to maximize your creative investment in Local Adjustment presets. From creating a new preset and sharing it with others, to installing presets provided by others, a whole new world of creative tools are at your disposal. Imagine the time you can save by creating a preset of your favorite local adjustments and brushing it on your image without always having to start from scratch. Make the preset once, reuse the tool, make your subtle adjustments needed for your image and you are done. No wasted time duplicating the effect image to image. And when you need that creative boost, you are now able to use the same custom Local Adjustment brushes others have created.
