When it comes to shooting high ISO images and processing in Lightroom, the general consensus is Lightroom is unable to do a reasonable job at reducing noise. While it is true that Lightroom will not perform as well as Noise Ninja or Nik Dfine day in and day out, Lightroom can handle much of you Noise Reduction needs.
Before we go further, I want to reinforce, Lightroom is highly capable in the realm of Noise Reduction but is a general purpose editor. Noise Ninja and Define are both plug-ins specifically designed for the purpose of removing noise. If you go in expecting to get identical results from Noise Ninja and Lightroom, you will likely be disappointed.
The expectation for Lightroom is to reduce the noise enough to make the image better without causing and loss of quality to the image. Lightroom will not make your 3200 ISO image look like it was shot at ISO 100, but it can make the noisy image a bit more tolerable.
… most applications for Noise Reduction also integrate Sharpening.
Another note before we move on, with the forth coming release of Lightroom 3, we now know that the Noise Reduction tools are getting an overhaul. However, so far in the beta releases, Noise Reduction functions in the same way, albeit with better results. So as you read this know that most of what you glean from this article will be appropriate for Lightroom 3 with few changes.
Noise reduction is a method by which software removes excessive digital noise from an image, usually through blurring and blending the pixels in the areas needing attention. Every tool does this differently and with differing results. Since the effect is generally made through a blurring or blending process, damage occurs to the image, making the image appear soft.
So, most applications for Noise Reduction also integrate Sharpening.
In Lightroom however, applying Noise Reduction does not automatically trigger a Sharpening pass of the image. Sharpening is a separate function of Lightroom, which we covered here, that you will have to utilize to get the most out of you Noise Reduction efforts. We will be covering both Noise Reduction and complimentary Sharpening here, as both have to work in unison to give anywhere near acceptable results.
For this article I am going to work on an ISO 1600 image from a Canon 400D, otherwise known as the Rebel XTi. A solid camera, but it has poor high ISO performance and ISO 1600 is pretty much unusable without a lot of Noise Reduction.
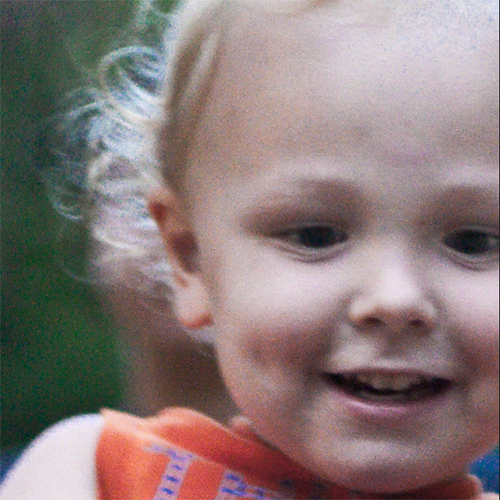
As you can see from the starting image, it is rife with both color and luminance noise. In general the image is unacceptable at this 1:1 zoom in Lightroom and needs further attention.
The tools we will use to carry out Noise Reduction operations are located in the Develop Module in the Detail tab.
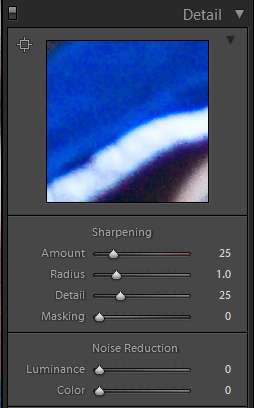
All the primary manipulations we will make to reduce noise will be done through these six sliders, comprising of the four Sharpening tools and the two Noise Reduction tools. Every one of these sliders will need to be used in unison to render the best possible image from the less than optimum source material. So without further discussion, let us just right to my Noise Reduction workflow.
My first step whenever attacking a noisy image is to start by reducing Color Noise. To me, Color Noise is more readily visible to me than Luminance Noise, and by correcting the apparent Color Noise the image start to automatically look better. I always start with the Color slider set to 0 to allow me to view all the Color Noise present.
Then I slowly move the Color slider to the right until all the noticeable Color Noise at a 1:1 zoom fade away. Once you reach the point of optimum reduction, you may wish to move further along, but you will find that the Color slider can start causing color shifts if it is applied to liberally, so if you find overall color quality suffering, back the slider down to where the noise disappeared.
You have to do this step slowly and carefully, otherwise you may overstep that sweet spot. You want to be as close to optimum Color Noise reduction as possible as the future steps depend on you getting close. Remember, just enough to make all the random color disappear, but not enough to cause the colors to start changing in the image. I found for this particular image a Color slider value of 23 was optimum.
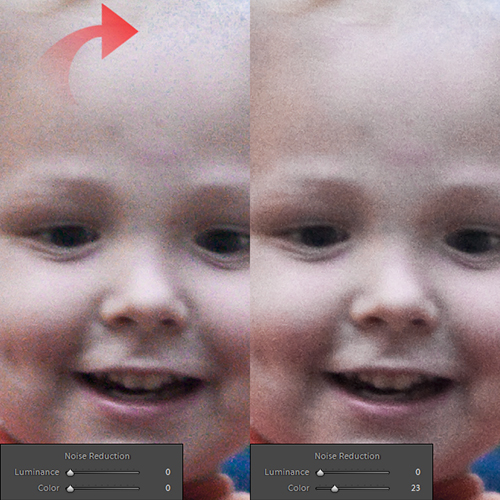
The starting image is on the left, and the adjusted image is on the right. There are two areas of importance to see here, the arrow denotes a large field of discoloration in the original image that the Color Noise Reduction eliminated in the adjusted image. Also look at the little area to the right of the slider images. On the left you can see a large mix a varying hues, whereas the right side shows a more even distribution of color.
Remember that you will be unable to eliminate 100% of all color inaccuracies, but you are looking for a sweet spot that eliminates most of the color issues without creating new ones.
After you finish with your Color slider adjustments, you are ready to move onto the Luminance slider. The Luminance slider has a greater effect upon the image than the Color slider does. In fact, the Luminance slider functions much like a blur filter in Photoshop. The idea is to blur away the blotchy noise that high ISO images produces while maintaining image quality.
As with all other aspects of photography, we have to settle on a trade off. Do we desire a crisp image with noise, or a noise free image that appears soft? Once again, we are hoping to seek an optimum point that blurs away as much noise as possible without overly softening the image. We can bring back some sharpness by adjusting the Sharpening sliders, but too much Luminance applied will hamper the Sharpening tool’s ability to sharpen the image well.
Again, just like with the Color slider, start from 0 and slowly work your way to the right watching your image quality as you go. Remember you cannot get rid of all the Luminance Noise in your image, but you want to minimize it. If the image gets too soft you will need to back off the effect, as Sharpening will bring out even more noise if you soften the image too much. Remember Noise Reduction is a compromise. You cannot have low noise and super sharp images unless you shoot more within you camera’s useful ISO range.
Anyways, at about a value of 58 on the Luminance slider, I felt the Luminance Noise was sufficiently reduced without softening the image more than I was will to.
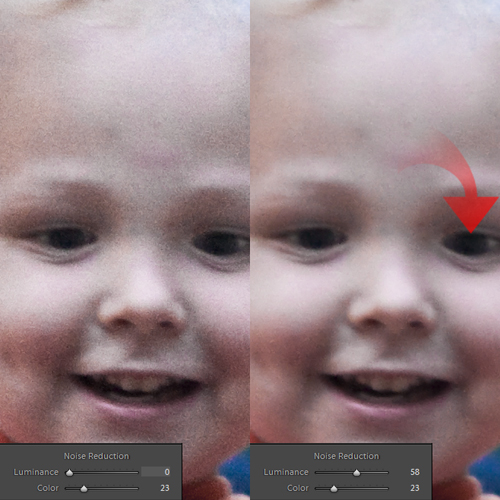
At this step you can definitely see the level of smoothness that the Luminance noise applied. Overall the softening of the image is not too severe, with the notable exception of the eyes, as indicated by the arrow. I was willing to compromise on the sharpness of his eyes at this state to get a more palatable image.
Now, the image does not look too bad in my opinion at the default sharpening levels in Lightroom. In case you have altered you sharpening defaults, the values I have set as default on my system is contained in the image below.
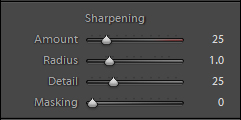
Although I feel the image looks good here, I feel it can be further improved with some judicious Sharpening. This would be a good time to read my series on Sharpening in Lightroom if you have not already read it, as all the principles present there will be used here.
I start with the Amount slider in the sharpening tools. I slowly drag it to the right, while holding down the Alt/Cmd key forcing Lightroom into preview mode. While using preview mode, the monochrome presentation makes the luminance noise stand out more. While keeping an eye out on the Luminance Noise in the preview, I slowly sharpen the image until I get back a reasonable amount of sharpness without over enhancing the noise we previously blurred away.
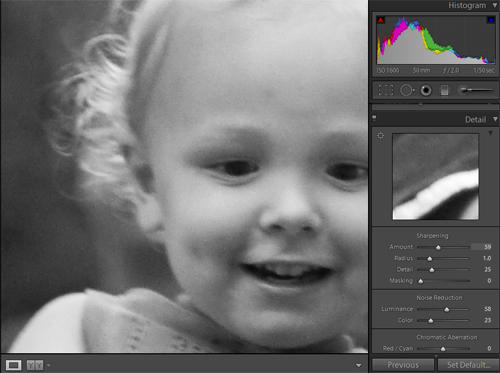
After some adjustments, I found and Amount value of 59 to be reasonable to garner me the results I desire.
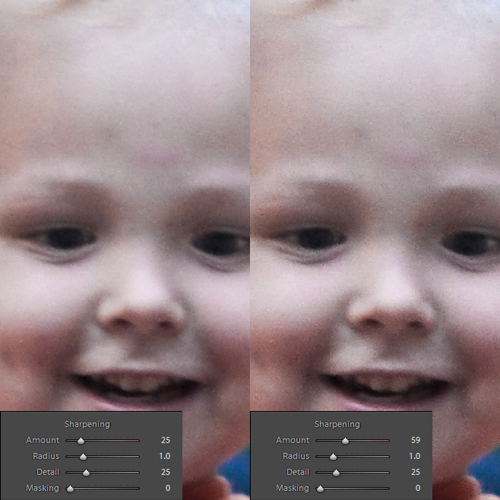
As you can see, the Luminance Noise was strengthened by the sharpening, bringing more definition to the noise. However the noise is nowhere near as bad as it was before we started. Also, with the sharpening system Lightroom has integrated, we will be able to unsharpen the image a bit with the Mask slider.
I am going to leave the Radius slider be, as I don’t see the need to further amplify the sharpening. A value of 0.9 to 1.1 is fine for sharpening an image that has been treated for noise. Increasing the Radius will simply intensify the noise in the image. In fact, you may want to consider taking the Radius slider back to 0.5 when you are dealing with an excessively noisy image, but a value of 1.0 is usually fine for me.
The Detail slider also can increase the appearance of noise, however is extremely useful to bring back edge detail into your image. For me I am interested in enhancing the eyes. Again, slowly adjusting the image while holding down the Alt/Cmd key, adjust the preview until you see an increased level of detail on the parts of the image you feel need additional definition.
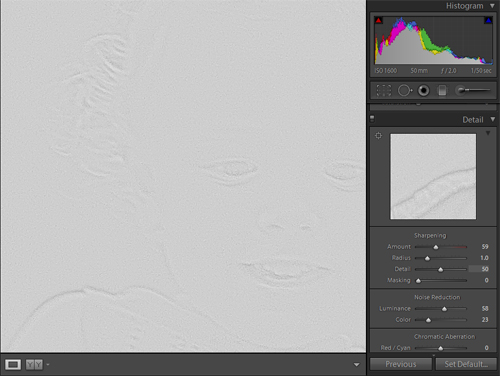
After you get emphasis on the parts of the image you need, then let go of the Alt/Cmd key and see how bad the noise has been increased and how much local sharpness you see in your problem areas. For me, I felt a Detail amount of 50 allowed me to get some sharpness back into the eyes, although I felt it increased the noise a bit too much. However, again, I am backing on the fact that the Mask slider will come to my rescue there.
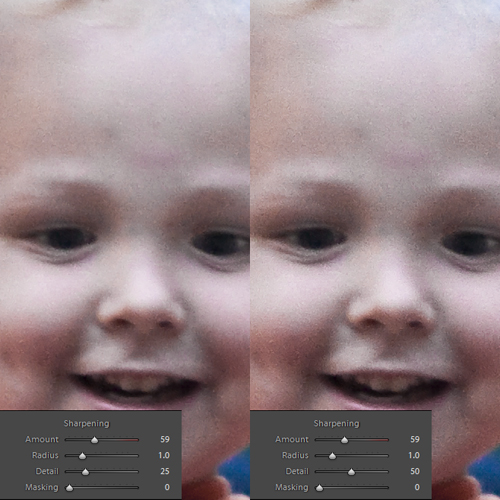
Now the final primary step of this process is to apply the Mask tool. This tool allows you to somewhat delineate what parts of the image will receive the Sharpening settings of the preceding three sliders and what parts will not be effected. The hope here is that by liberally using the Mask slider we can apply Sharpening only to the edges, where it is needed, which will serve to only increase noise in those particular areas.
I will tell you that if you have re-introduced a lot of noise into your image, you are going to need a lot of Mask to get you image into the ball park. So with the Alt/Cmd key held, go ahead and start moving the Mask slider.
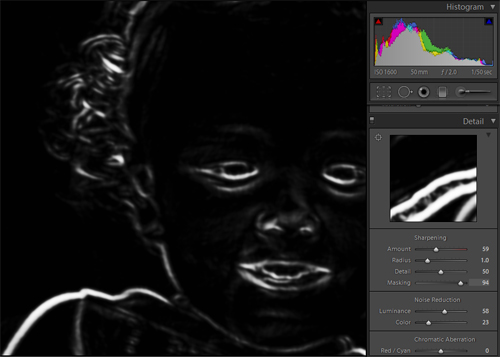
You can see that I applied a rather aggressive Mask application to the image. The mask essentially is only allowing sharpening to the major edges in the image. Looking closely you can tell there is more noise present in the edges than in the main body of the image.
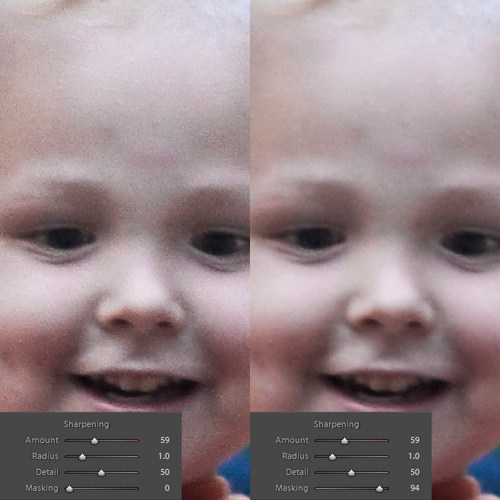
At this point, the first pass of Noise Reduction and Sharpening is complete. Below is the before and after images. As you can tell, some sharpness was lost in the process, but the noise is drastically reduced.
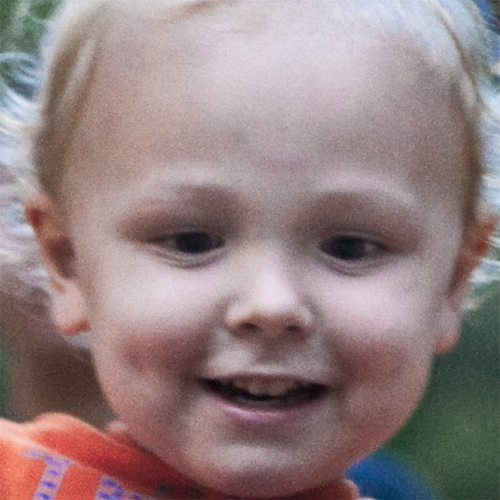

Since the first pass is complete, you can now go back and further refine your Noise Reduction and Sharpening setting to perfect your image. From here I cannot help you as each image will need its own special treatment. You will want to revisit the Noise Reduction settings first and then hop back and forth with the Sharpening sliders.
… with practice, you can create some killer, clean images using only Lightroom.
Also, do not forget to adjust Clarity, Contrast and Tone Curve, as they can help further enhance the image. Taking my basic Noise Reduction, refining and adding a few Basic Tone adjustments, I feel I have sufficiently created an interpretation of my image that greatly reduces noise.

Also, to further minimize noise, you can scale your image down to about 75-80% and apply Minimal Export Sharpening. This can further aid to reduce noise beyond the efforts already made.
So that just about covers the basics of Lightroom Noise Reduction. As I mentioned earlier, Noise reduction is a compromise between sharpness and a clean, noise free image. At higher ISO you can have a sharp, grainy image or a soft, smooth image. Ideally you will find a point between the two that will suit you.
You do not need a good Noise Reduction plug-in if you have Lightroom 2, but you will probably get better results faster. But with practice, you can create some killer, clean images using only Lightroom.
However, with the coming of Lightroom 3, Adobe has drastically improved the Color Noise Reduction tool, and I am hoping the Luminance tool see the same level of improvement. Also of note, an Edge Detail slider has been added to Lightroom’s Noise Reduction arsenal, which promises to make the process easier with less dependence on the Sharpening tools. Until Lightroom 3 is officially released, we will not know for sure, but the Beta version shows some distinct promise in improving Lightroom’s ability to turn down the volume.


