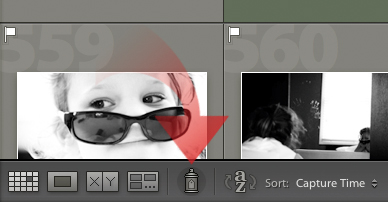
It’s a rather tiny icon, and you probably don’t give it much thought … I know I didn’t.
Yet it’s so simple and does its job so well it’s time to give this little guy a shot. Luckily for you, we’ve taken the mystery out of this hidden gem with some examples of how you can add the Painter into your workflow.
Initially, many people assume the Painter just applies keywords, but it does a lot more than that! Since keywording is how I began using the Painter, let’s look at how it works in that mode.
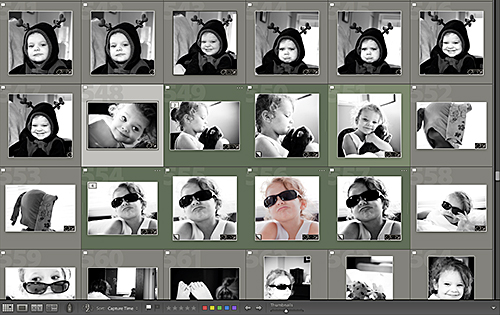
I am putting together a book of fun and goofy images of my daughter so we’ll begin our journey in the Library Module:

I’m working in more of a free-form mode as I browse for images, and while I am doing this, I’m not sure what I want to use yet. I’m sure you find yourself in similar situations as well.
For my book project, I just wanted to cruise through the 2,000 images I had and quickly tag them with a keyword that I could filter or create a collection from later – this is where the Painter tool comes in handy.
{note: for more details on keywording, check out our post on setting up and choosing keywords in Lightroom}
The tool itself is located just above the filmstrip:

Once selected, by default, you are dropped into keyword mode:
![]()
This is the mode I am working in during the above example.
There are 2 ways to apply keywords with the Painter tool, and this is generally how all the Painter tools modes work (rotation being the exception):
- single-click on any image
- click-drag on multiple images
Either method is quick and easy. If you accidentally apply changes to an image and wish to remove the changes, just single-click the image again (or click-drag) and the Painter will undo its previous changes. It’s pretty sweet!
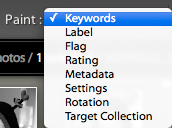
But there is MUCH more to what can be done with the Painter tool. Once activated, the tool has a list of available modes that can be used:

- Keywords – apply single or multiple keywords
- Label – add a Label
- Flag – add a Flag
- Rating – add a Rating
- Metadata – apply additional Metadata
- Settings – apply a Preset to an image
- Rotation – Rotate Left, Rotate Right, Flip Horizontal, Flip Vertical
- Target Collection – Add to Quick Collection
Aside from keywording, I think the Settings mode is very cool since it essentially allows you to paint a preset across images very quickly. I plan to spend more time in this mode in the future.
And that is the secondary goal of this workflow – to explore what the tool offers beyond the obvious.
If you have another use for this tool pleae share in the comments below. I have a feeling we’ve only scratched the surface of how the Painter can speed up a workflow!


