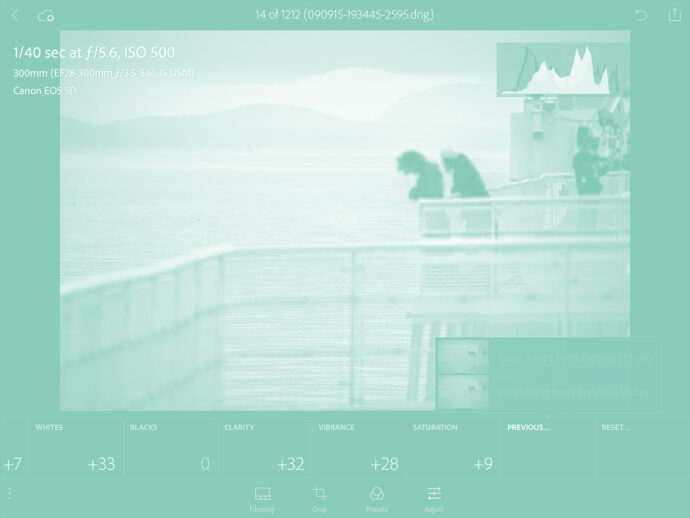
You’ve been chained to that desktop for hours, haven’t you? I can tell. Your eyes are puffy. A little red, too. And you’re beginning to slouch.
Remember the good ‘ol days?
There used to be joy in photo processing – and by joy I mean the calming high you got from playing in a dark room with semi-noxious chemicals.
Maybe it’s the stuff of urban legend, but many of us romanticize the days of yore. Sitting in a darkroom, perfecting our craft, and creating fantastic images. It was a hailed part of the process that separated the pros from the amateurs.
The modern darkroom (often in the form of Adobe’s Lightroom) isn’t so glamorous, and many photographers lament the time they have to spend in front of a monitor.
“I’d rather be out shooting,” is often seen on profiles on Facebook and Twitter. I have occasionally muttered these words to myself, and thus it is my quest to simplify and streamline my workflow.
Further thus, I have been thrilled with the deployment and development of Lightroom Mobile as a highly useful tool in decreasing the time I spend seated in front of my computer.
I’m going to give you a sneak peek behind the scenes of how I handle my workflow and pump out large amounts of images without going blind.
Don’t Throw Away Your Desktop Just Yet
Relax, you still need one.
I mostly work with stock images taken during trips and some local voyages. Therefore, my images have already been imported to Lightroom on my powerful desktop machine and placed in a folder specific to that trip. This process will work with any number of images from various dates and locations. More on that in a moment.
For help with setting up Lightroom Mobile for the first time, take a look at this post from Adobe. It has all the twists and turns laid out so you can start working on your iPad, iPhone or Android Phone.
The Process I Use To Make Money
My workflow for working on stock images is best shown in the screen grab below.
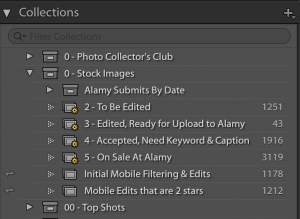
In short, my process is simple:
- rate things from my general catalog as 2 stars (2 – To Be Edited) that I want to work on and include for consideration to submit to Alamy, the stock company I work with.
- After I make final edits to the images, upgrade them to 3 stars (3 – Edited, Ready for Upload to Alamy).
- Next I submit my images for consideration. Until the images have been accepted, they sit in purgatory in the 3 star Smart Collection.
- Once accepted, the images are rated with 4 stars (4 – Accepted, Need Keyword & Caption) which means they need a caption and keywords added. Lastly, with keywording and captioning finished, the images move to five stars (5 – On Sale At Alamy).
- Done!
This process allows me to grab photos from anywhere within my 200,000+ image collection and ensure they will make it to the stock company. No dragging or dropping or remembering locations of folders. It’s all automatic once I select a photo and press the number 2 on my desktop keyboard to give it 2 stars.
Collections, Collections, Collections
I have four Smart Collections and two regular Collections inside a Collection Set. Collections are virtual in nature and are very helpful to this process as you can move images in and out without touching the original edits or images. Collections have been covered in detail here at XEQUALS and Adobe’s site.
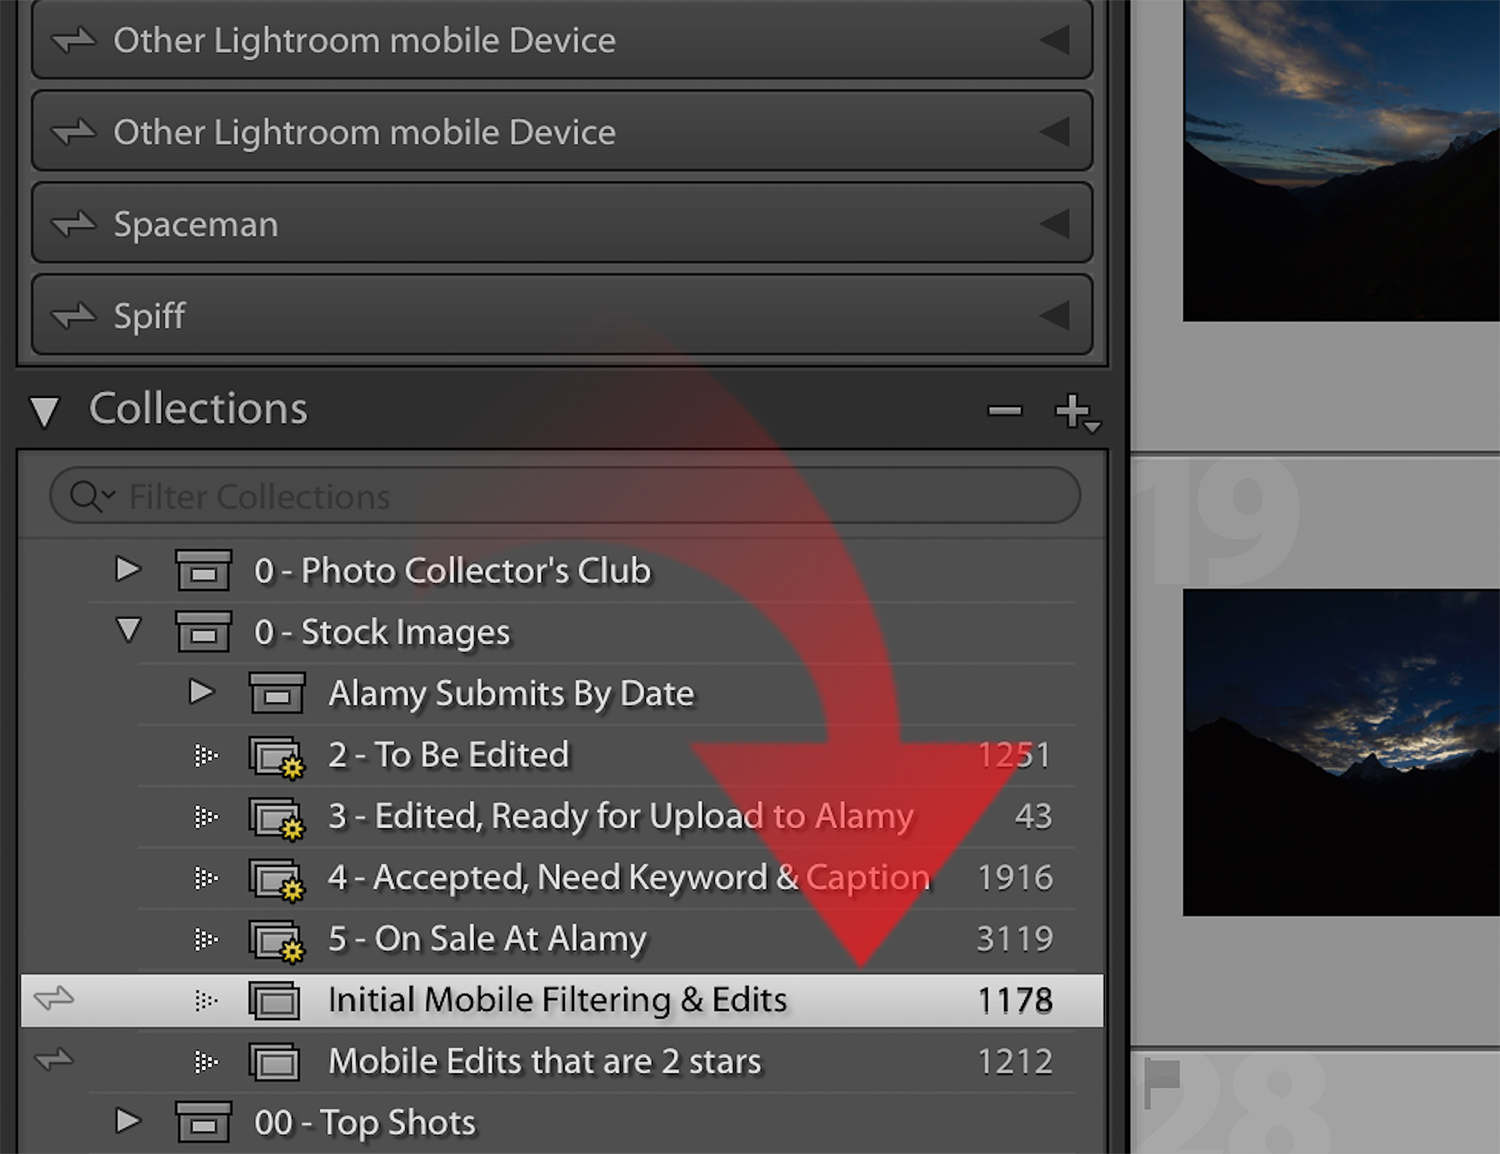
Smart Collections cannot be made available for mobile use (bummer). Adobe has a number of reasons for this (syncing dynamic objects gets confusing and can break easily) so I have created the 2 regular folders named Initial Mobile Filtering & Edits and Mobile Edits that are 2 stars.
Those regular Collections are the ones I will sync with Lightroom Mobile. As implied, the first Collection will be used to rate items from 0 stars to 2 stars for further editing, reject within Lightroom for immediate deletion, or leave as is for possible future consideration.
To start, I grab a folder of images from inside any folder inside Lightroom Desktop, select all of the images and drop them into the Initial Mobile Filtering & Edits Collection. Right now there is a trip to Nepal and one to Barbados in there waiting to be filtered and that is the 3,421 images you see represented in that Collection.
Turn It On And Grab A Comfy Chair … And Possibly A Beverage
What I love about Lightroom Mobile is I can edit from anywhere, online or offline. To accomplish this, I first have to select the Collections I want to sync with Lightroom Mobile and then make sure the images are downloaded for offline use. If you are certain that you will always have an Internet connection, this part of the process is less important.
I will literally get up from my desktop when I’ve had enough of that seated position and relax on the couch with my iPad to continue editing and selecting
To make a Collection available to Lightroom Mobile, simply right click (CRTL+Click on a Mac) on the Collection and then choose Sync with Lightroom Mobile.
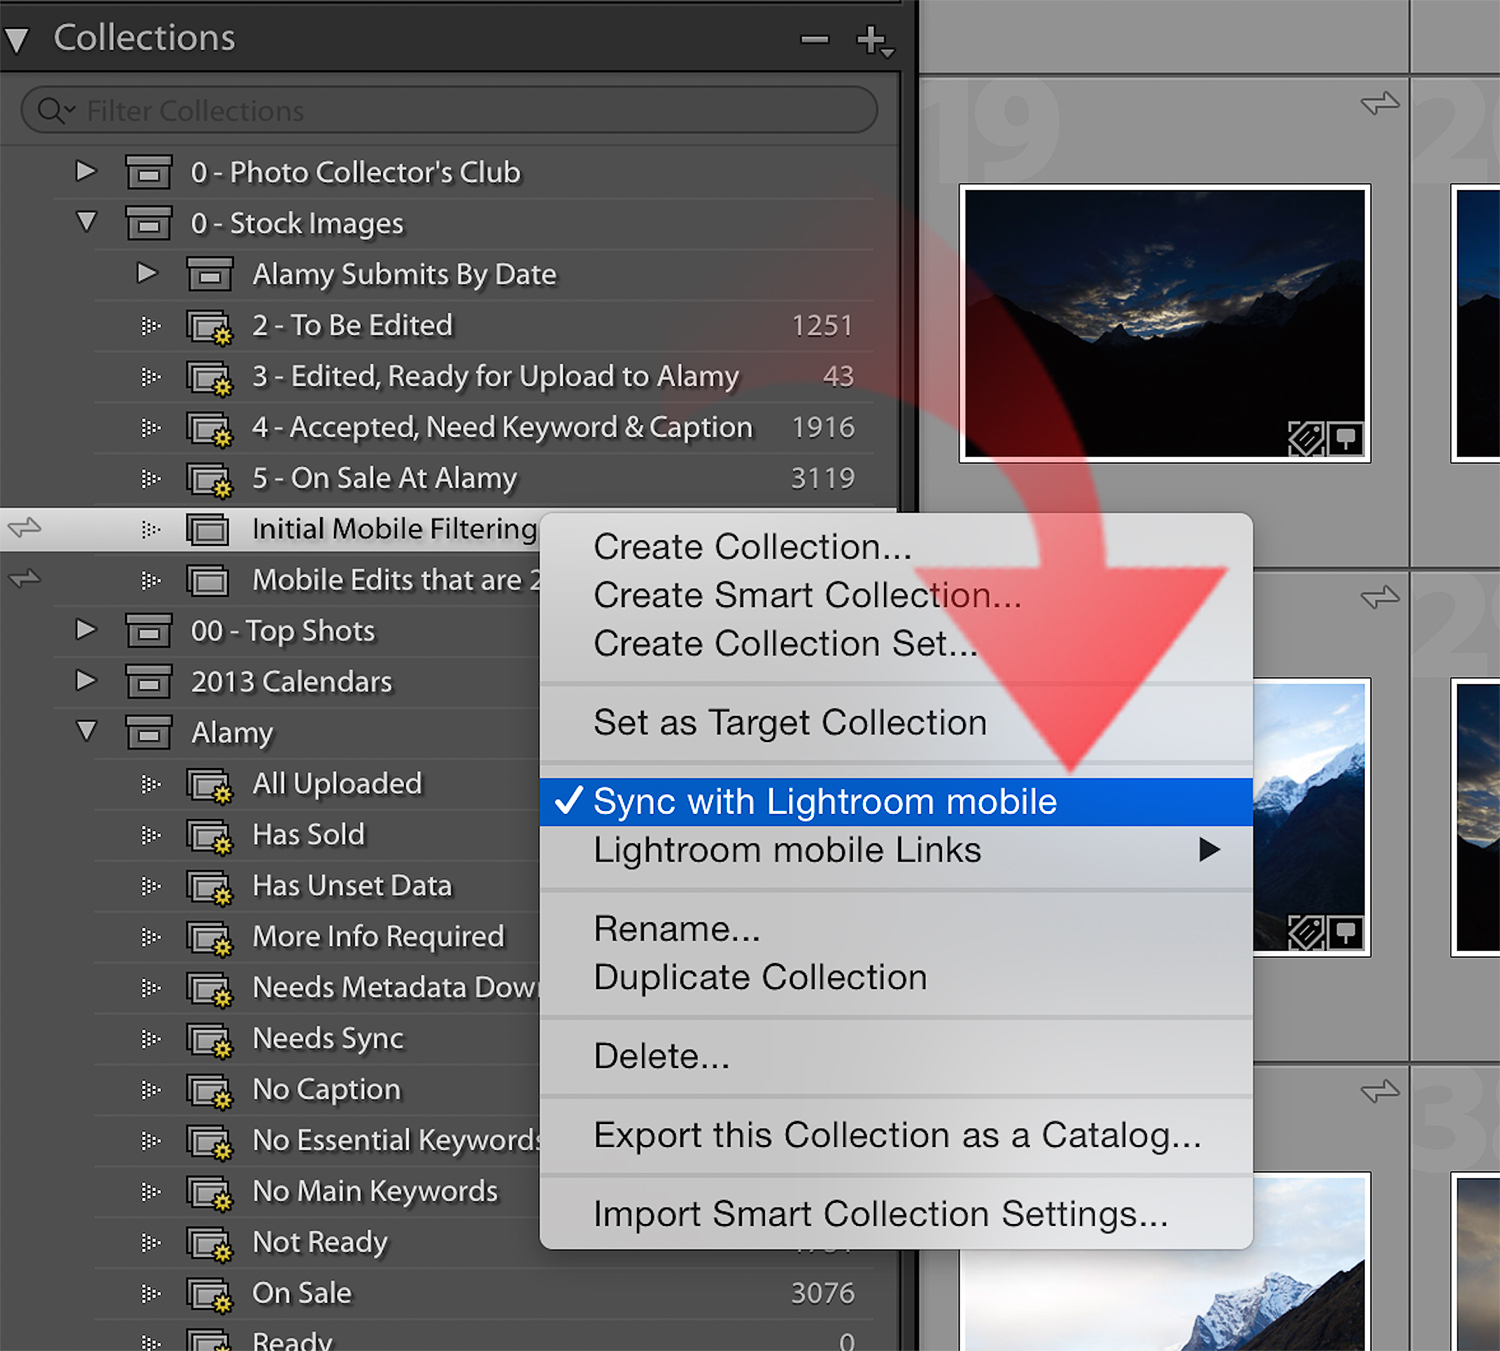
If your computer is online and you are logged in to your Adobe Creative Cloud account (reference the Adobe post about setting up Lightroom Mobile) then Lightroom will start syncing the Collection to the cloud.
On your iPad, open Lightroom Mobile and ensure you are online. If so, presto! Your newly selected Collection will appear.
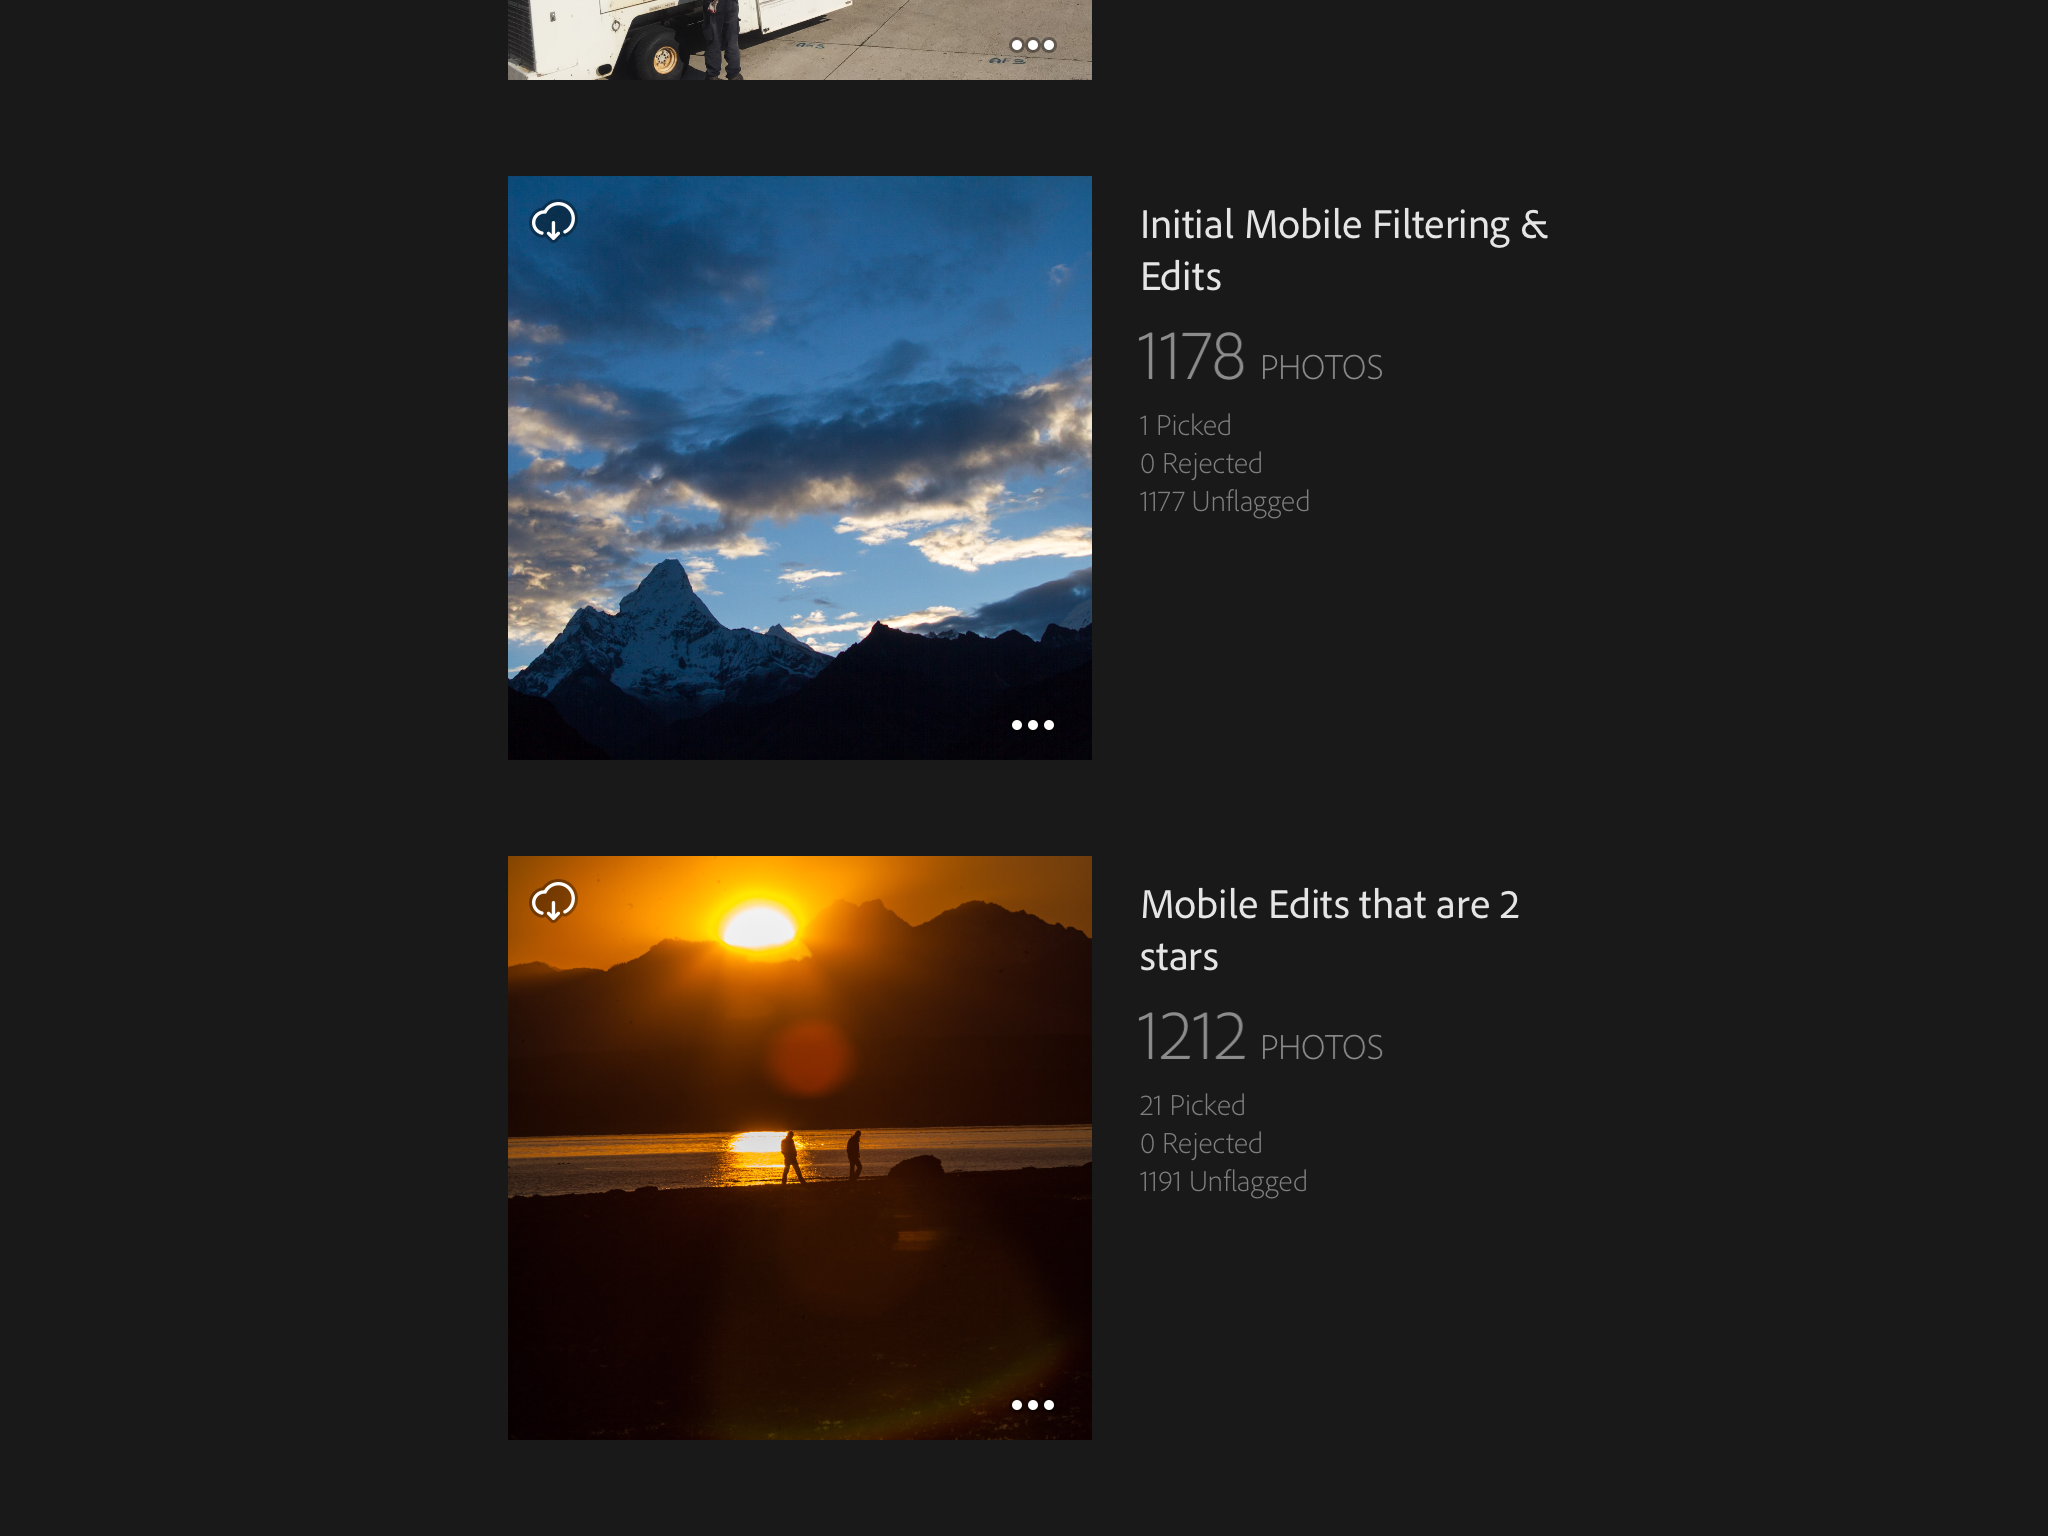
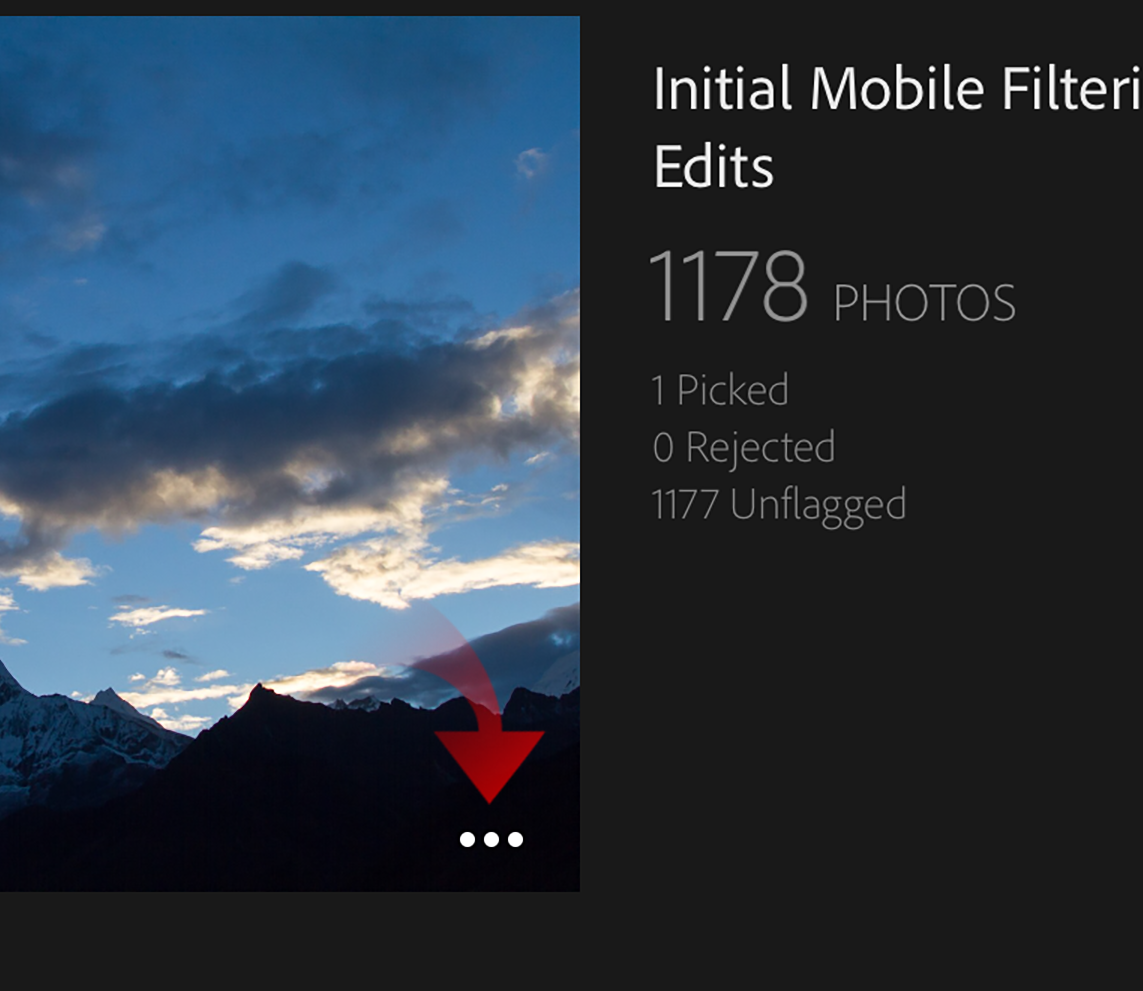
For those wishing to edit images offline (highly suggested), you need to perform a couple of extra steps. First, click on the three little dots (…) in the bottom right corner of the Collection sample image
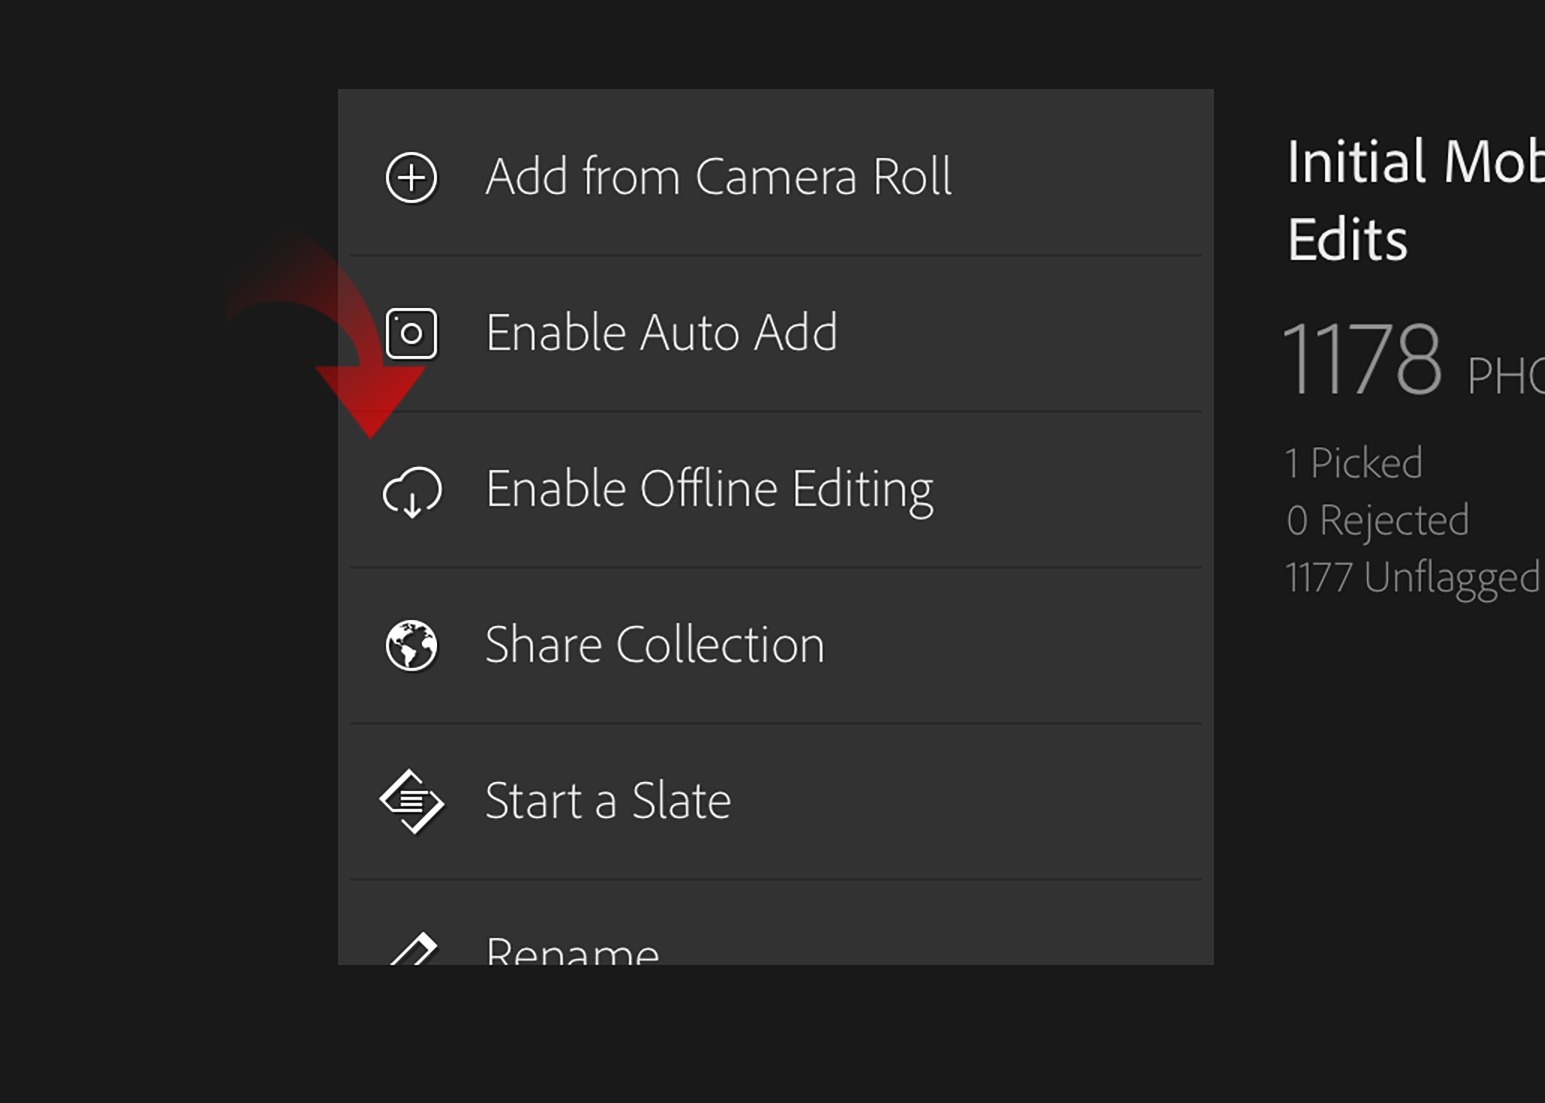
Now tap the Enable Offline Editing option.
A dialog box will appear. It will let you know how much space is consumed by this operation. Thankfully Lightroom does not sync the entire image, just a downsized version (and should thus not be used for advanced focus pixel peeping).
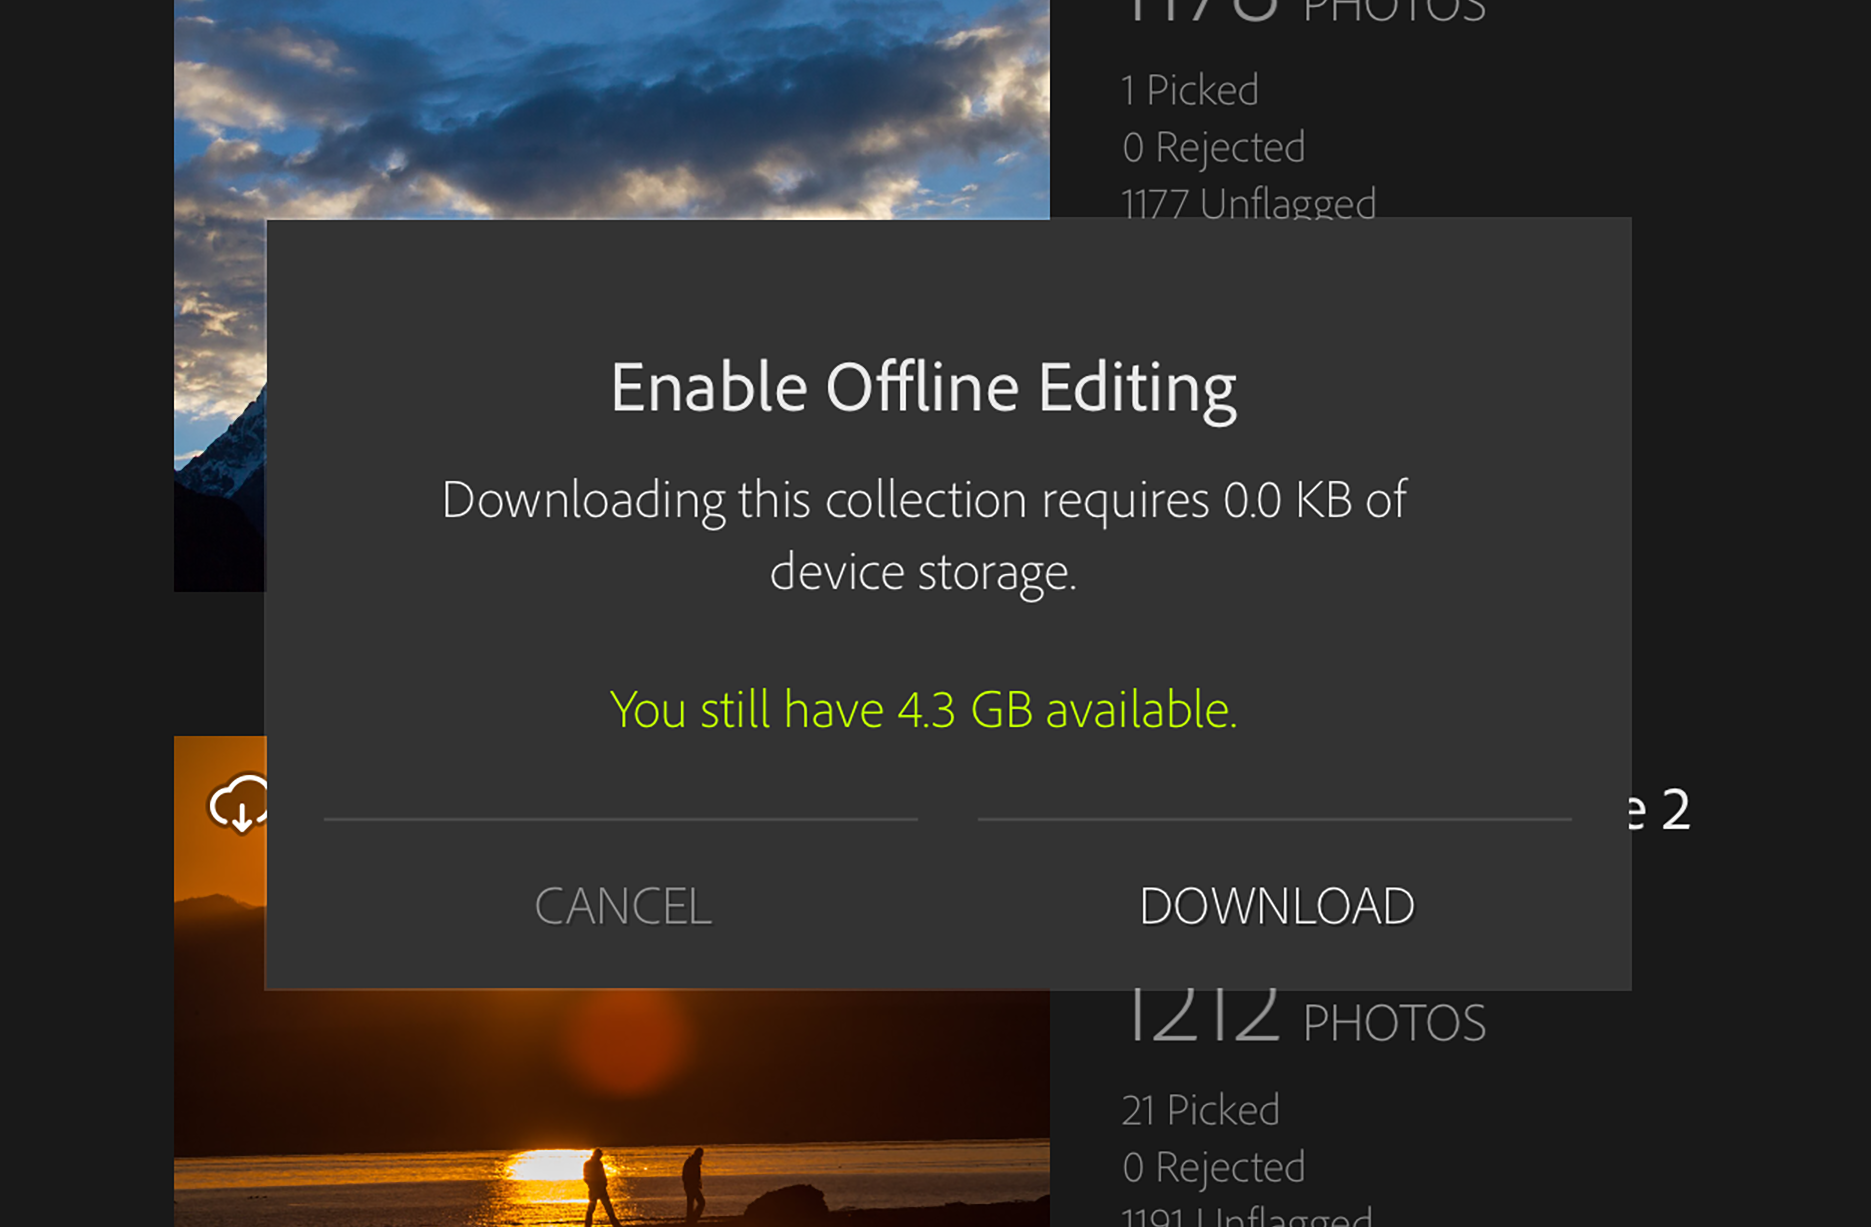
As noted in the image above, my 3,419 images need 779MB of space. That’s roughly 227KB per image. Plan accordingly depending on how much space your mobile device has left. Download times also depend on your Wi-Fi connection, but you can get even more done with sorting and editing while the download happens in the background.
You may now begin your edits from your comfy chair with your beverage in hand.
This is but a taste of how, in part 2, we will use this foundation to add some different spices to our workflow gumbo.
Bam!
