Use the Lightroom Print Module Like A Boss
Regular Lightroom users and readers of X-Equals are probably aware that with the introduction of custom picture packages in Lightroom 3, photographers gained additional tools for outputting their photographs whether destined for the printer or as a JPEG file. A lesser known feature of the Print module is the ability to add a simple frame or border using this text.
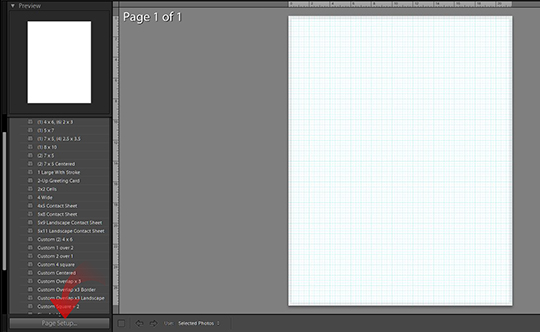
To get started, select the image(s) you want to add text to and move into the print module. If you’re working with multiple images, it’s often easier to add them to a Quick Collection (B) first and then work from that collection. The first step once in the print module is to click on the Page Setup button on the left to define the sizes and characteristics of our image.
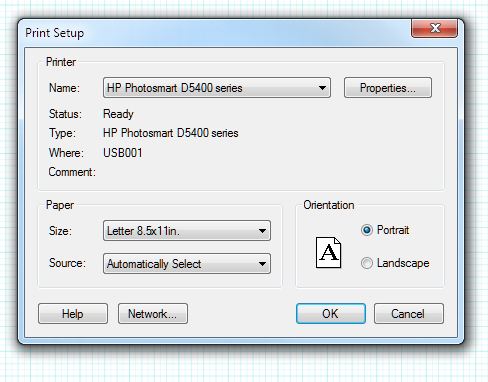
The default is set to Letter but for this I’ve changed it to Borderless 10 x 15. If you’re sending it to an online provider, using a local minilab or pro lab, or printing it yourself your choice may vary. There are plenty of other sizes possible depending on the printer installed, ranging from CD/DVD covers to large, borderless pages. Choose the size you want and then click Ok. You can use this same method even if your destination is the web.
I had selected 2 photographs, both in portrait orientation. If you have a mixture of portrait and landscape oriented photos it’s best to do this in two stages. The first time select only your portrait oriented shots and set the page up accordingly, then repeat with the landscape oriented shots.
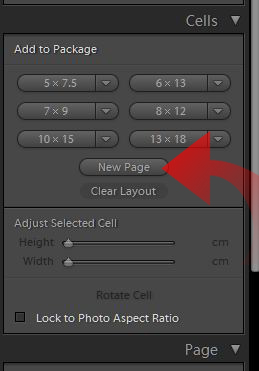
As I have 2 photos and the page setup only gives me one page, I can look in the Cells panel on the right (make sure you’re in custom package in the layout style) and click on New Page. Also, I’m going to uncheck the Lock to Photo Aspect Ratio. When I place my image on the page, I want to leave a little space at the bottom and the easiest way to do this is to slightly alter the aspect ratio.
In the filmstrip at the bottom I see my two photos. This is why it’s best to place your selected images into a Collection – it will keep your film strip easy to manage as only your desired images will be displayed. You could also use ratings, labels or flags if it fits your workflow better. To get my photos onto the blank pages it’s just a matter of drag and drop. You’ll notice that they don’t take up all the available space so you’ll need to manually adjust them which is why we left the aspect ratio box unchecked in the previous step.
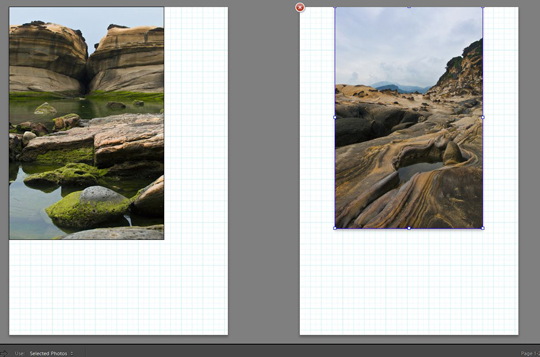
Drag each image to wherever you want to place it on the page. With each photo individually selected, you’ll see a blue bounding box. You can drag any of the corners or center of the border to precisely adjust the placement of the photo. I’ve chosen to go with a full bleed here but you can fit them to any size you want.
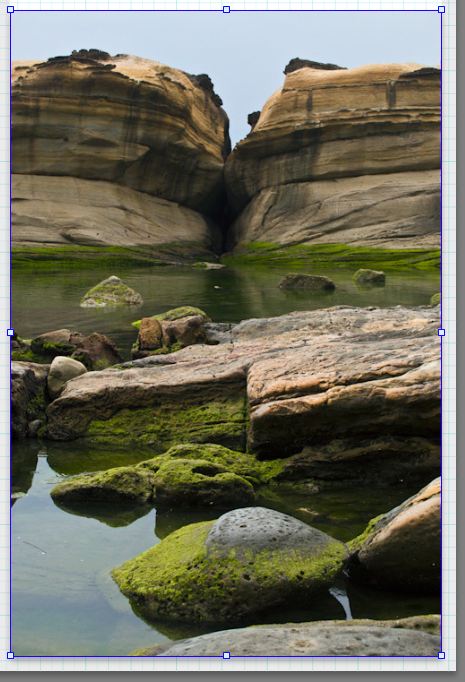
Once you have positioned the photos where you want them, it’s time to add the border. This part of the process is a global setting meaning it will affect both images equally. One of the panels on the right is called Image Settings and contains options for Photo Border and Inner Stroke. These are what we’ll be working with. The default background color is white. You can change this in the Page panel where it says Page Background color. Check the box and click on the color swatch to select your color.
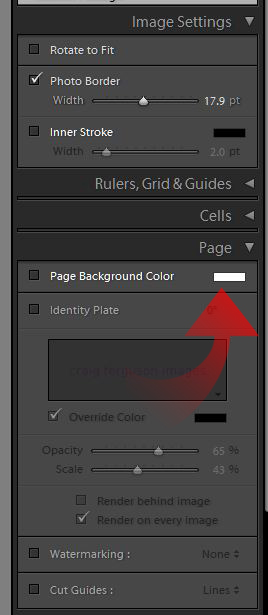
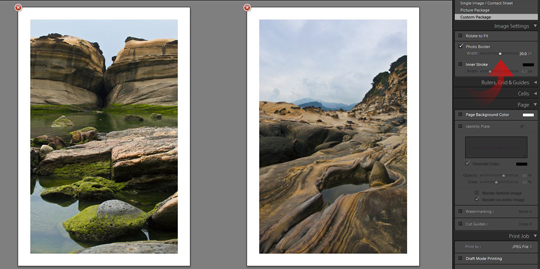
Starting with the Photo Border, check the box to create a border with the same color as your page background color. Your photos will appear to shrink with the border to accommodate the frame. In the image below, I’ve chosen a 20 pt border for my frame.
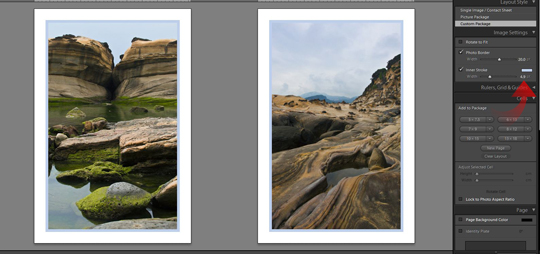
A lot of the time, a simple white border is all you need but sometimes a splash of color and that’s where Inner Stroke comes in. This will add a thin border within the image. The color swatch in the Image Settings panel allows you to set the color and here you can see I’ve chosen a pale blue/grey. It works okay on the photo to the right but not so well on the one to the left. This is a point to remember when it comes to global adjustments – what works for one may not for another.
With that, you’re done. You are now ready to either send the 2 photos off to your printer or select Print To File if you wish to have a lab or print vendor handle the printing or you’re going to post it on the web. If your destination is the web, save yourself some time to using the Lightroom Publish Services for Facebook, Flickr and SmugMug.
