So now that everyone knows how to make a calibrated camera profile, it’s time to take it another step. You can see the added benefit of accuracy that camera profiles bring to Lightroom, but photography is supposed to be a creative art, so let’s manipulate the system.
Camera profiles were originally created to mimic the standard picture styles built in to Canon and Nikon cameras. To that extent nothing precludes you from creating a custom profile that reflects your personal style. Starting with a standard calibration recipe, you can manipulate the colors and curve to bend your RAW data to your will, before you even have to start making adjustments in the Develop Module.
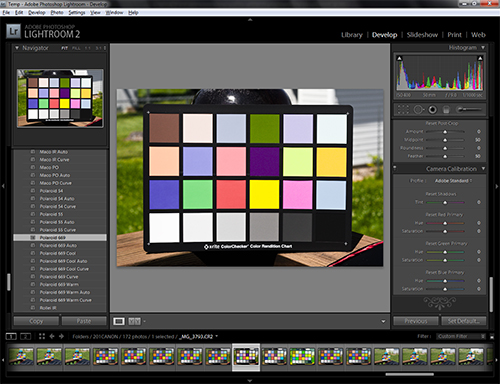
First, let’s look at an easy way to accomplish this, by leveraging presets to do the heavy work for you. If you already have your own personal look saved as a preset, you are one step ahead; otherwise you will need to save a preset from the image that you want to attempt to duplicate the look. Go ahead and fire up Lightroom and apply your preset of choice to you color checker image:
Now you want to save a new preset from it, including only the basic and color adjustments:
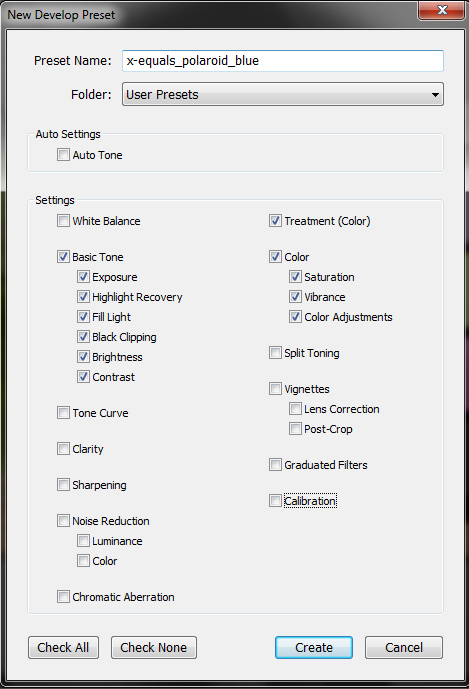
We remove all sharpening, split-toning and local adjustments from this preset, as the DNG Profile Editor really only works with colors. You will have to redo these adjustments when you edit a processed file, but your correct color balance will be automatically applied. Go ahead and click Create.
Once you have saved your new preset, you will want to open one of your color checker images. Now apply your preset to said image:
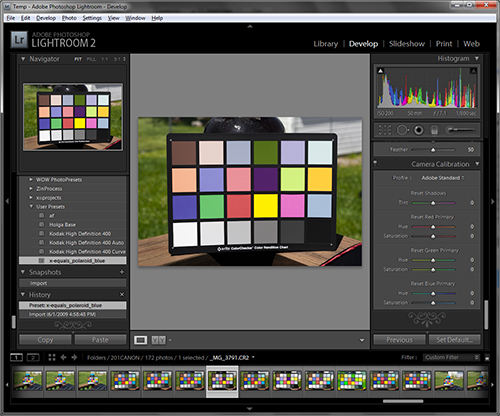
Now is the hard part … adjusting the image to make sure there is no color cast affecting the white and gray patches on the card. Also be sure that no patches are over exposed. If there is a color cast or overexposure in the image after you process, DNG Profile editor will reject the film. Now you will want to export to a Tiff file. Bring up the contextual menu (Control + click or right click) choose Export >>> Export … :
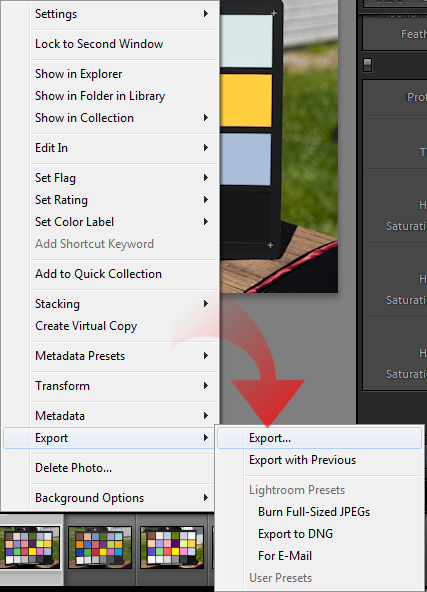
Export your Tiff with the following settings: Color Space: ProPhotoRGB, Compression: None, Bit Depth: 16 bits/component:
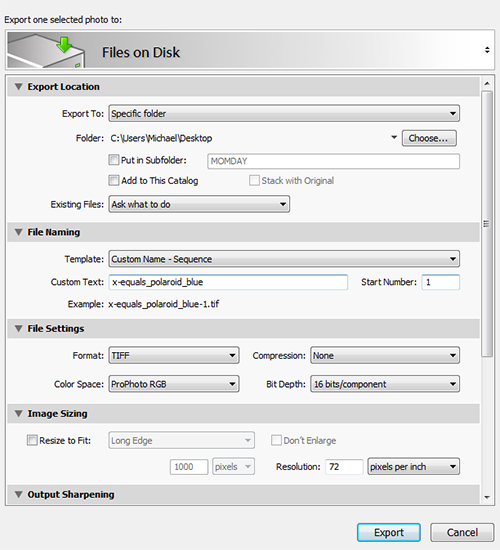
This will export a Tiff file with as much information as possible while baking the preset’s settings into the image.
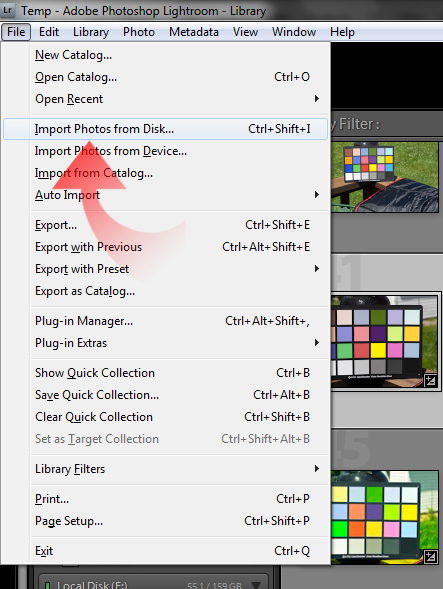
Once the Tiff is exported, you will want to import the image back into your Lightroom catalog. Click File >>> Import Photos From Disk … :
Once the dialog opens, browse to the location where you exported the Tiff file:
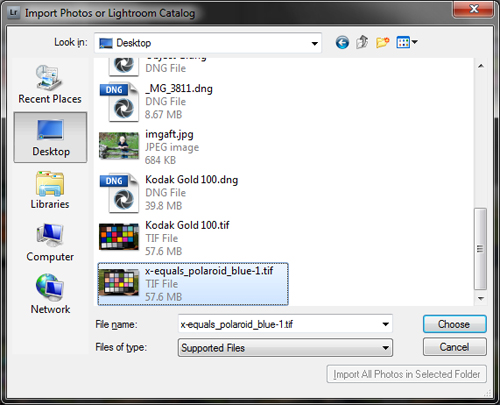
Click Choose. The Import dialog will open:
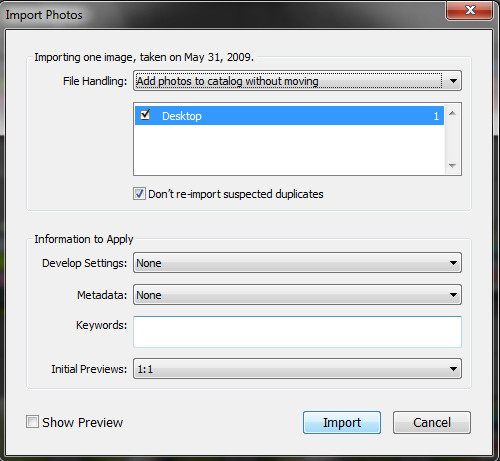
Import with a 1:1 preview so you can inspect the image – make sure no develop settings are applied.
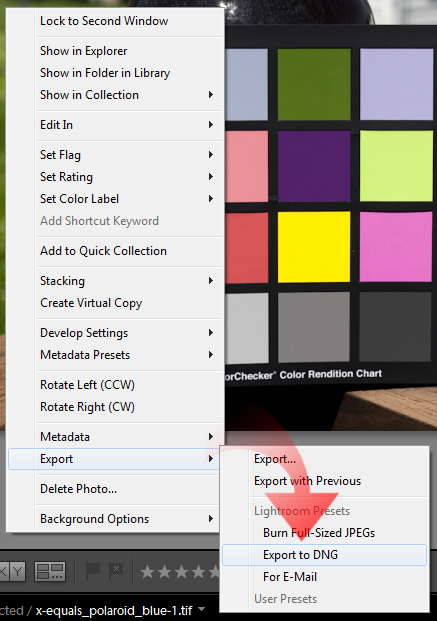
Once it is back in the system, double check the color and exposure, if it doesn’t look right, trash the file and reprocess. If everything looks good, and you are ready to see if the DNG Profile Editor will accept your efforts, go ahead and export the image as a DNG. Bring up the contextual menu again and select Export >>> Export to DNG:
Save the DNG file in whichever folder you want:
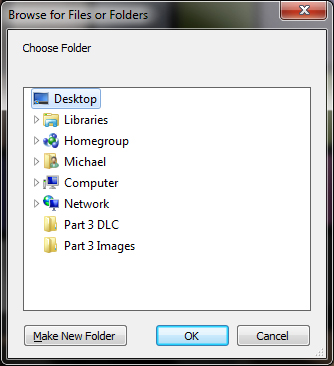
We took the Tiff to DNG route to bake in your custom colors as a Tiff and then wrap it back up in a DNG so the Profile Editor can use the file.
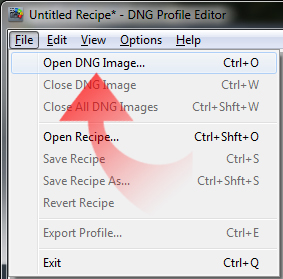
Go ahead and open Adobe DNG Profile Editor and keep Lightroom running, because you may end up needing it. Go ahead and open the DNG file you have just created, click File >>> Open DNG Image:
Browse to the location of the DNG file you just made:
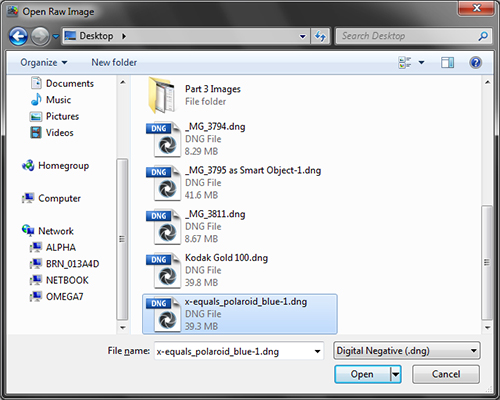
It now opens in the DNG Profile Editor.
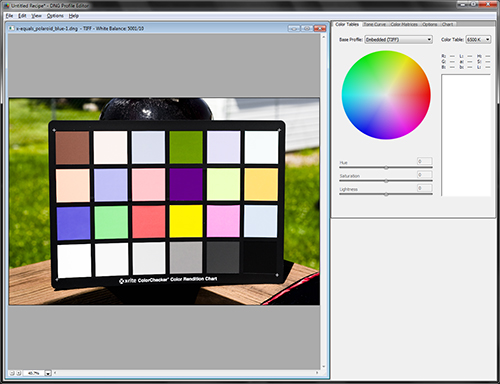
The image may look a bit funny to you, but that is because none of the adjustments that Lightroom performs will be visible. We will worry about that in a moment.
For now click on the Color Chart tab and try to profile the image (if you don’t know how to do this, stop and read part two of this series to walk you through the process):
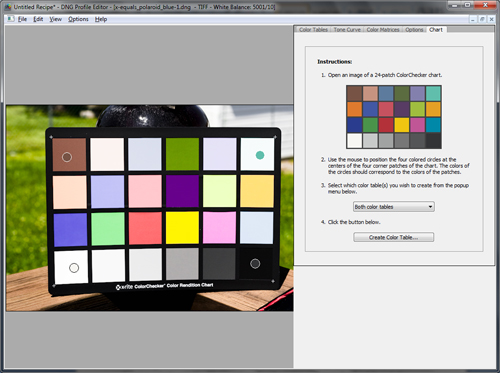
Click Create Color Table. If it plots the color points on the first try, consider yourself lucky. A successful Color Table scan will look like this:
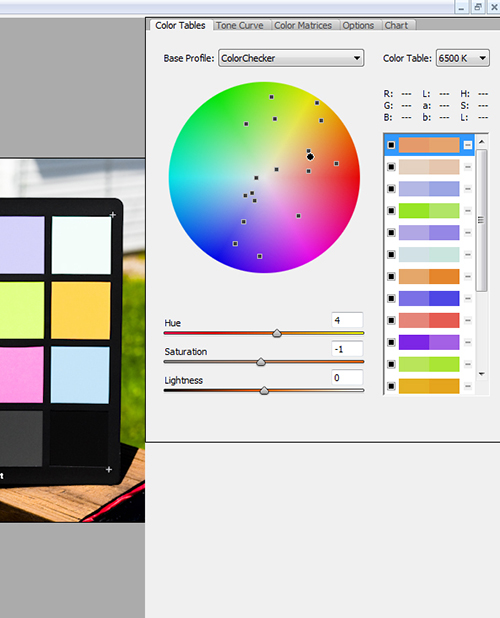
Otherwise, you will get an error message informing you what the Profile Editor found wrong with your image:
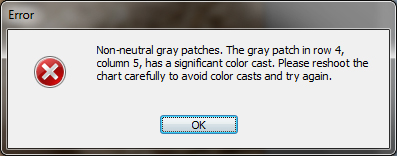
Pay attention to the dialog, as you will need to hop back over to Lightroom, go back to your original color checker image, and start the process anew (I didn’t say this would be easy, but it IS worth it.)
Once you get a successful chart analysis, move over to the Curve tab and adjust the curve until the preview looks suitable:
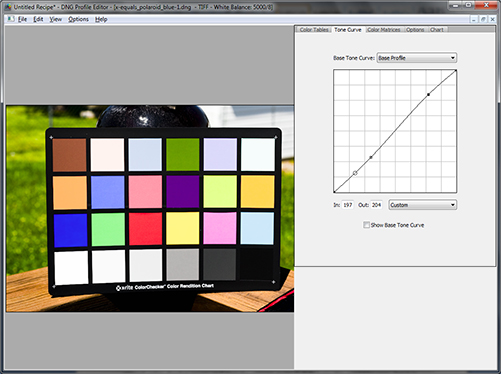
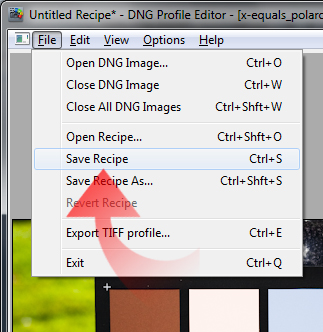
If you need to adjust Saturation or Hue go ahead and do so in the Color Matrices Tab. Do these tweaks now and save your recipe. Click File >>> Save Recipe:
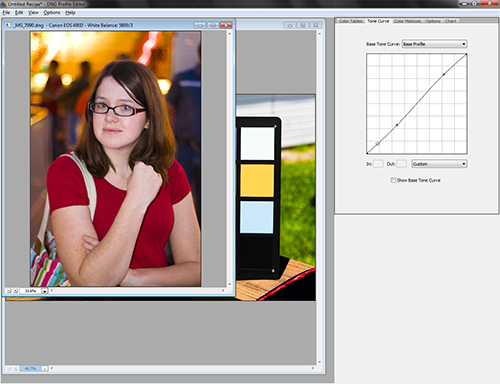
Now you will need to open another DNG file from the camera you wish to export the profile to. Click File >>> Open DNG Image Choose the DNG image you wish to use to create the profile with:
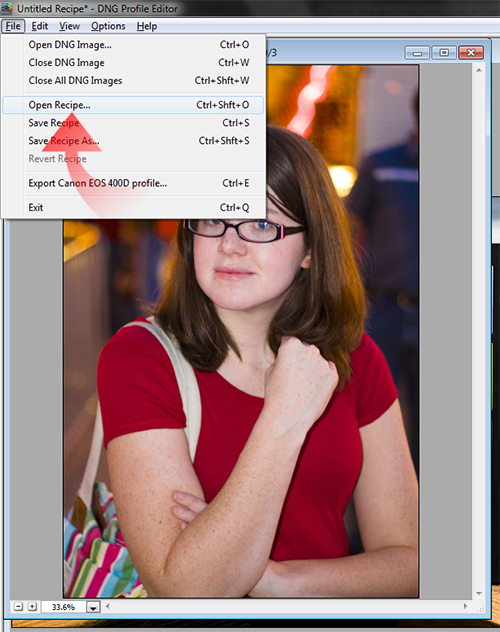
Now click File >>> Open Recipe. Then select your recipe that you had just saved. Open it and it will apply the recipe to the current image:
You can see an estimate of the effect in the preview window:
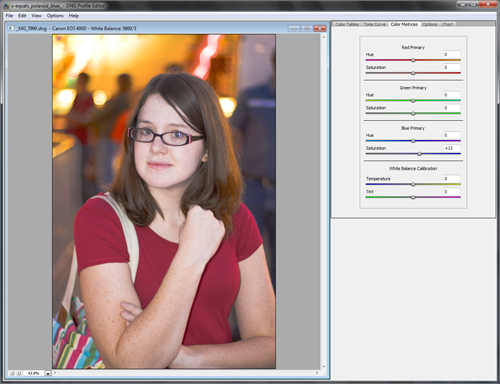
Now Click File >>> Export to export the new profile to Lightroom:
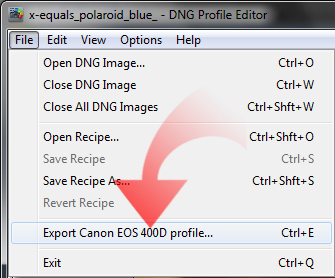
Give the profile a name as you would want it to be seen in Lightroom. The profile has been exported.
Now you need to proof your new profile to make sure it is getting the desired response. You will need to restart Lightroom to get the new profile loaded into memory.
Once it is back open, choose a regular image and apply your new profile:
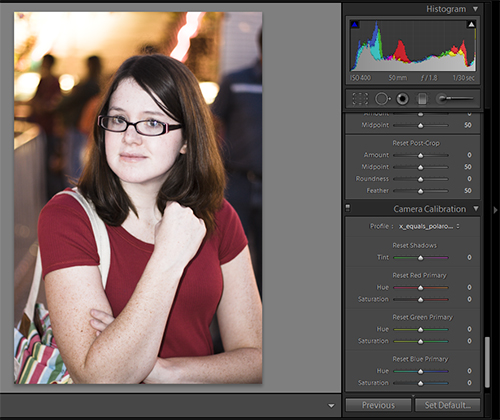
If it looks good, you are set. However if you find issues with the rendering, make note of what the issue is. Is the curve to aggressive? Are the Orange/Browns muddying up skin tones? Blues looking too purple? Take a moment to consider what need more tweaking.
If it just looks completely wrong, you may want to start over from scratch, but I will recommend that you attempt to remedy the situation in the DNG profile editor right now. Weaken your curve in the Tone Curve tab, drop the saturation in the Orange and Brown colors in the Color Tables tab, and adjust the Blues in either the Color Table or the Color Matrices tab.
Once you are ready to try again, save your recipe and export again. Restart Lightroom and test again.
This process does require a bit of trial and error, and can be frustrating. However, once you have a working recipe you can export it to any camera you use by opening a DNG from that camera and importing the recipe and exporting a profile as shown in Part Two.
Don’t limit yourself to presets either. Open the color checker file into Photoshop and apply actions or plug-ins, then round trip back to Lightroom and export the resulting file as a DNG, repeat other directions as usual.
You can also share recipes with others who can download the recipe file and export it to profiles for their own cameras. All you need to do is send them the .dcpr file create by the DNG Profile Editor, within it contains the magic.
Using someone else’s recipe is simple.
First download a recipe file, try using my recipes I designed while researching this article, you can find the link at the end of the article. Once it is downloaded, place it in a folder you can find easily. Now fire up the DNG Profile Editor and open any DNG file made with your camera.
Next click File >>> Open Recipe and browse to the folder that has the recipes you wish to cook into a profile. Highlight the one you wish to use and click Open. The recipe will now load and your preview image will change to reflect the new recipe. Now all you have to do is click File >>> Export Profile, name the new profile what you wish it to be listed as in Lightroom. Click Save and once the dialog box pops up restart Lightroom.
The new profile will be listed when editing images from the camera you exported to.
This is not the only way to create custom profiles; it’s just the one I find the most efficient. Another option is to manually adjust each color point by hand, frequently exporting and checking in Lightroom. I don’t recommend that method as it is even more time consuming. As it is, getting the modified color charts working in the Profile Editor is time consuming. However once you get the image profiled, it is smooth sailing. Plus, as you do a few profiles, you will get a feel for when an image will work for the Editor.
As I mentioned earlier, don’t be afraid to take your images into Photoshop too. That will open up even more possibilities as you experiment further with this process.


