Now that Lightroom 3 has finally arrived, everyone gets to take advantage of the new Lens Corrections panel. Adobe has many common lenses from various manufacturers profiled, and Lightroom can automatically correct any abnormalities and perspective issues present in the lens. Another benefit is that Adobe Labs has pre-released the Adobe Lens Profile Creator, which allows you to profile your own lenses mated to your camera body for the most accurate lens corrections possible.
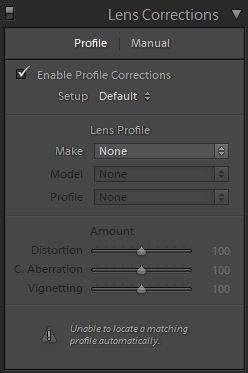
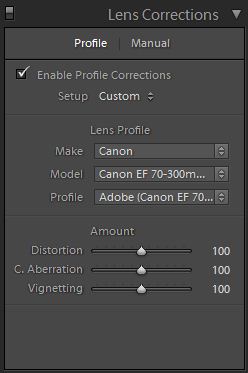
If you are using a lens that Adobe has already profiled and have Enable Profile Corrections enabled, the EXIF data in your image will automatically apply the proper profile for your needs.
If you have profiled your own lenses, the Adobe Lens Profile Creator embeds that lens’ EXIF information and will also be automatically applied.
You also have the option to apply profiles from other makes and models of lenses that have been profiled, allowing for some creative use of this tool.
Once you have applied a profile, you can them manually adjust the amount of correction that is applied to your image. The lens profile attempts to compensate for image distortion, chromatic aberration and vignetting, and a slider value of 100 denotes the default profile settings are in use. You can then adjust these sliders as needed to increase of decrease the effect of the standard profile.
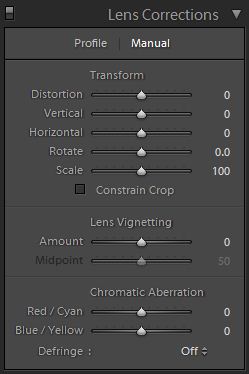
Aside from the Lens Profiles, Adobe offers us up a Manual Mode in the Lens Correction panel. This panel, which also contains the Lens Vignette and Chromatic Aberration tools, also contains a new tool, Transform. Transform and its components allow you to make adjustments to the rending of you image, allowing manual correction of perspective and image scaling.
Now, it takes some getting used to what each of the Transform sliders do, but once you get the hang of it it is not so bad. Distortion can be used to round out the edges of the image and outwardly curve the subject much like a Fish Eye lens. It can also be used to pinch in the edges of your image, curving the subject in towards center. Vertical and Horizontal push and pull the image from their respective perspectives, allowing you to correct perspective issues easily. Rotate simply allows you to rotate your image freely and Scale allows you to scale your image as needed to compensate for your corrections and crops.
Now that we have basically covered what the sliders do, and how you can use them to improve your images, lets look at using the correction tools to alter your images in creative ways. Today we will look at creating a Fish Eye effect. Here is an image taken with a Canon 400D Rebel XTi with a 28mm f/2.8 Minolta MC Rokkor via lens adapter. As the widest lens I had that day, it is what I used, but I wished I had a 16mm lens instead.
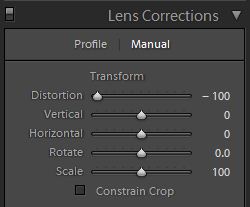
So the only option left is to fake it in post. Before this would a purely a Photoshop job, but Lightroom 3 allows us to do a reasonable attempt easily. First we will start by changing the Distortion slider to -100, causing an outward bending of the image.
This results in the following changes in the image, including loss of image area.
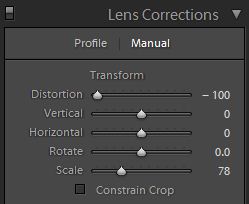
At this point, we have an image similar to a Full Frame Fish Eye, but we have lost some of the image, so let us use Scale to bring back some of the image.
This adjustment brings the full image just back into full view again.
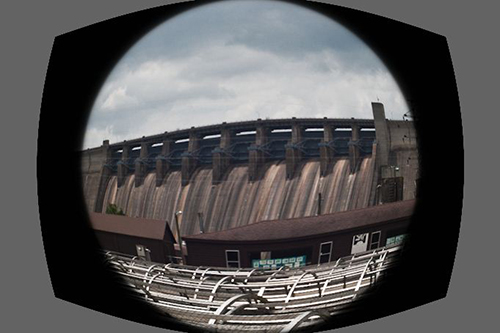
Notice the gray field surrounding the image. Unfortunately, this area cannot be altered and when you export your image this grayness will still be in your final product. If you have Photoshop CS5, Content-Aware Fill may be able to alleviate this issue. To do this all in Lightroom, either scale back up until the frame is full again, or use a custom crop to get the image you desire.
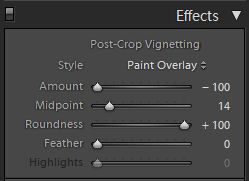
If you are more after the Circular Fish Eye look, simply add a Post-Crop Vignette to your image to get the effect. These settings work great.
These settings will render the image in this manner.
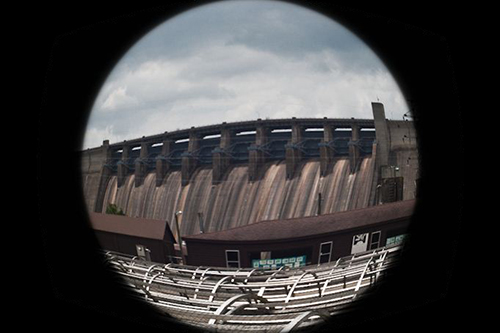
And with a quick pass through Photoshop to black out the gray areas, you can create a fake Circular Fish Eye effect.
There are surely countless other ways that the Lens Correction tool can be used in a creative manner.
