In part 1 of this series, we dug into the camera profiles included in Lightroom. Today we are going to dig a bit deeper and learn how to produce an accurate, custom profile for your own camera. This is a must if you want accurate colors and use a camera not made by Canon or Nikon, it is also a good idea to make a custom profile if you own a Canon or Nikon, as there can be differences from sensor to sensor.
The tool we are going to use to create these profiles is the Adobe DNG Profile Editor.
To start out, I recommend you pick up an X-rite/Macbeth Color Checker. This is easily the best method to calibrate your new camera profile. It features 24 color patches of known value colors, including White black and four shades of gray.
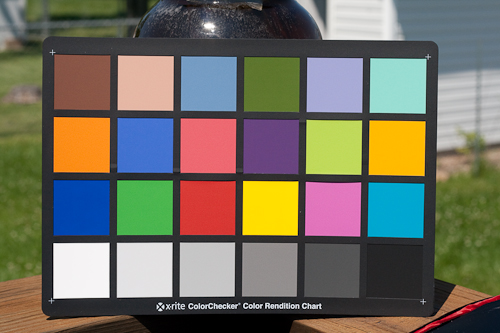
The Color Checker is one of the primary calibration tools in photography, videography and a multitude of other graphic arts. It also makes a great white balance tool also, as it gives you good grays and allows you to see the white balance effect on all the colors, but I digress.
Take your Color Checker and set it in even, neutral lighting. Make sure that there is no evident color cast in any of the gray panels. Now grab your camera and set it to its native ISO (usually 100 or 200) and snap a few frames, filling the frame with the chart. Take a good exposure, making sure not to overexpose any panels of the color checker. If you do over-expose, the program will let you know, so take care and get a good exposure with no shadows or color casts. I took mine in bright sunlight; I had more than a few snaps that were too overexposed for the DNG editor.
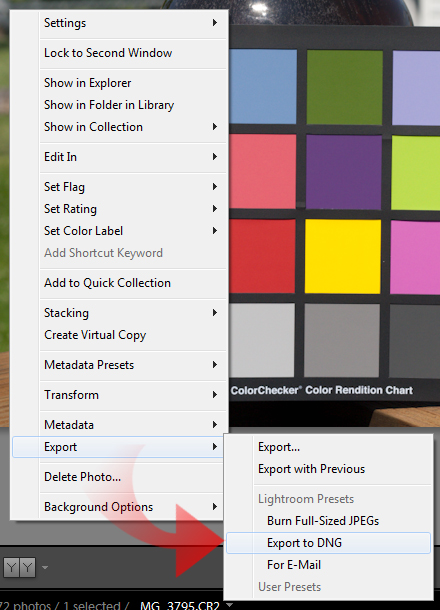
Now go ahead and import your images into Lightroom. This is not particularly required, but it is a good idea so you can check you histograms…plus you will be ready for some creative tweaks in a little bit. Once you find a well exposed frame, with no color casting, bring up the contextual menu over the image (right-click/control+click). Hop down to Export… and chose Export to DNG:
Select a folder to drop your new DNG into, I use my desktop:

Maybe not the best idea normally, but I will be deleting this file when done. Anyhow, you are done with Lightroom for now, but keep it open just in case the DNG Profile Editor has issues with the frame you have chosen.
Now go ahead and fire up the Adobe DNG Profile Editor:
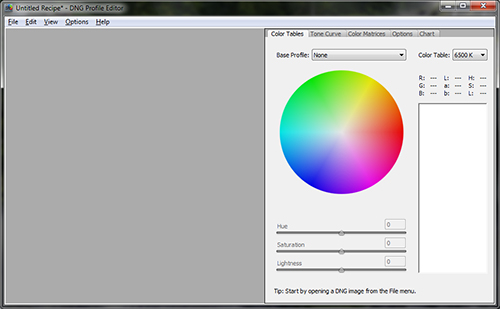
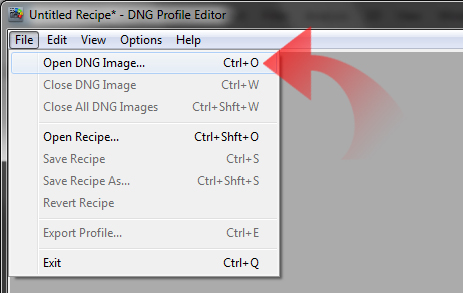
Click on File in the toolbar, then Open DNG Image:
Proceed to locate your exported DNG:
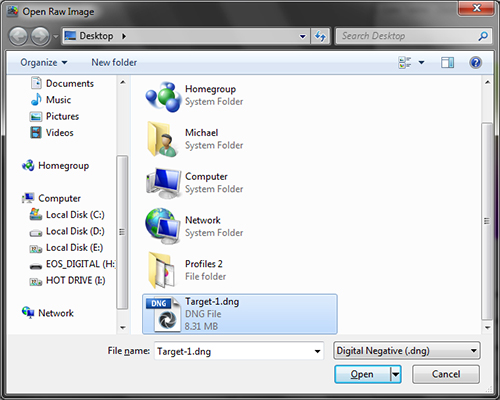
Now click on Open. This will open your image in the DNG Profile editor. On the right of the screen is a tab bar full of different options. I would like to draw your attention to the furthest tab to the right Chart:
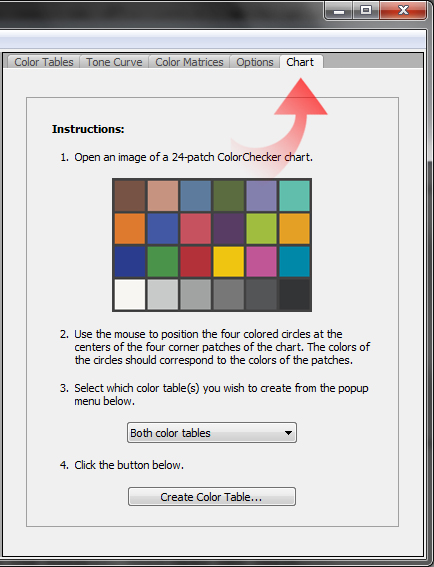
Click on it, now you should notice 4 different dots pop up on your screen:
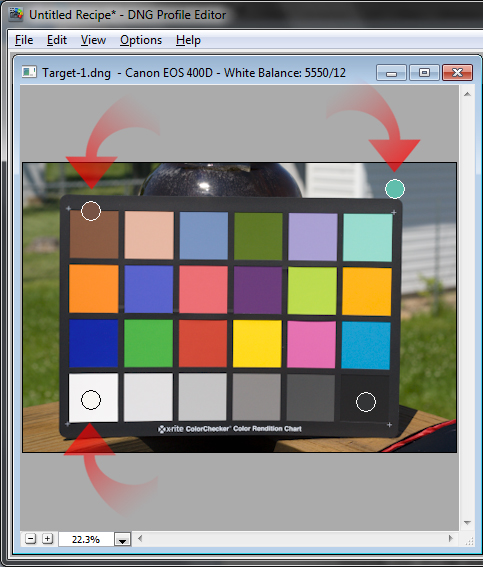
Place those colored dots on their respective square on the Color Checker. Now click the Create Color Table… button on the right:
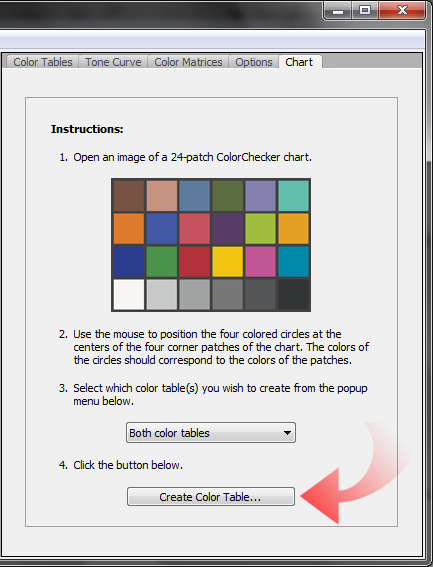
If all goes successfully, you will get a dialog saying “Color table (s) built successfully.” Otherwise, you will get a descriptive error informing you what was wrong with your Color Checker shot. Once you have successfully built the color table, click OK.
Now the tab has switched back to the “Color Table” and each of the 18 color patches now have dots representing them on the color field on the right:
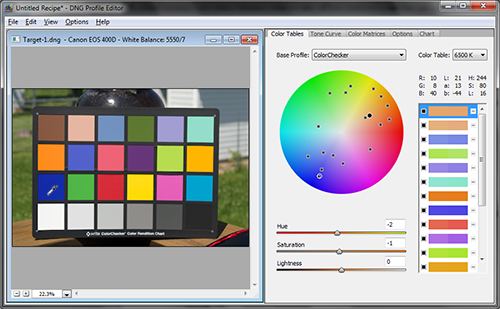
As you take the eyedropper icon over color patches in your image, you will notice the respective dot becomes highlighted with a square. If you want to tweak an individual color’s response, you can highlight it and adjust its Hue, Saturation and Lightness below the color field.
I am not going to adjust any colors, as I want to make a fairly accurate profile, but nothing is stopping you from playing around with it. Your adjustments will be visible in your image on the left.
The next tab is the Tone Curve tab:
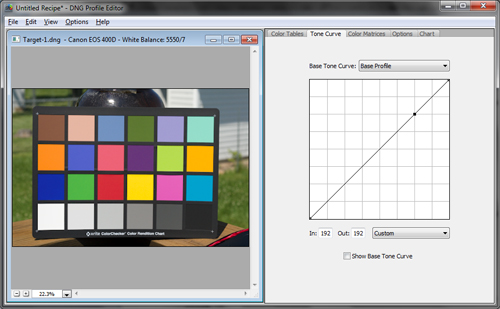
I want to give my profile a little punch, so I am going to give it a mild S-curve:
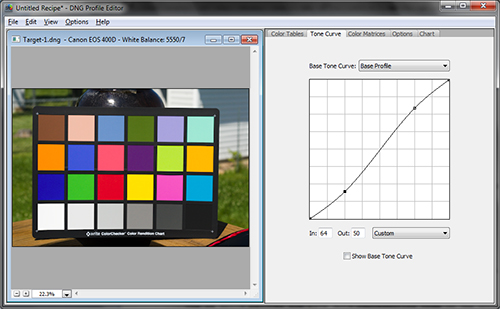
Adjust as you see fit and move on to the next tab Color Matrices:
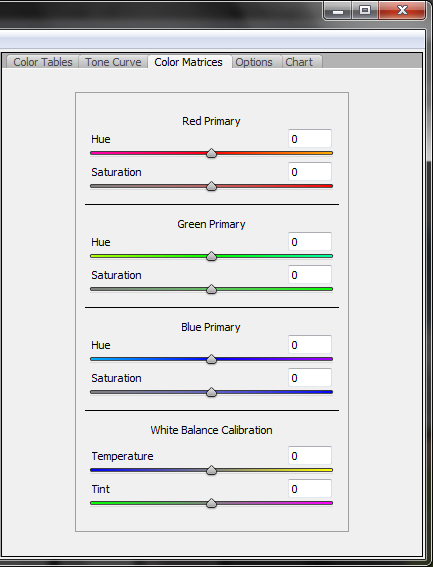
Here you can adjust the primary colors and your White Balance. I tend to leave this alone, unless I am making a creative profile. The final tab to consider is the Options where you can give the Profile an name and any copyright information you may want to include.
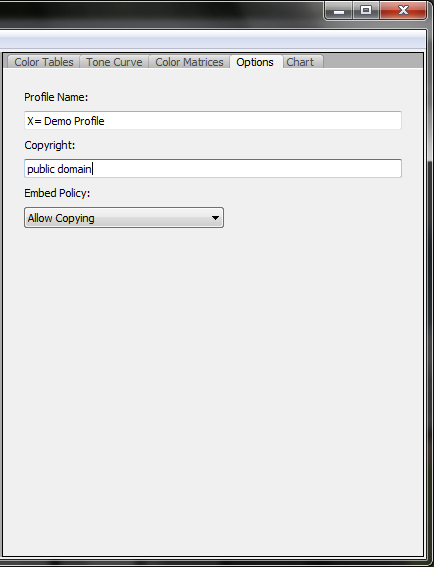
You can also limit embed policy of the profile, but I recommend leaving it as “Allow Copying” for compatibility. Once everything is how you like it it’s time to save your “recipe”.
Go ahead and click File and then Save Recipe:
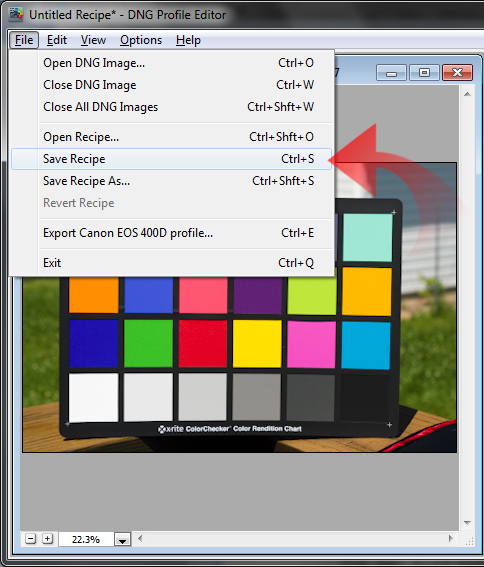
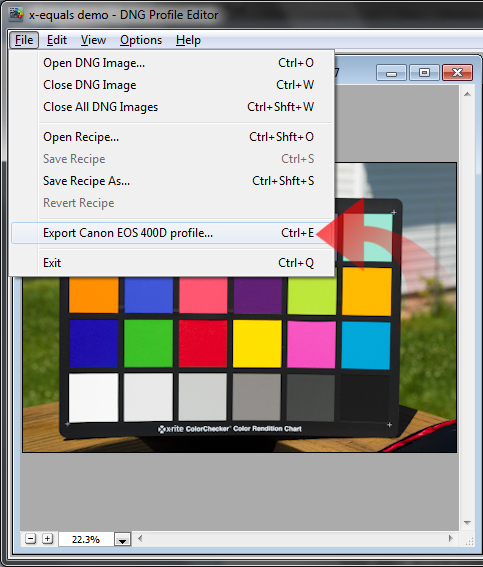
Give the recipe a name you will recognize, as you will need this recipe again in a moment, click okay. Now go ahead and click “File” then Export <camera name here> Profile:
Give it a name you want to see in the Camera Profile dialog in Lightroom:
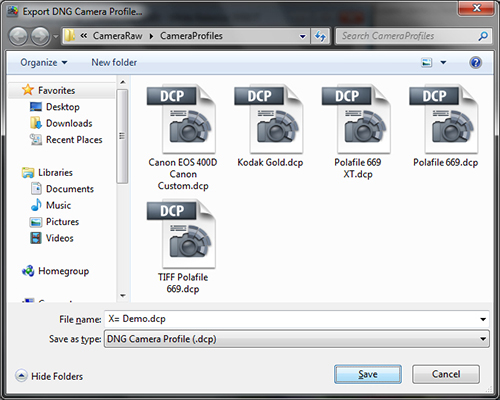
Click Save and once the confirmation dialog is up, your profile is saved. Now close Lightroom and re-launch – your profile will now be available for the camera you used to take the Color Checker image:
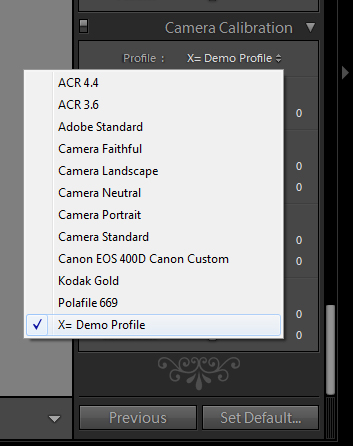
Congratulations, you have made your first camera profile:

The left side is the ACR 4.4 profile, the right is the profile we just created. Quite a difference isn’t it?
Now that you have your camera profile and its recipe saved, you can apply the same color response to any other camera you may own. Simply open a DNG file from any other camera, it does not have to be a color checker image. Once it opens, click File and Open Recipe…:
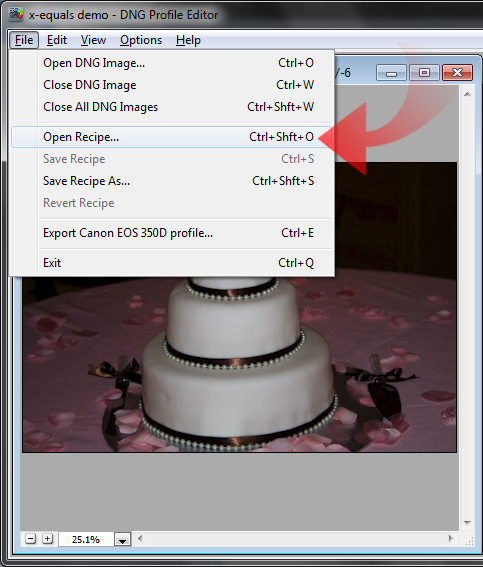
Then select your recipe you made earlier. DNG Profile Editor will not adjust the current camera’s color response to that of the calibrated camera. Then click File and Export….Profile and give it a filename differing from your other profile’s name. Click Ok and re-launch Lightroom. Once you click on an image made with the new camera, you will find the new profile available.
Once you get a firm grasp on the Adobe Profile Editor it will open up new creative options to you.
So get a ColorChecker and play around with your cameras and calibrate their profiles. All those Olympus and Sony shooters need to, and you Canon and Nikon shooters should make your own custom profile(s) as well. They provides you with more control and color accuracy.
Once you got a profile or two down, in Part 3 I’ll show you how to get more creative with Profiles.


